Creating a Workflow
Workflows simplify the operation of publishing videos by aggregating all aspects of video publishing (content preparation, content protection and content delivery) in one configuration that can be easily managed, versioned and applied.
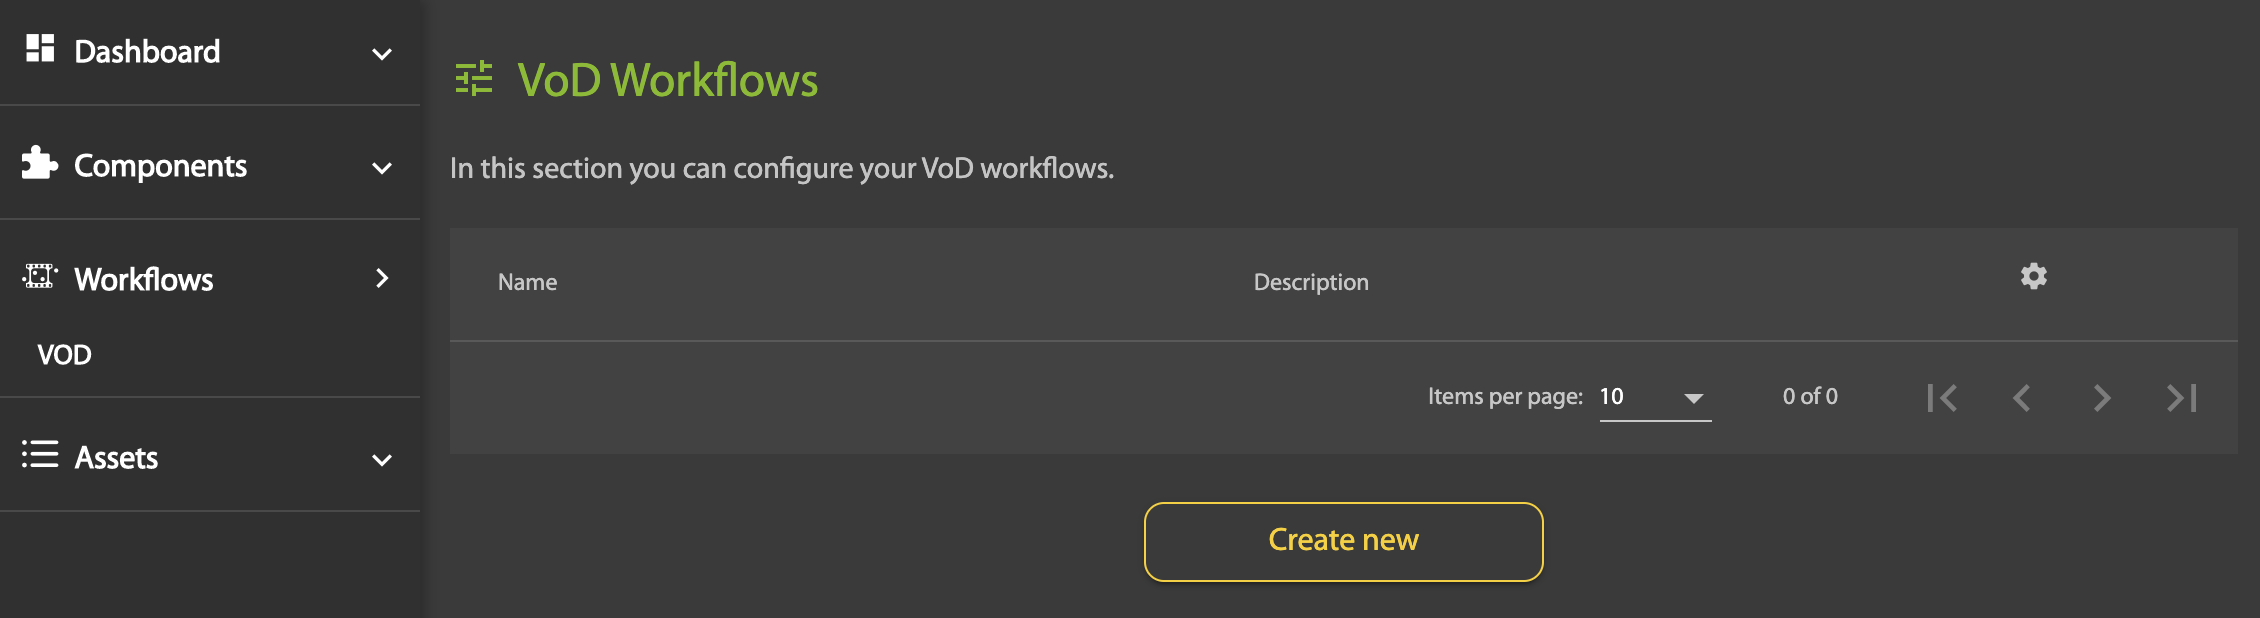
The Workflow > VoD page of the LightFlow portal lists the workflows in your account. To create a new workflow click on the Create New button:
Important
In order to use workflows for processing videos, you must first configure the Components that you intend to use.
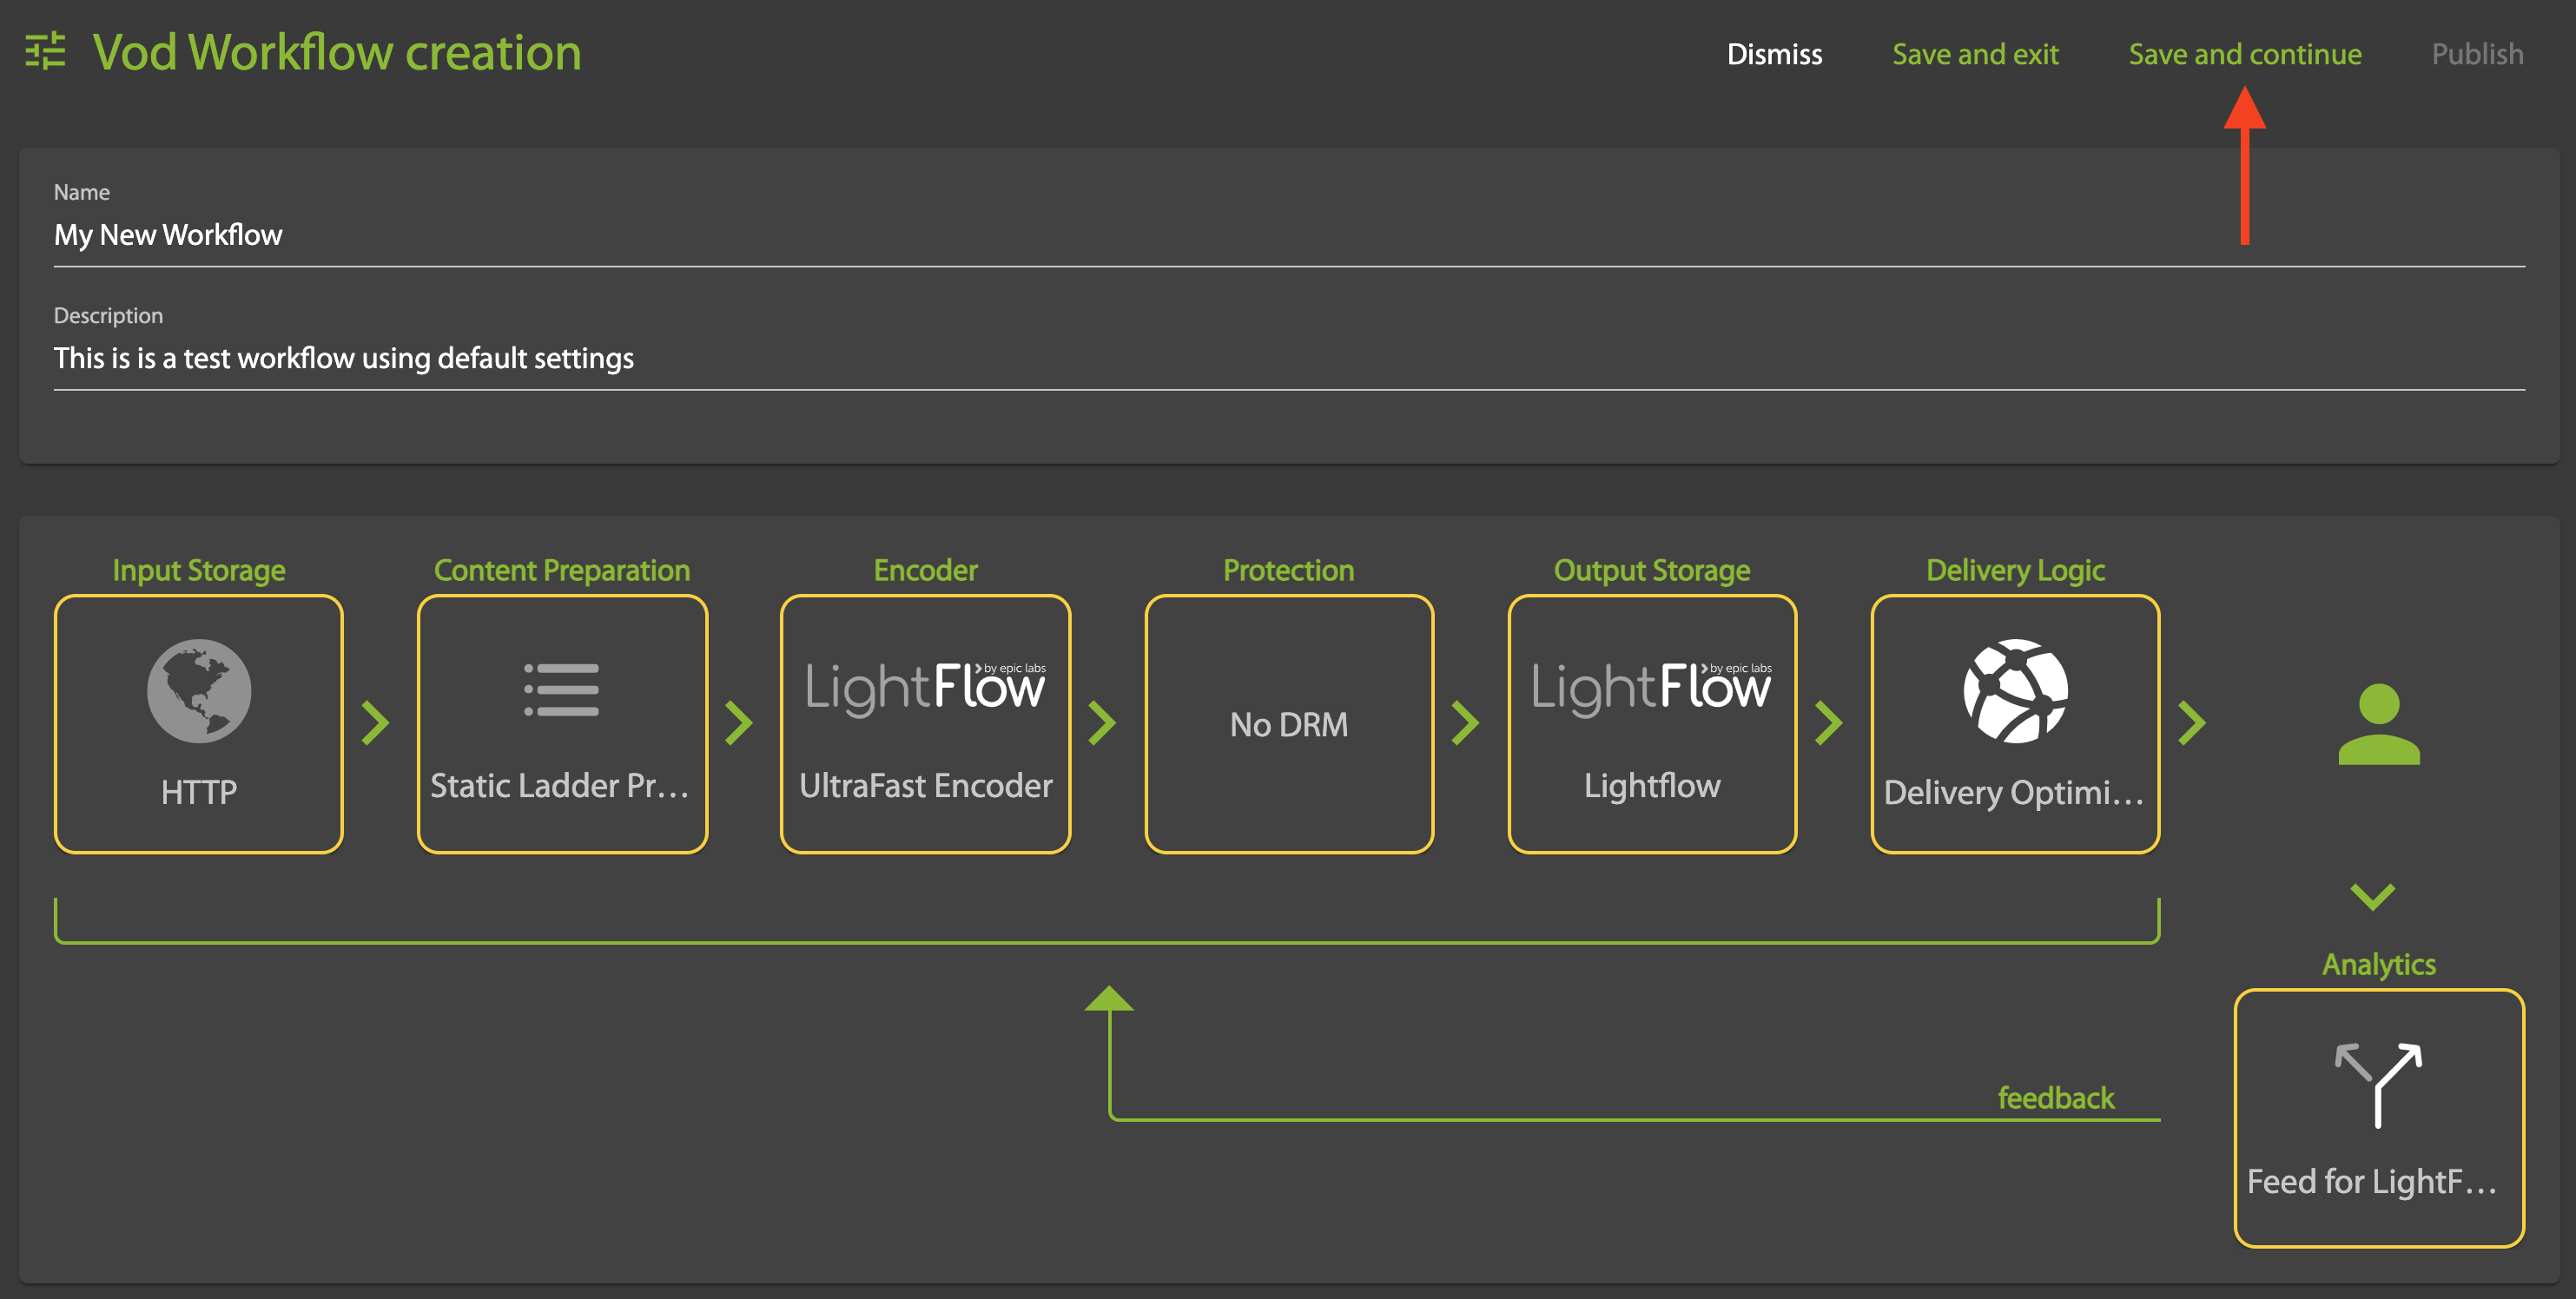
On the Vod Workflow creation page, start by giving your new workflow a Name and provide a brief Description:
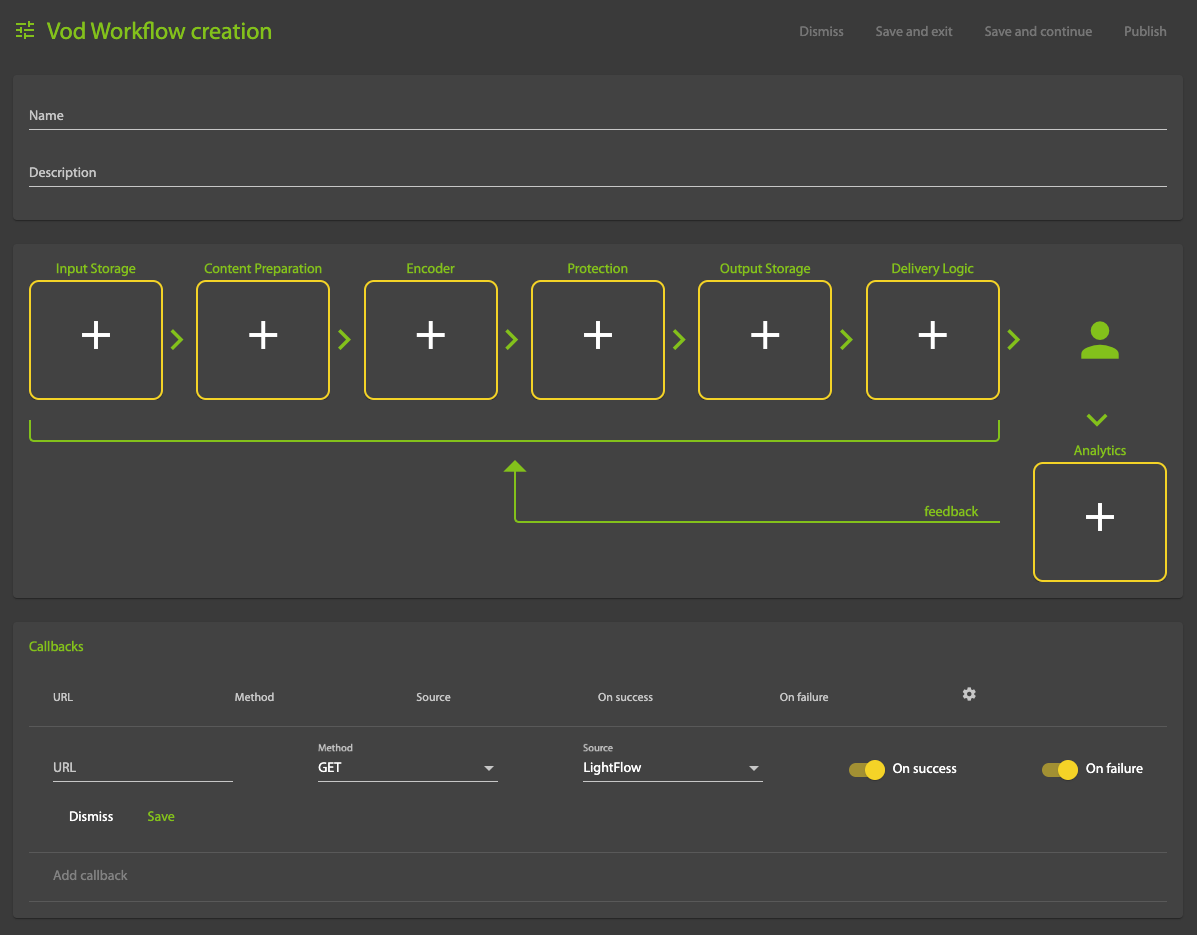
The steps in a workflow are defined as follows:
- Input Storage: The storage source used for input to the workflow (usually via HTTP).
- Content Preparation: An existing Content Preparation Profile.
- Encoder: The type of Encoder to be used (e.g. LightFlow UltraFast Encoder).
- Protection: The type of Digital Rights Management to be applied (choose None for a basic workflow).
- Output: The type of Storage Output to be used (e.g. LightFlow).
- Delivery logic: An existing Delivery Optimization Profile (choose None for a basic workflow).
- Analytics: The type of Player Analytics feed to be applied (choose None for a basic workflow).
For each step, click on the corresponding plus (+) icon. You will be prompted to provide the necessary details.
Once you have completed defining all of the steps, click on Save and continue:
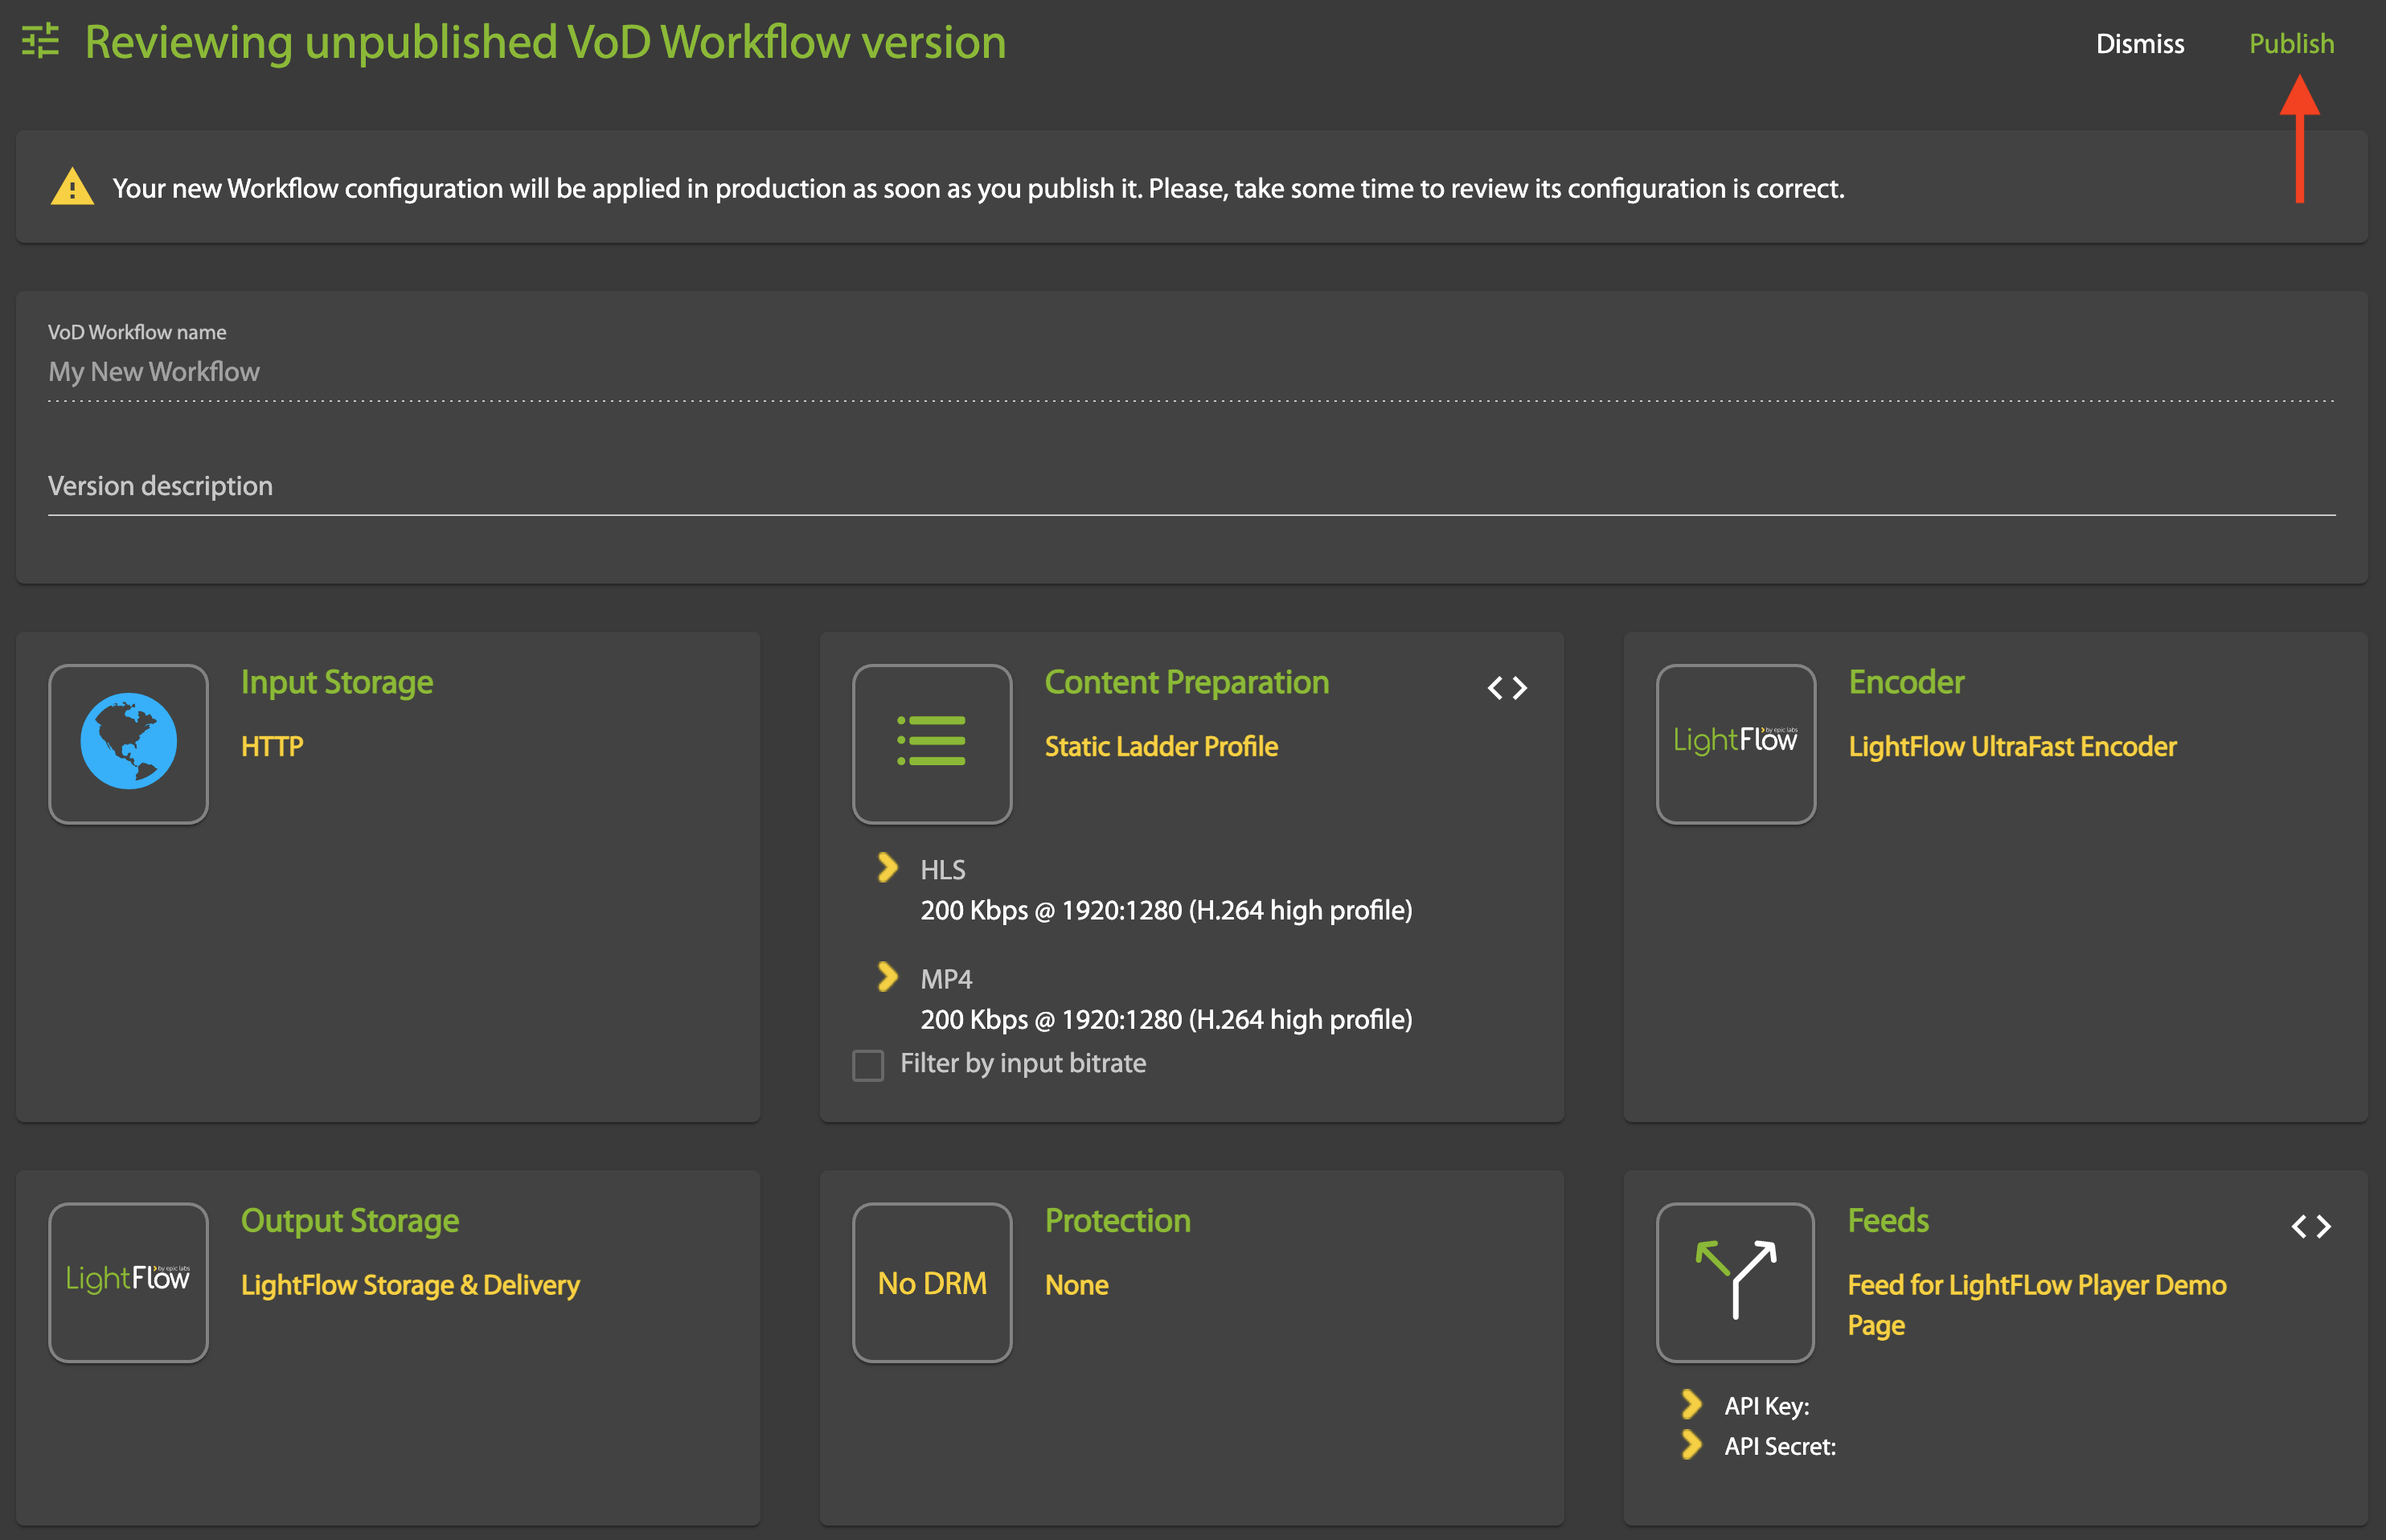
Next, click Publish:

You will be given an opportunity to review and confirm (or change) the workflow details, and to give it a version. When ready, click Publish to confirm the activation of the new workflow.
Callbacks
LightFlow can report back to you when there is an error processing the video, or when the video goes through any of the five stages (initializing, downloading, processing, etc.), including when processing has finished successfully. Typically you need only subscribe to the callbacks on errors and on success. On success you know the asset is published and you can proceed with CMS operations. And on error you know that you should retry or contact Haivision Support. The advantage of configuring callbacks under Workflows (versus via the API) is that instead of defining them for every job, you can just configure a general rule.
Click Add callback, then enter the callback URL, Method, Source and specify a trigger (On success, On failure, or both):