Connect to the Network and Audio/Video Sources
Note
This page includes information regarding both the original Makito X1 chassis and the Makito X1 chassis v2. The Network connector and DC IN/IO connector on v2 have been changed in order to meet higher vibration requirements.
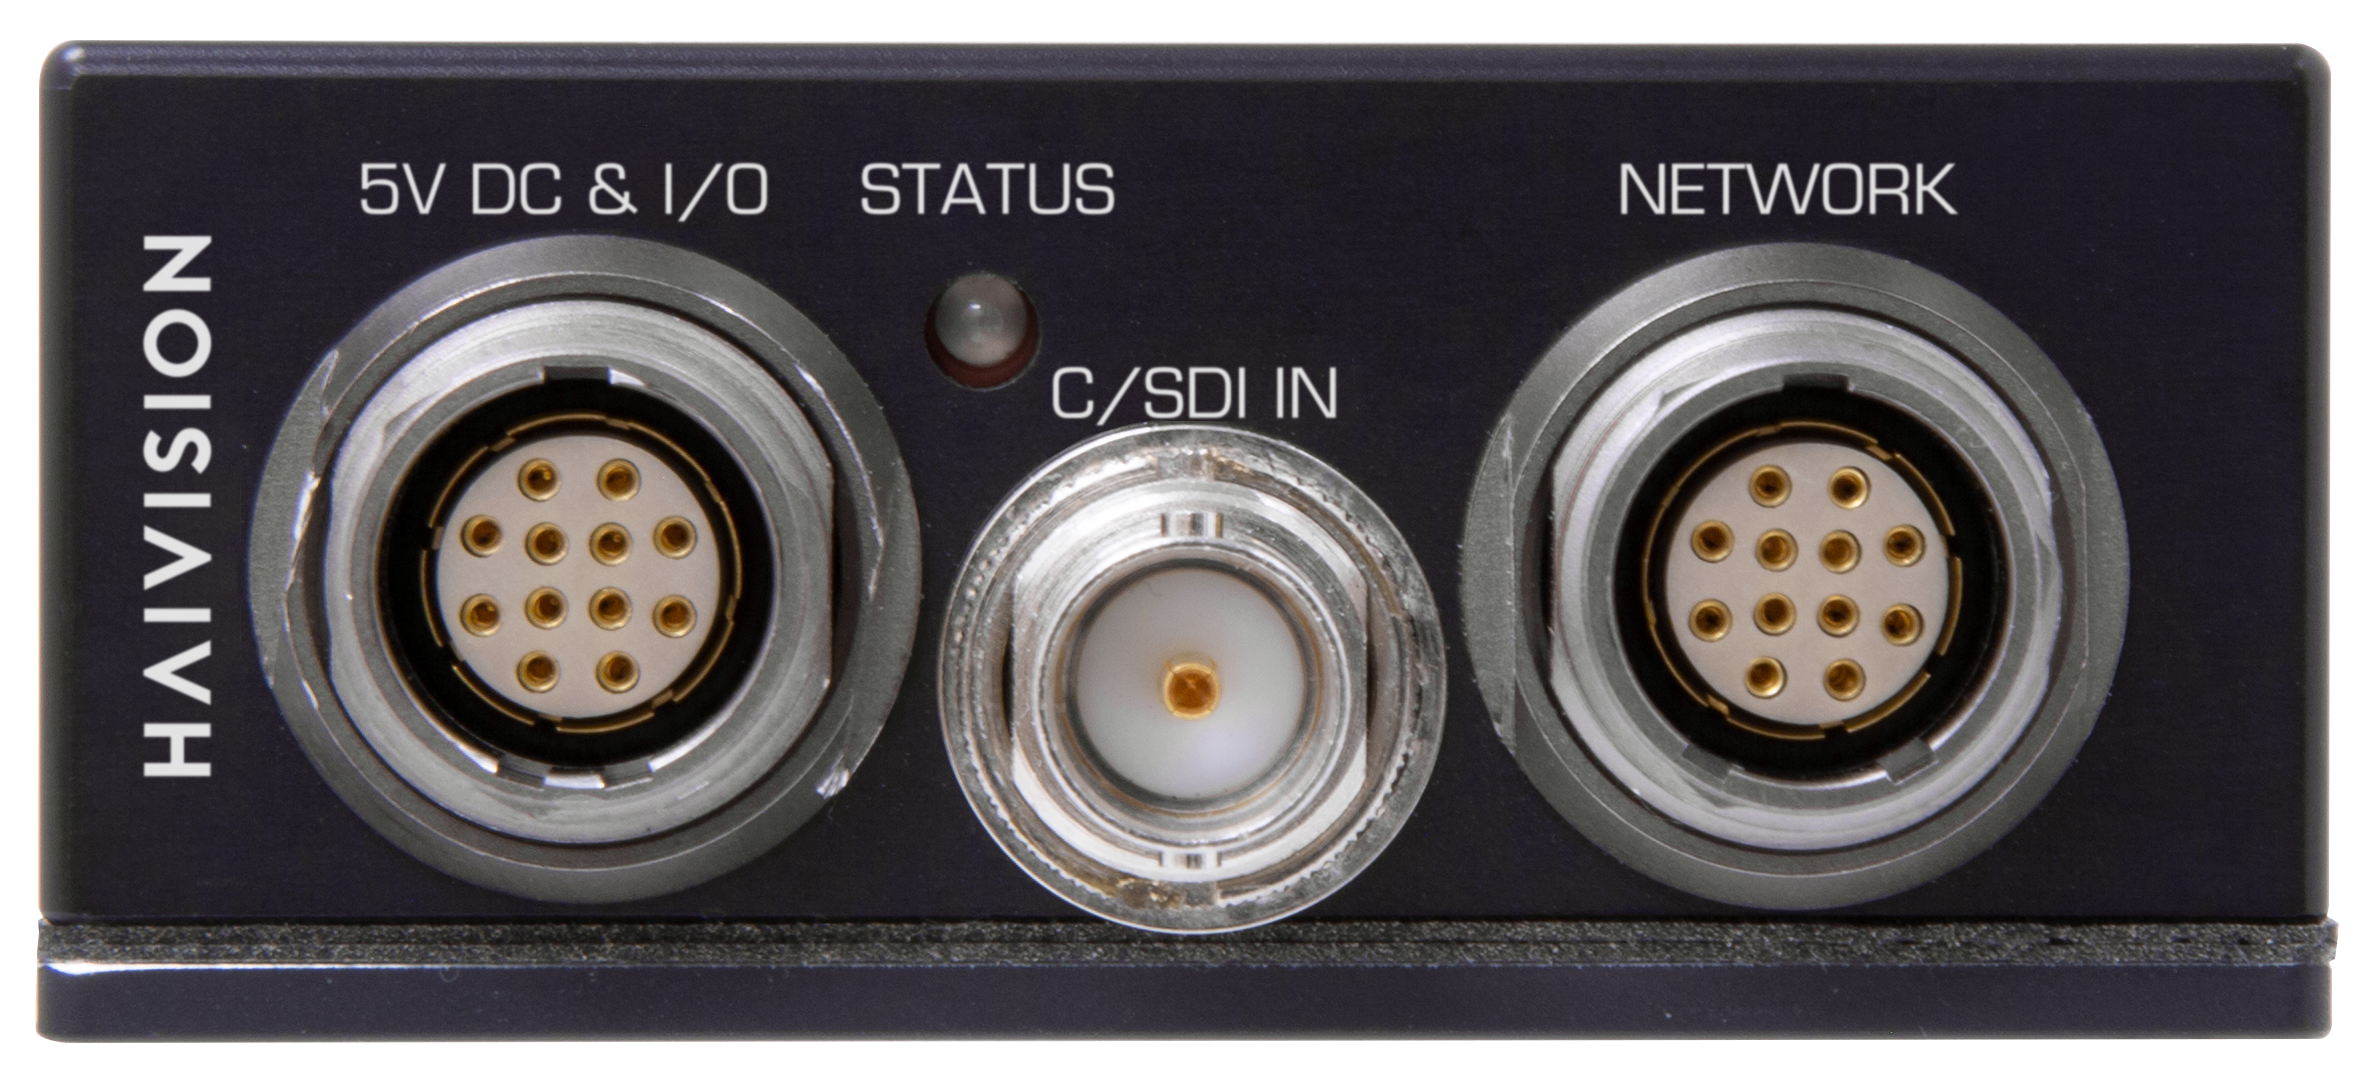
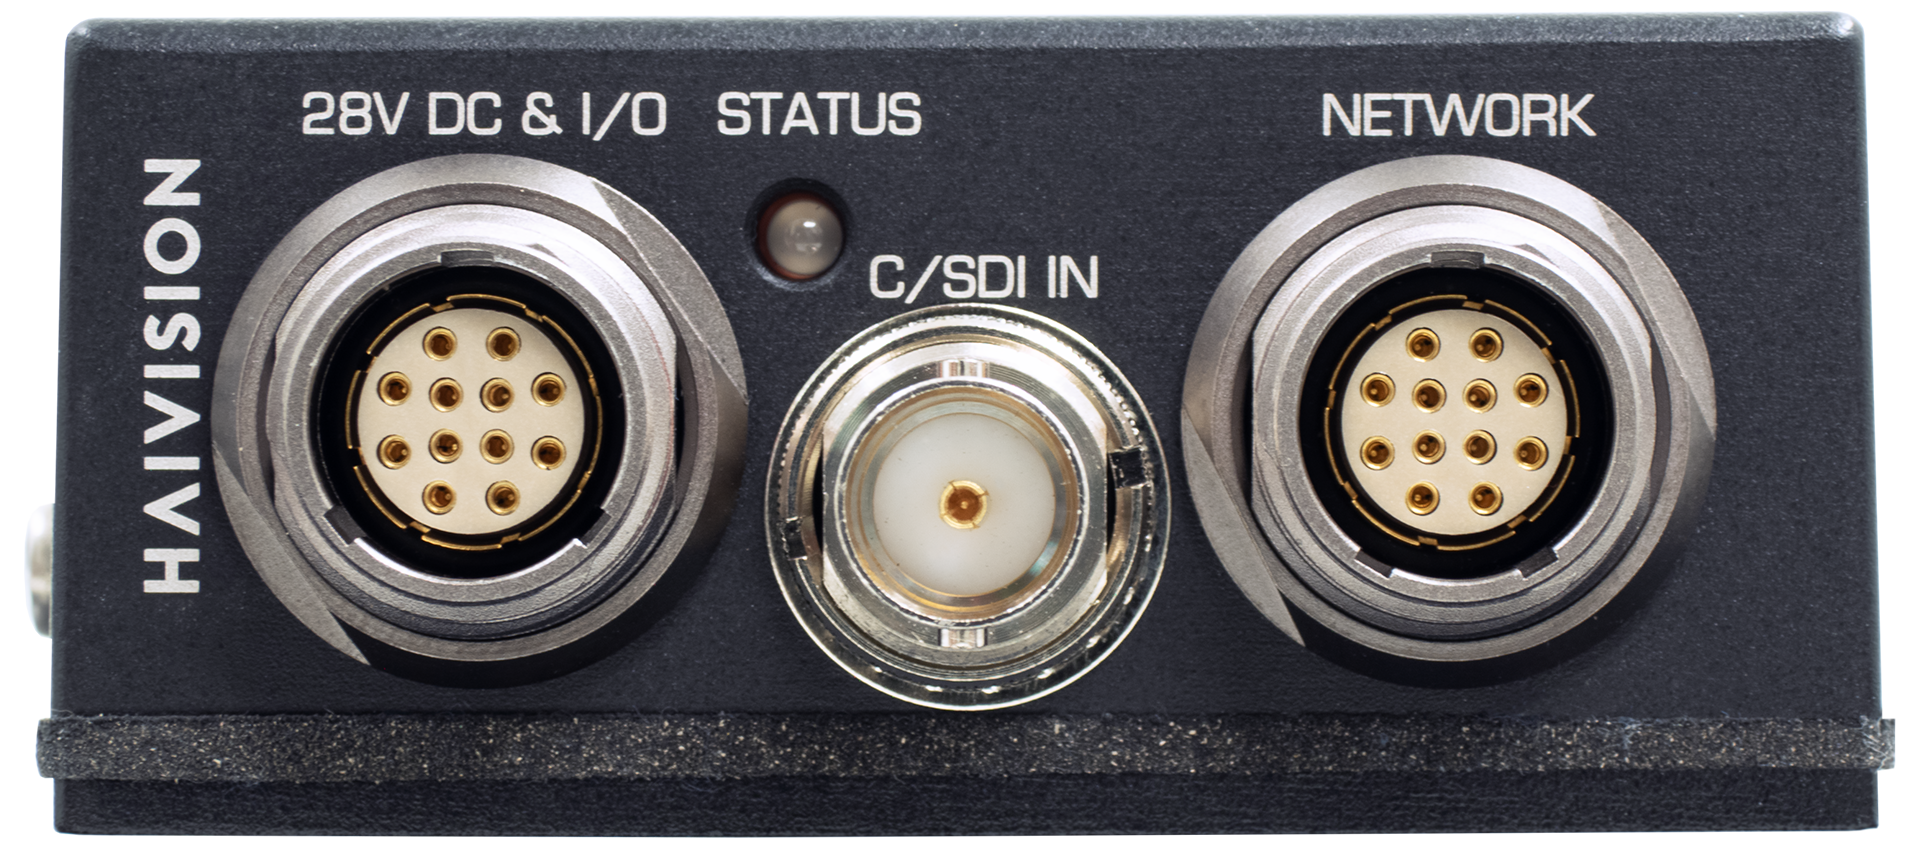
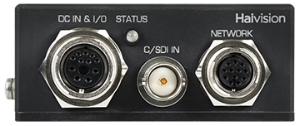
The Makito X1 Rugged enclosure provides the following rugged connectors:
Power & I/O connector combining these inputs:
Power (+5VDC, < 6 W)
Analog Audio Two (2) channels of analog audio – 15 Kohms input impedance
Serial Port (RS-232/422) – can be used for Management, Pass-thru or KLV or CoT metadata ingest
CVBS/SDI connector – 75 Ω BNC (used for either SD-SDI (Serial Digital Interface), HD-SDI video, or Composite (CVBS) input signals, with format auto-detected)
Network connector – 10/100/1000 Base-T Gigabit Ethernet; connector also includes a Reset line
The BNC connector is also a 3G-SDI capable interface supporting 1080p 50/60 fps video @ 3Gbps. In addition, it supports auto-detection of the HD resolution and embedded digital audio.
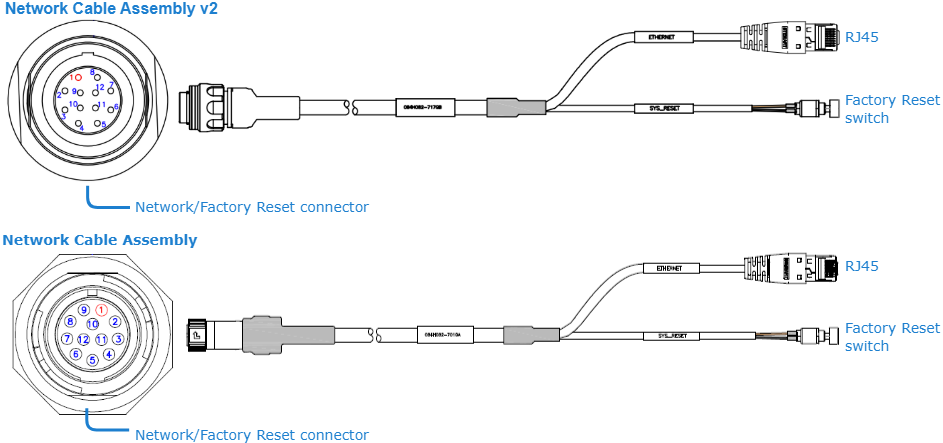
The Ethernet/Factory Reset and Power/Audio/Serial breakout cables (shown in the following steps) are shipped as part of the Evaluation Kit (#S-MX1E-R-SDI1-DK/#S-MX1E-R-V2-SDI1-DK).
To connect the encoder to the network and A/V sources:
Remove the protective caps from the encoder's connectors.
Connect the encoder's Network port to the IP network using the Ethernet/Factory Reset breakout cable (shown following):
Connect the encoder's CVBS/SDI video input to your video source, referring to the above image.
(Optional) Connect the encoder's DC In & I/O port to your audio source(s) using the Power/Audio/Serial breakout cable (shown following).
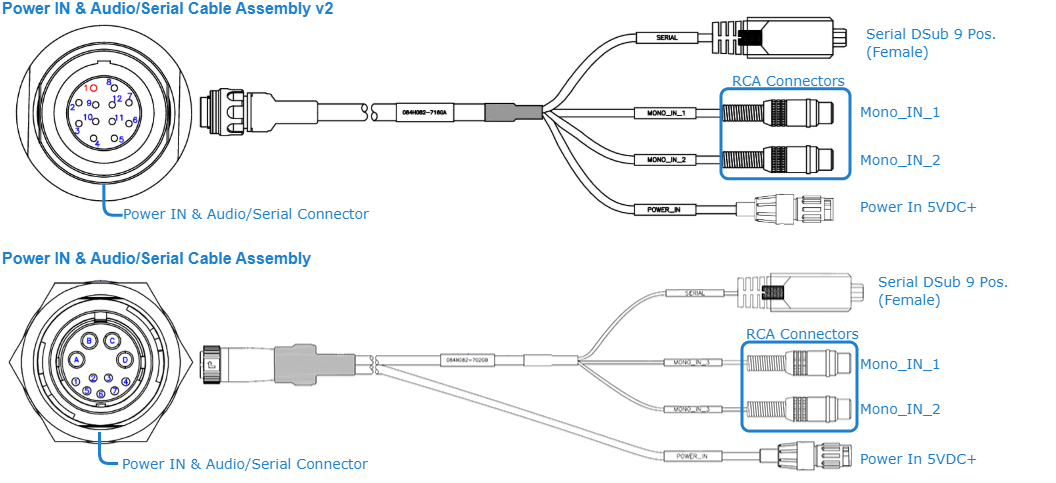
(Optional) If you have a KLV or CoT source that uses RS-232 or RS-422, connect the encoder’s DC In & I/O port to the metadata source or to the serial port of a computer using the power/audio/serial breakout cable.
The DC In & I/O port may be used to ingest KLV/CoT, as a management port or as pass-thru for camera control.
Note
The Reset button provides two options:
If you press and hold the button for less than 4 seconds, the system resets and loads the last saved "startup" configuration. If no configuration was previously saved as the startup preset, the default settings prevail.
If you press and hold the button for more than 4 seconds, the module performs a complete factory reset. It clears all of the previously configured settings, including IP, streams and encoder configurations.
(Optional) To capture analog audio, connect the encoder’s Audio/Serial connector to your audio source(s) using the the audio/serial breakout cable, shown in the previous step.
Note
As of Release 1.1.1, the Makito X1 Rugged supports two (2) input channels of analog audio. To configure analog audio, see Set Up a Test Stream.