Power up the Makito X1 Encoder
Note
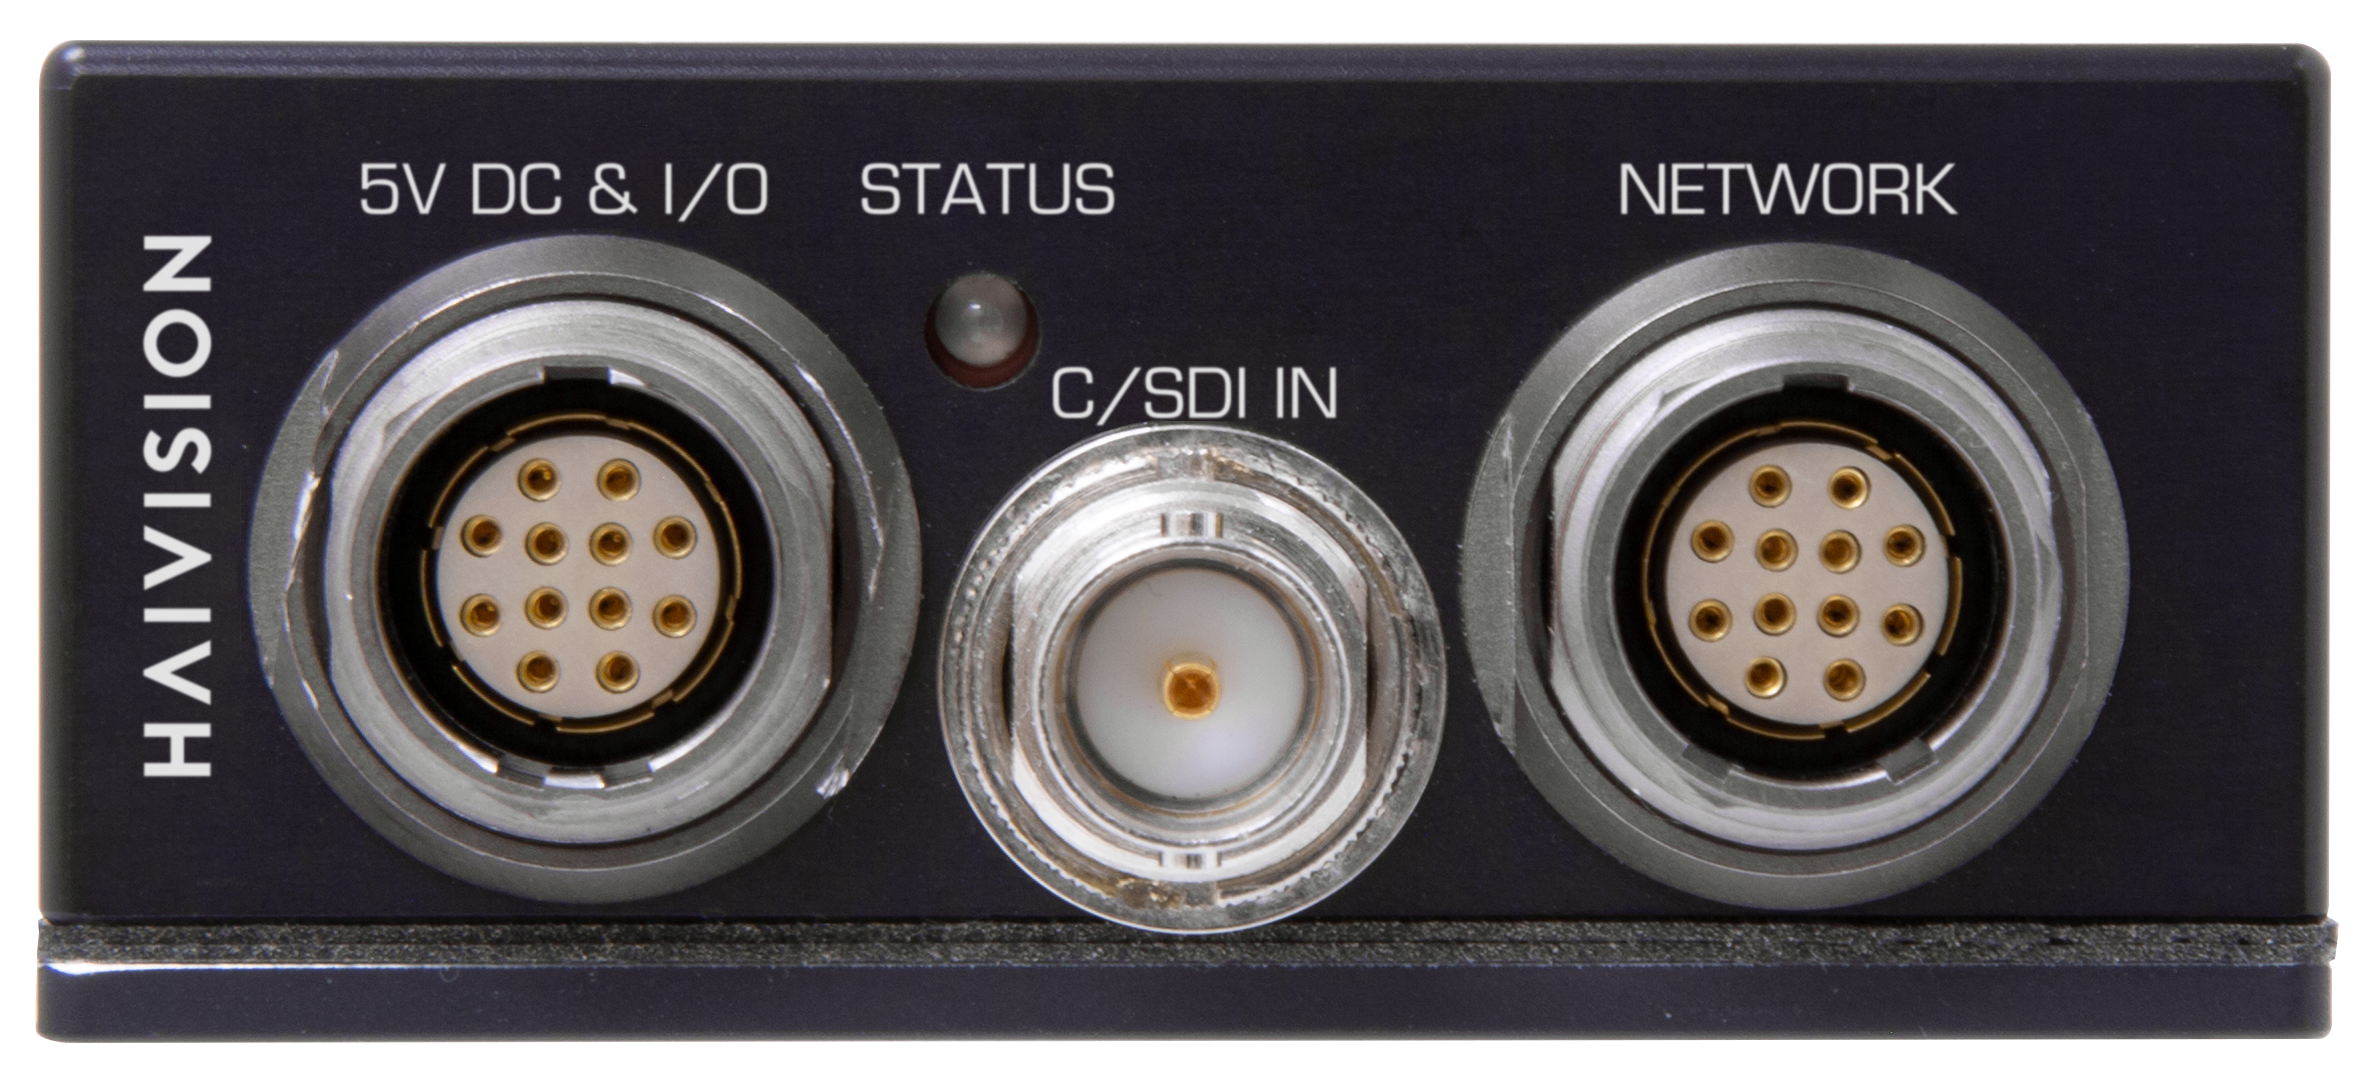
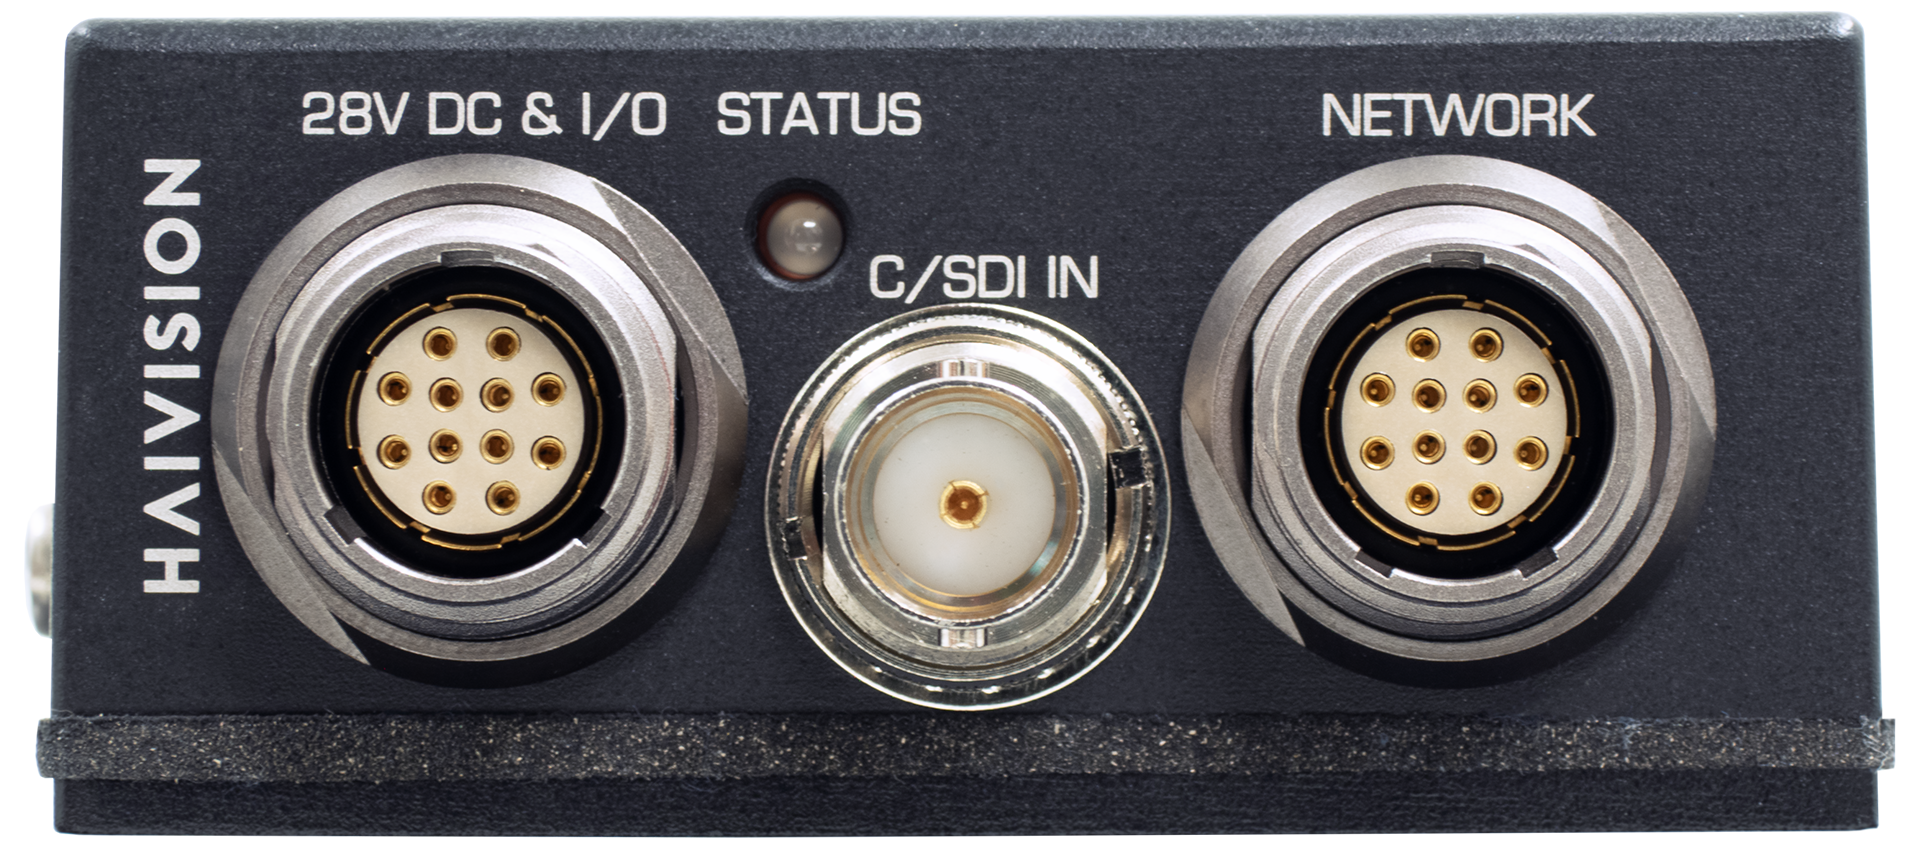
This page includes information regarding both the original Makito X1 chassis and the Makito X1 chassis v2. The Network connector and DC IN/IO connector on v2 have been changed in order to meet higher vibration requirements.
There is no power switch on the encoder. The power is automatically on when the unit is plugged in.
Warning
When using the AC/DC power adapter, the power cord is the main disconnect device. Ensure that the socket-outlet is located/installed near the equipment and is easily accessible.
ATTENTION Quand on utilise l'adaptateur AC à DC, le cordon d'alimentation est utilisé comme interrupteur général. La prise de courant doit être située ou installée à proximité de l'équipement et être facile d'accès.
To power up the encoder:
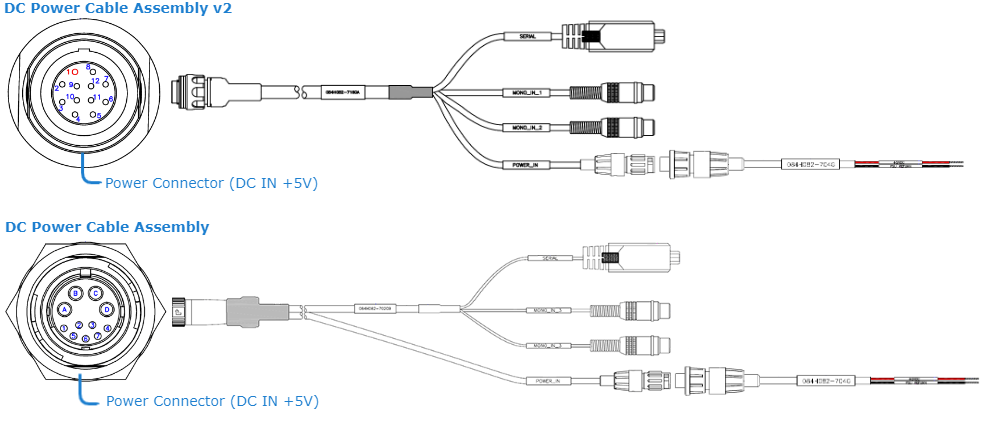
(As shown under Connect to the Network and Audio/Video Sources) Insert the Power/Audio/Serial breakout cable connector into the encoder's the encoder's power input port (DC In & I/O). Both AC and DC power cables (shown following) are shipped as part of the Evaluation Kit (#S-MX1E-R-SDI1-DK/#S-MX1E-R-V2-SDI1-DK).

Make sure the connector is properly inserted and locked to avoid intermittent power problems.
Connect the power cable to a +5V power source. (The AC PSU can be used to convert from 120V AC to 5VDC ±.25V.)
The Status LED next to the video input will start blinking green, indicating that the encoder is booting up.Wait until the Status LED stays solid green, indicating that the encoder is ready for operation.
Related Topics
For pinout information, see DC IN and I/O Connector.
To order the PSU, contact Haivision Sales at sales@haivision.com.