This detailed procedure guides you through the complete setup of a SRT video stream between a Makito Encoder and Decoder, as illustrated in the following figure.
On the Appliances screen, click the Add Appliance button.
Select Makito Series from the Appliance Type dropdown.
Click the Copy Passcode button.
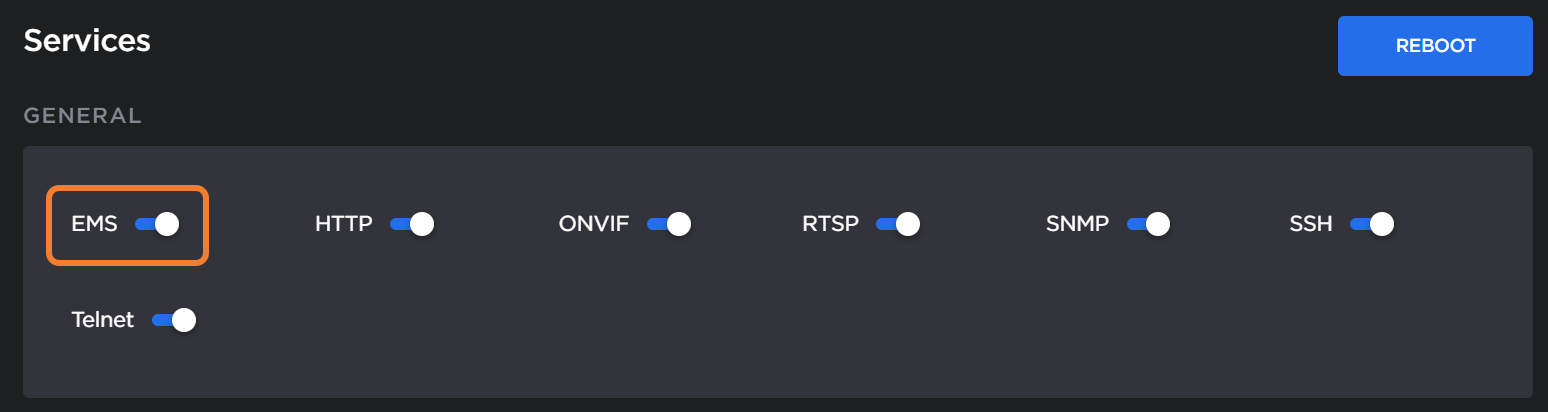
In new browser tabs, sign in to each of your Makitos' web interfaces and navigate to Settings > Services page on both:
Ensure the EMS toggle is enabled.
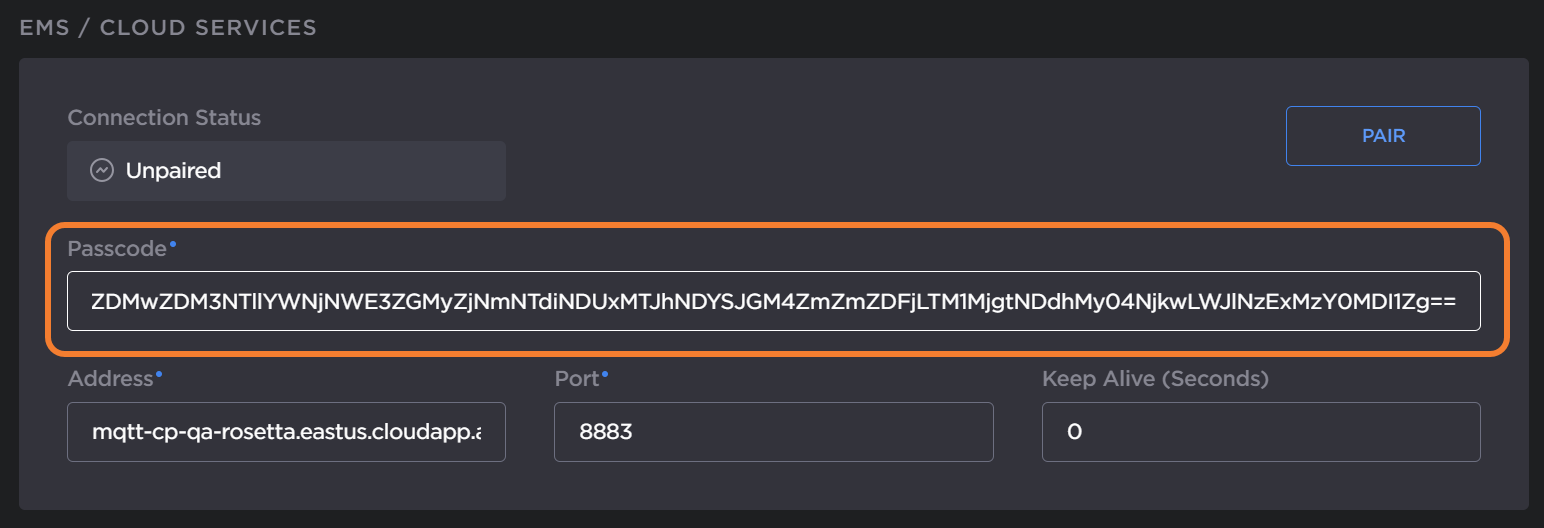
In the EMS/Cloud Services section, paste the passcode into the Passcode field. The Address and Port fields automatically populate.
Click the Pair button.
After a few seconds the Connection Status changes to Connected. You can now close the Makito tabs.
Back on the Hub 360 browser tab, your Makitos appear in the Appliances list.
Configure your Paired Makitos
In the Appliances list, find the Makitos you paired and click >Access Interface. An SSH tunnel is created and the web interface for the Makito opens in a new browser tab.
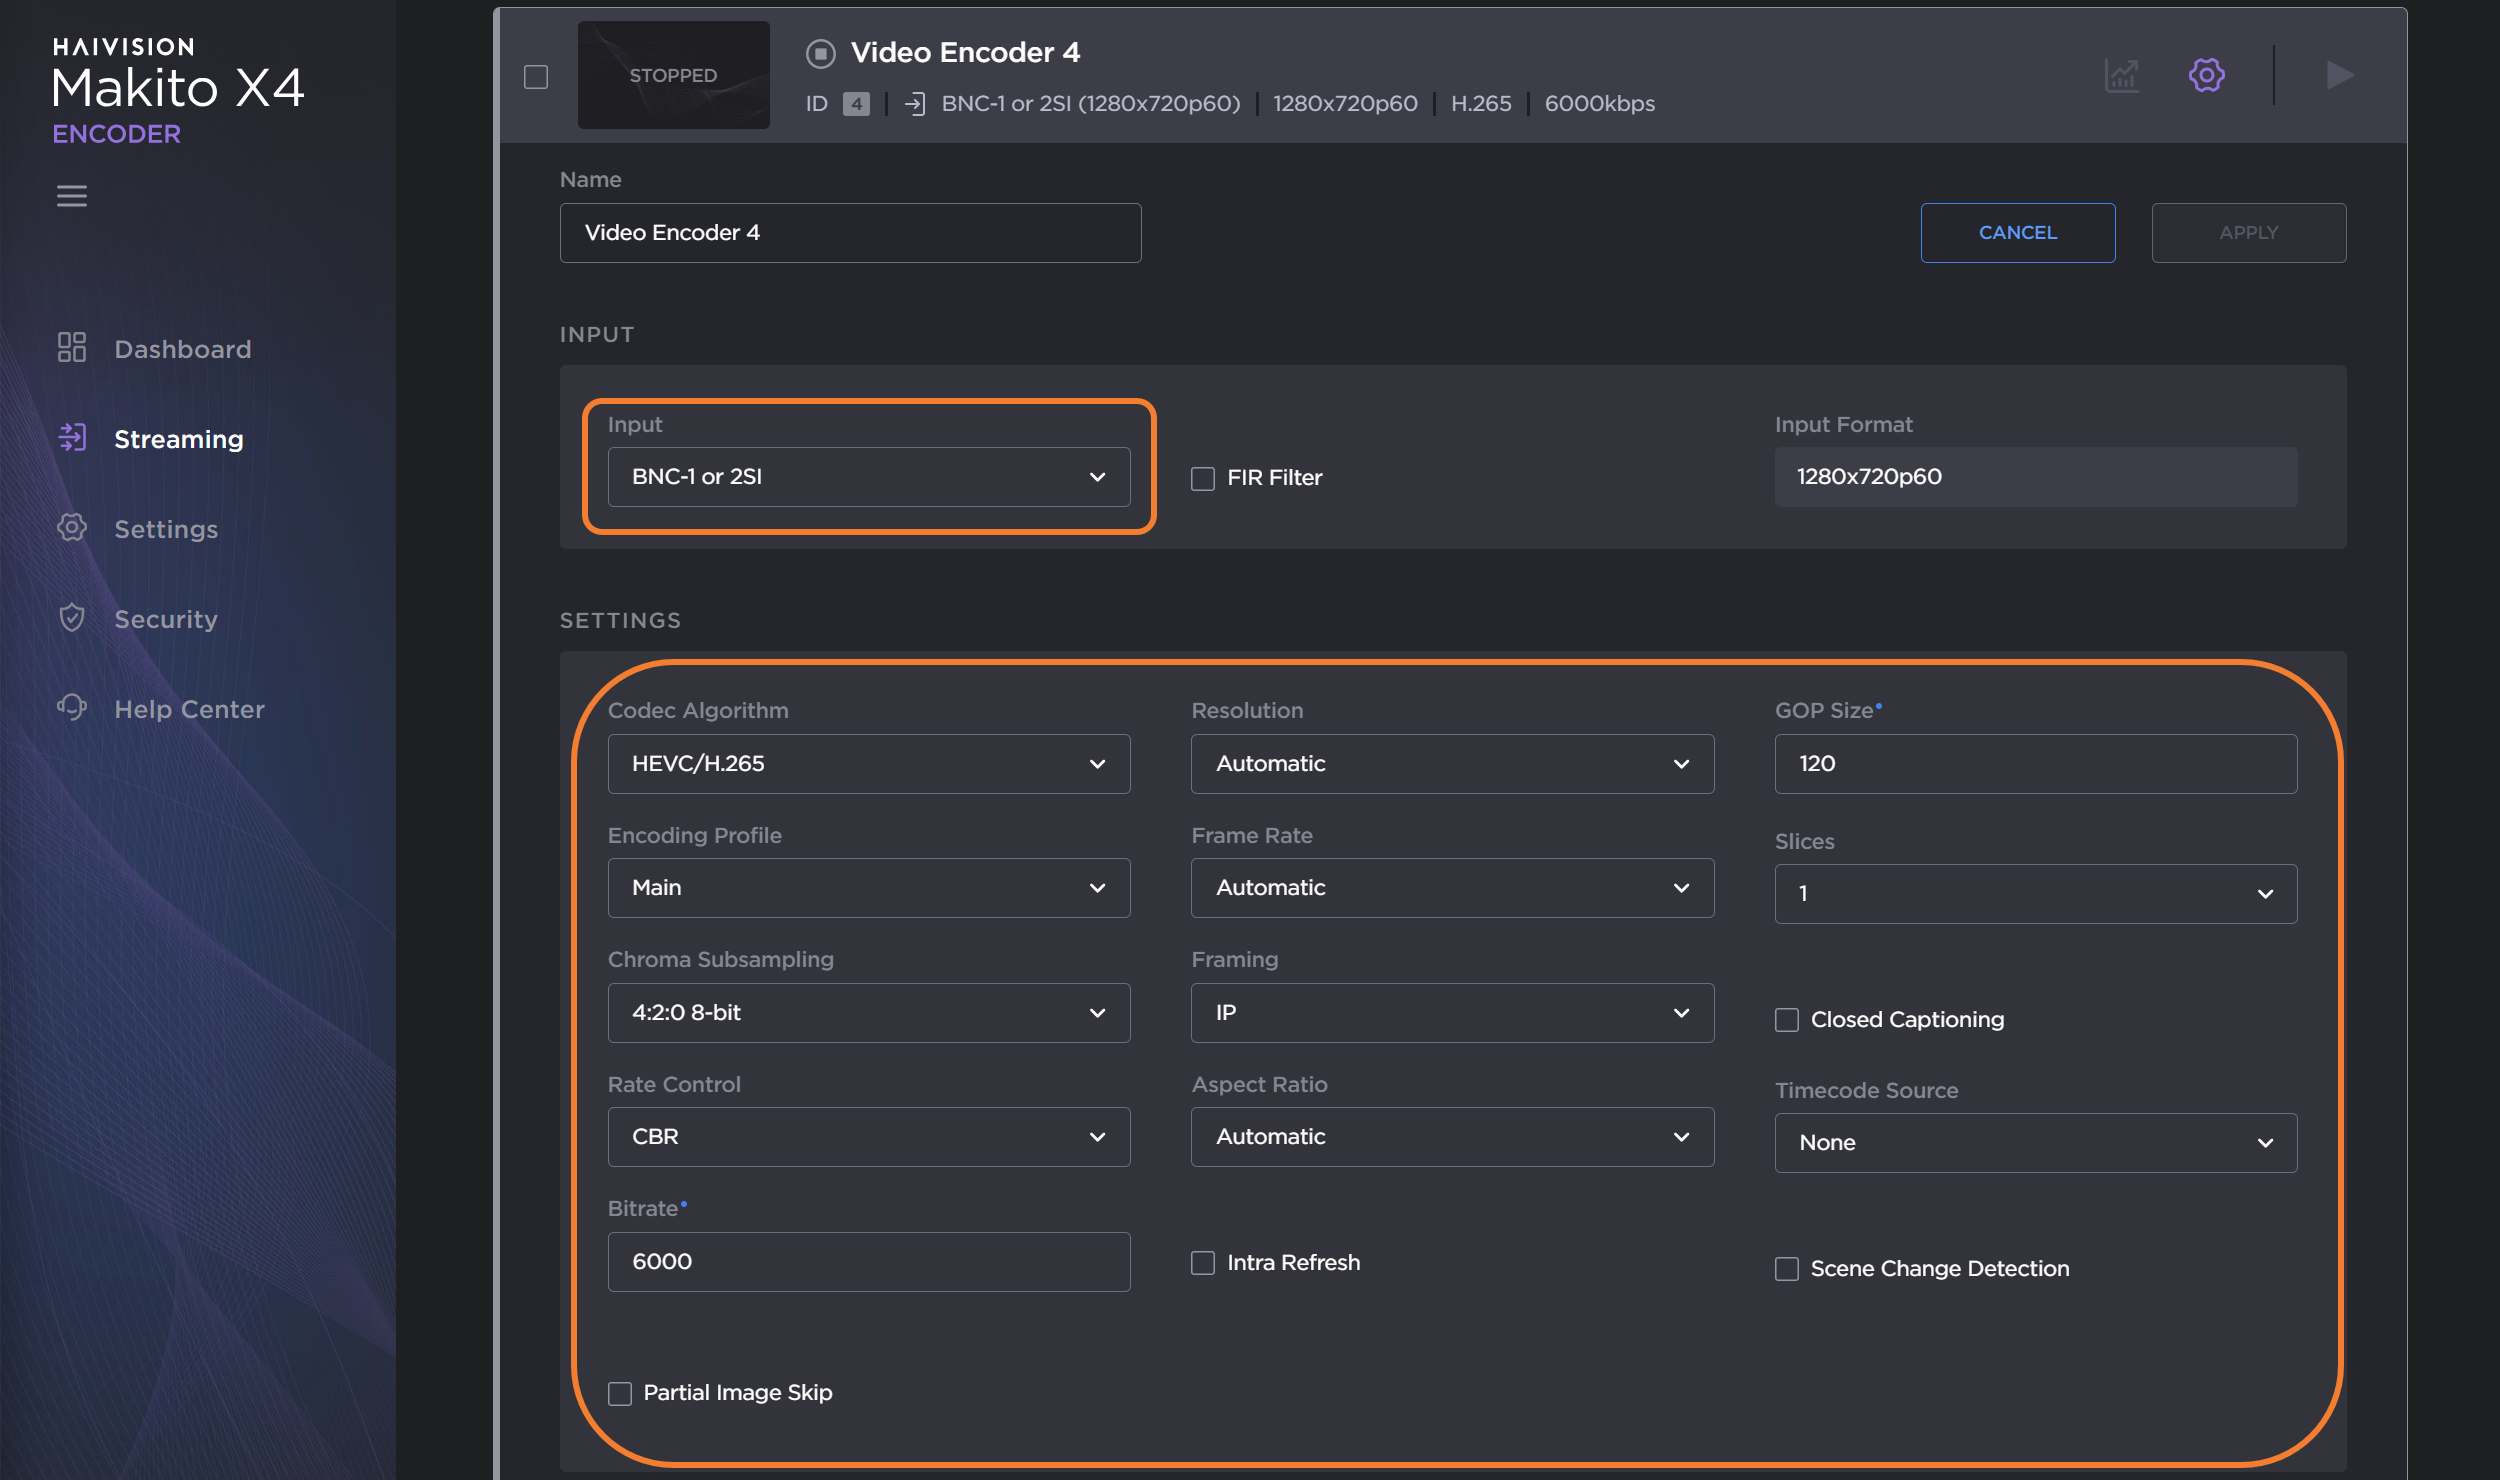
In the Makito Encoder tab:
Click the Streaming button in the sidebar.
Click the Settings icon next to the encoder you wish to use.
Assign the SDI input to the encoder, and adjust the input settings as desired.
Click the Apply button.
Ensure a source is connected and playing on the selected input.
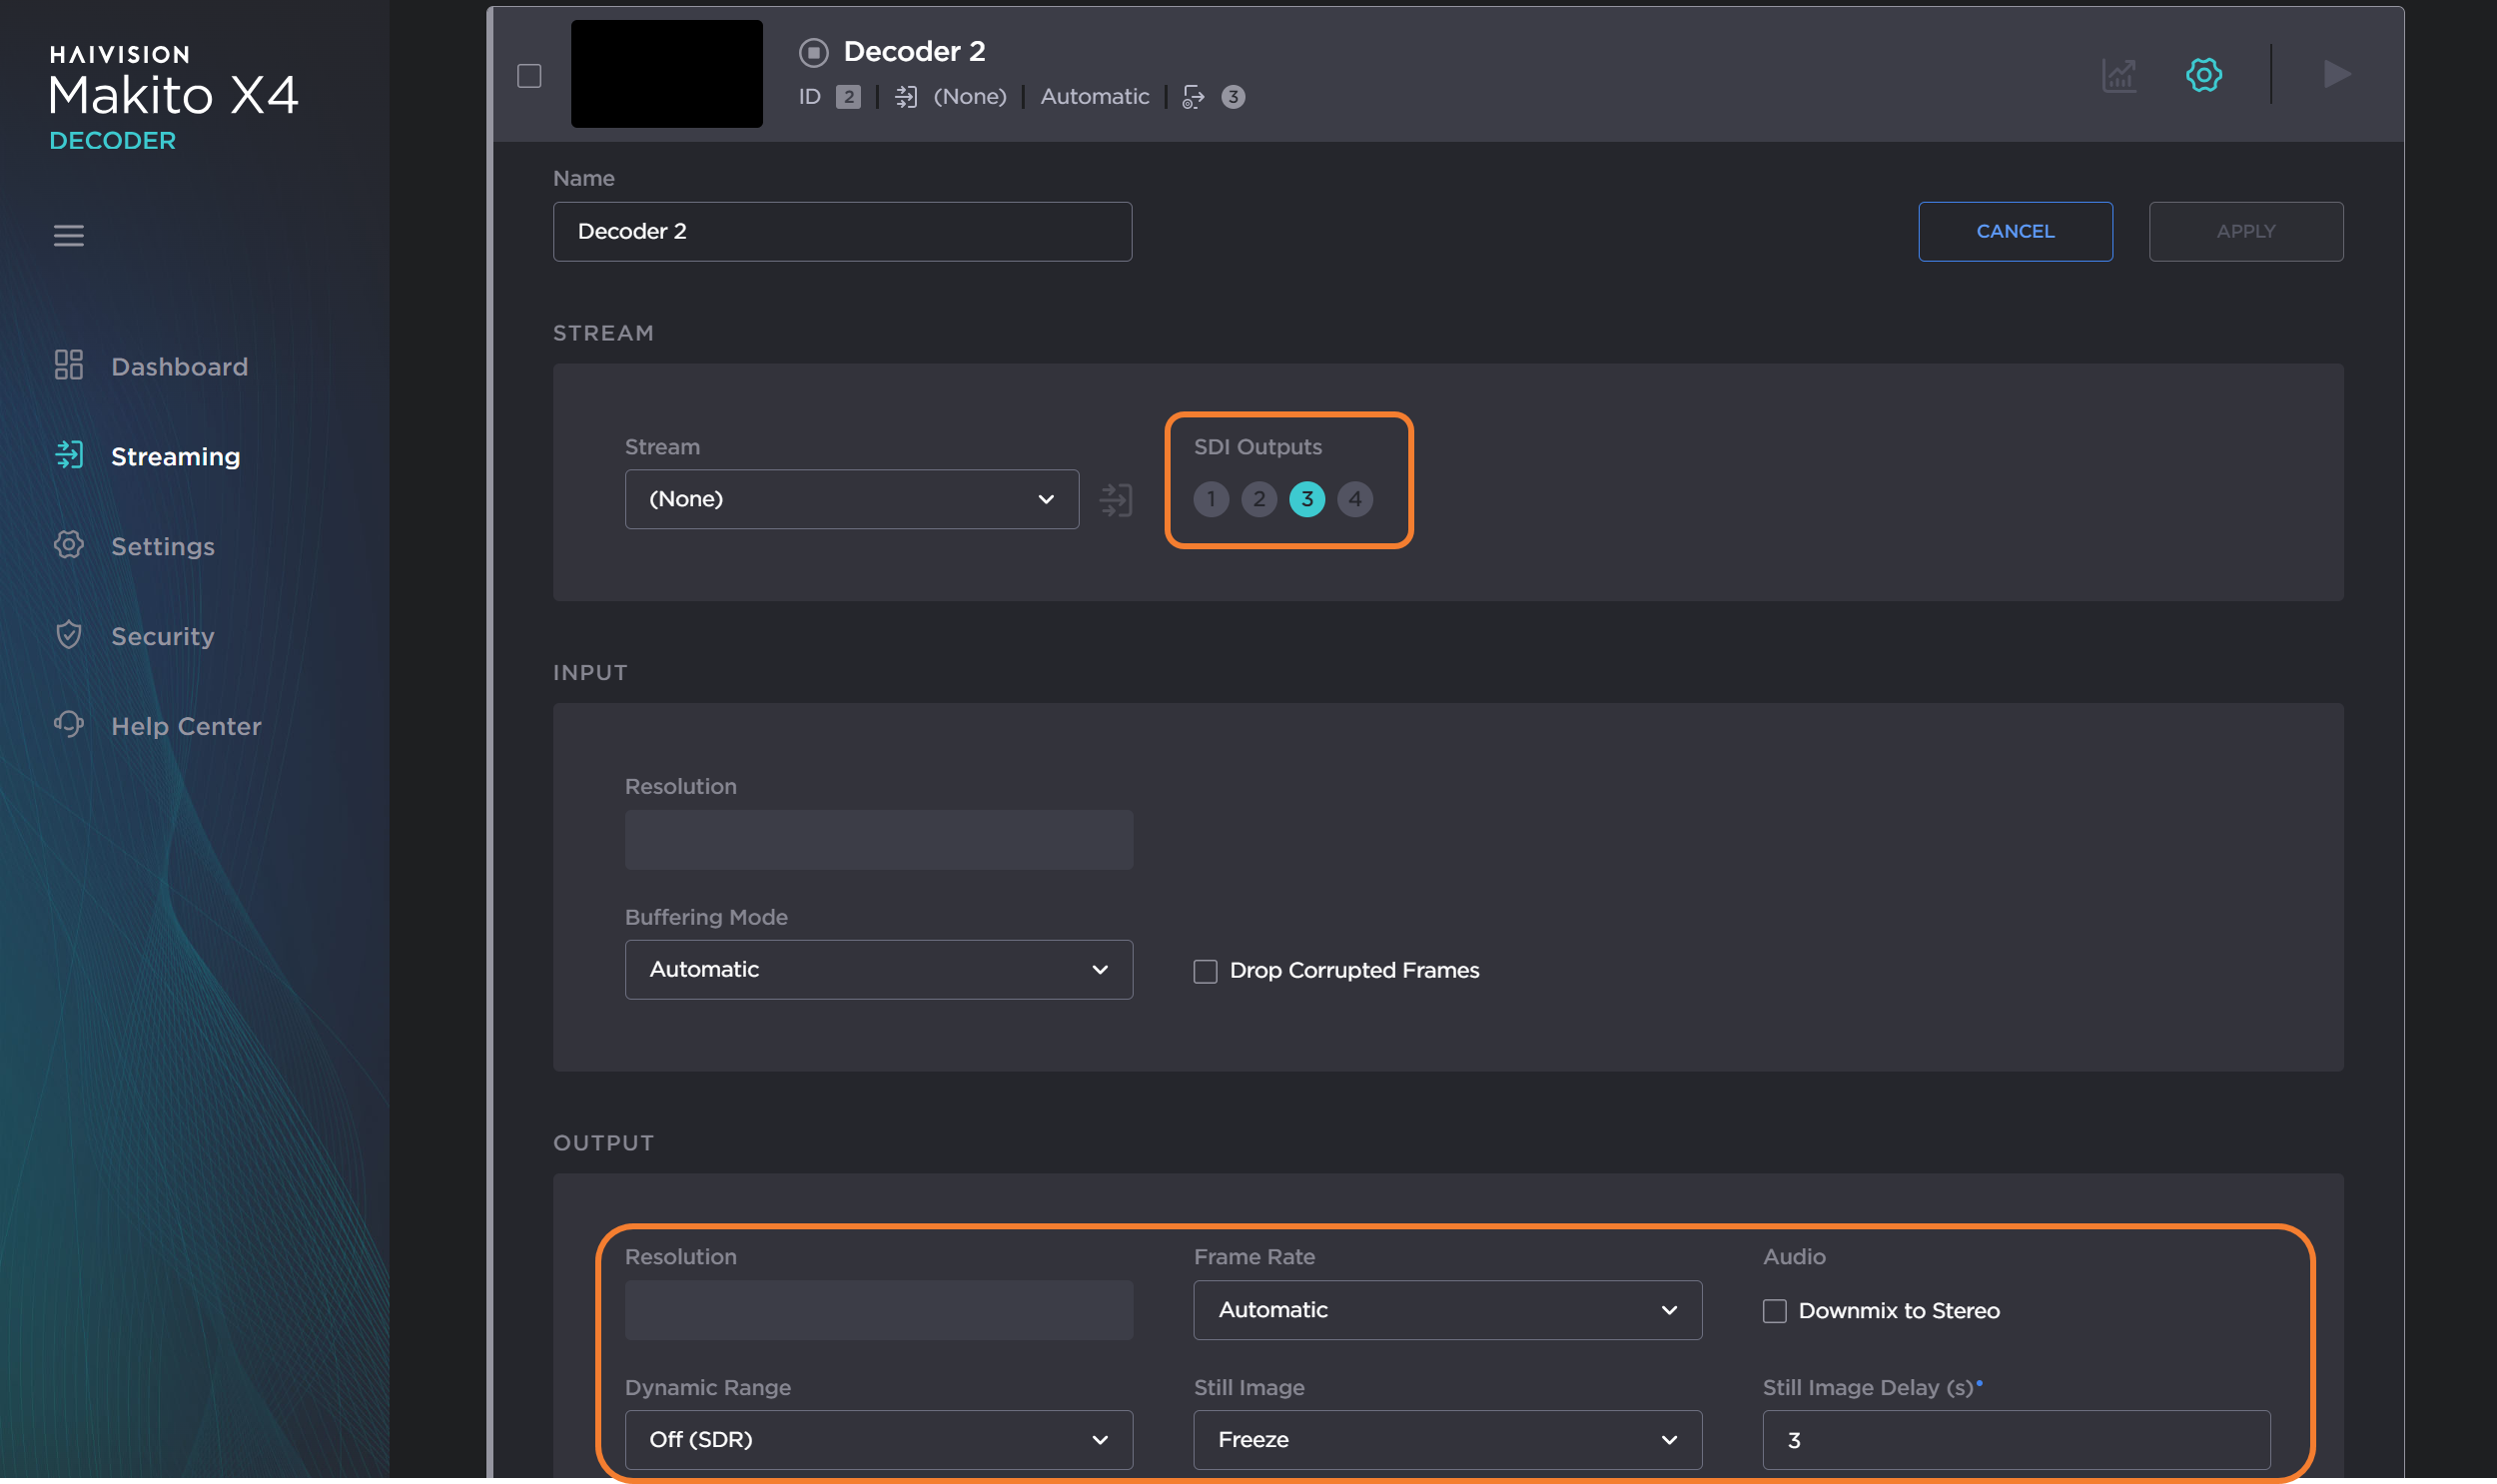
In the Makito Decoder tab:
Click the Streaming button in the sidebar.
Click the Settings icon next to the decoder you wish to use.
Assign the SDI output to the decoder, and adjust the output settings as desired.
Click the Apply button.
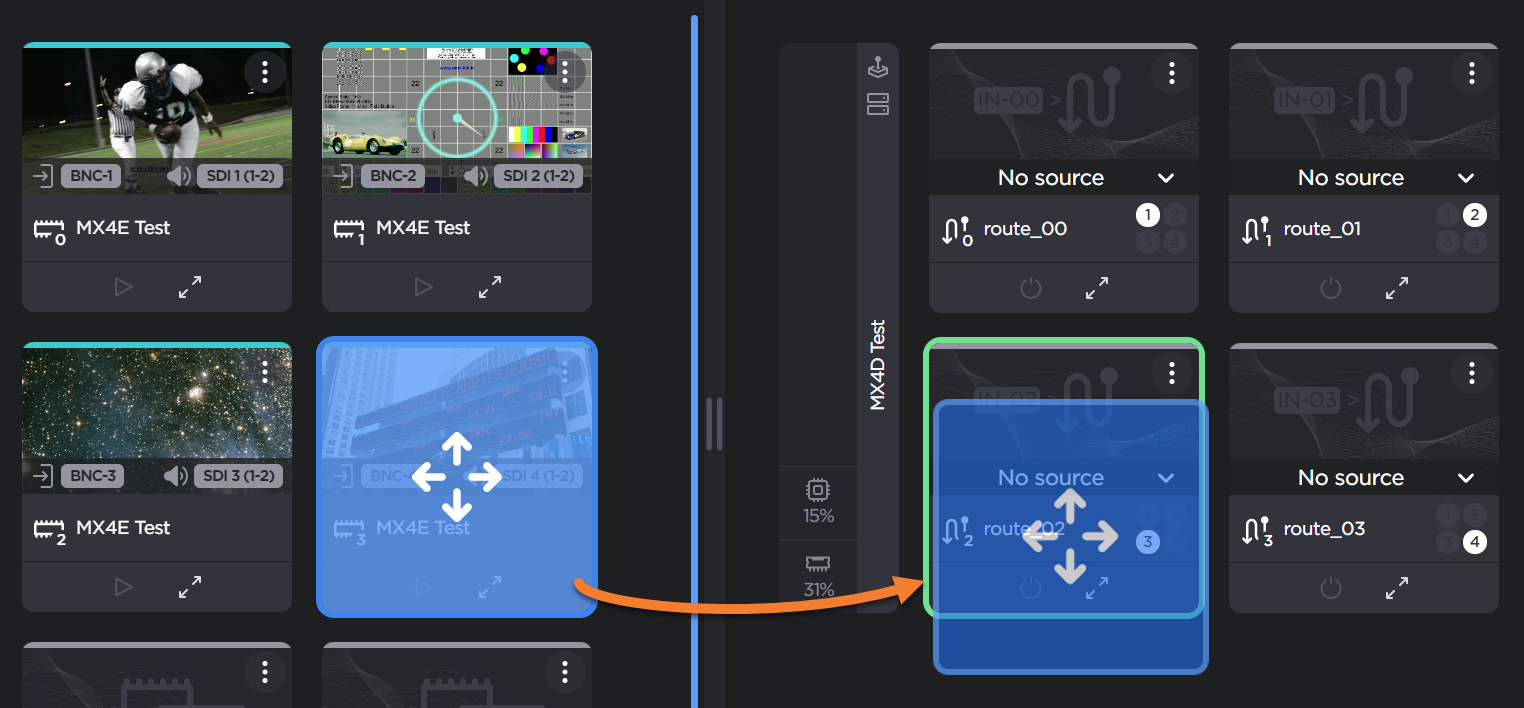
Create the Video Route
Go back to the Hub 360 tab in your browser.
Click Master Control in the sidebar.
Drag the configured Makito Encoder’s video encoder to the configured Makito Decoder output.
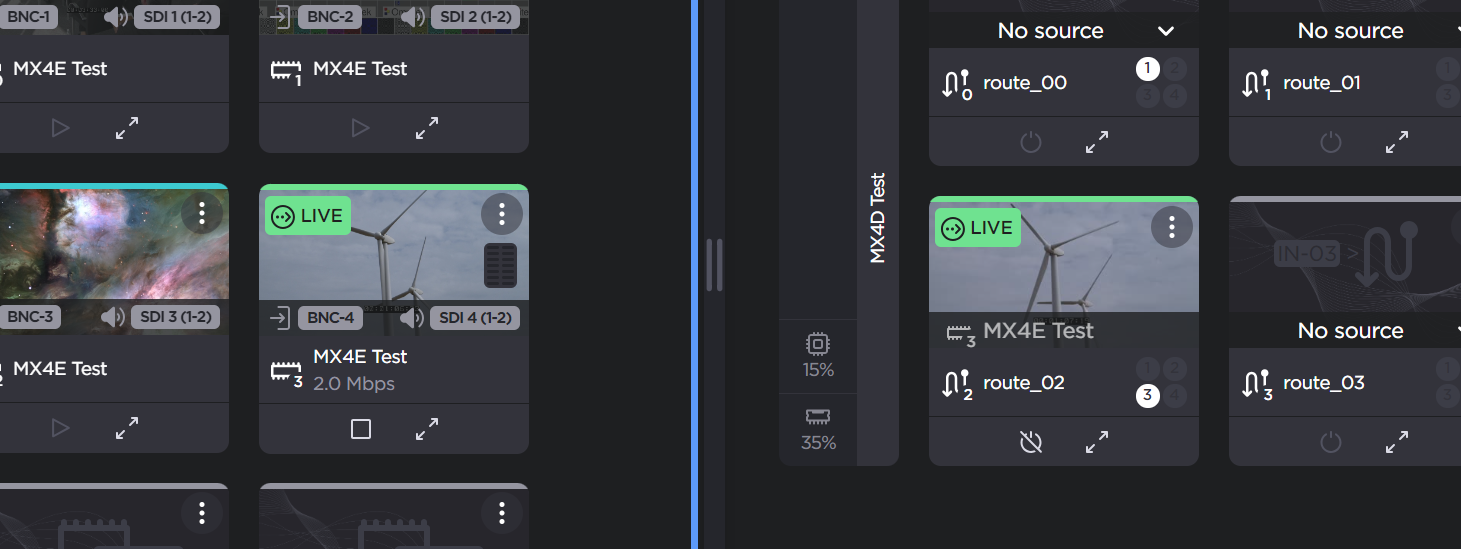
After a few seconds the Live SRT stream starts. This is indicated by the LIVE status appearing on the Source and Route thumbnails:
Monitor the Stream
The output generated from your Makito Decoder can now be seen via the chosen SDI output.
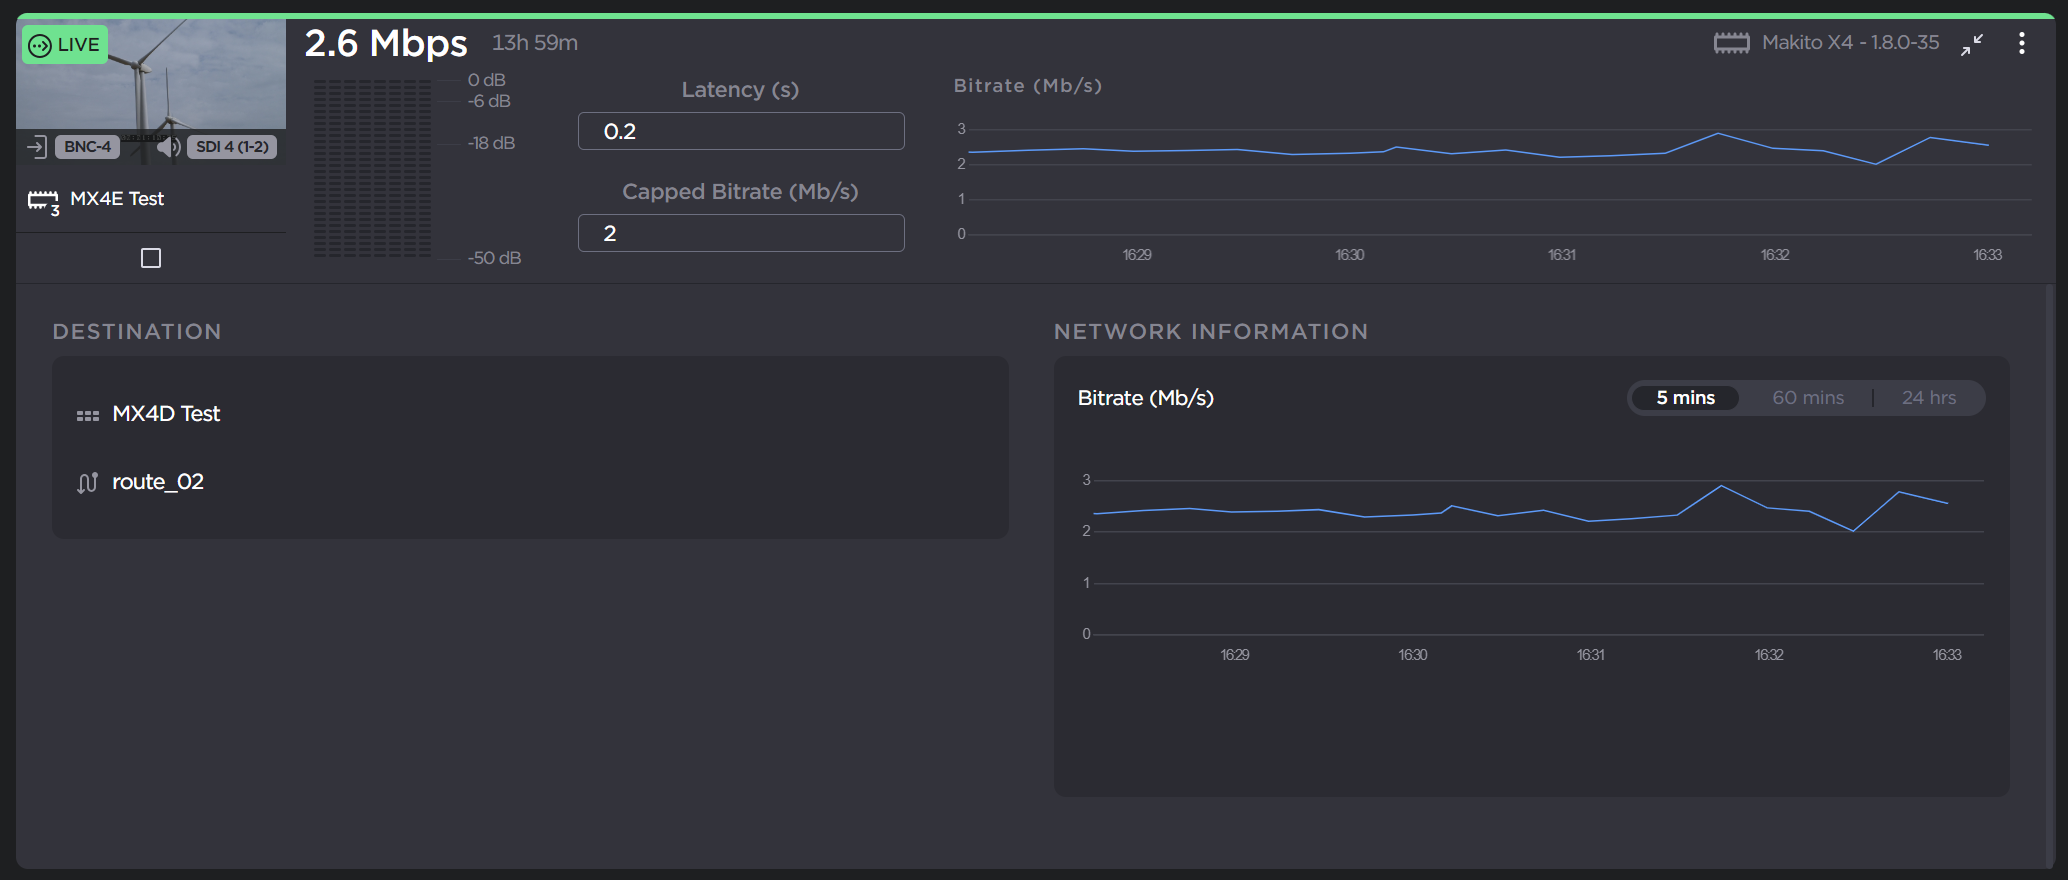
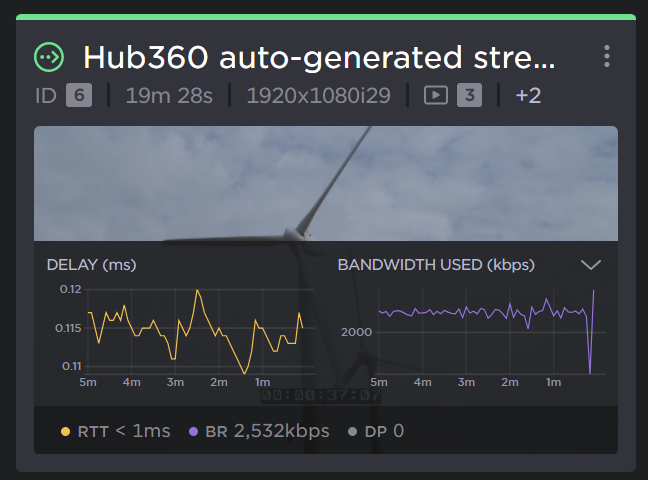
You can monitor the source encoder by clicking the icon on the source in the Master Control screen. Available information includes a bitrate graph and options to adjust the latency and capped bitrate. See Viewing Source Status for more details.
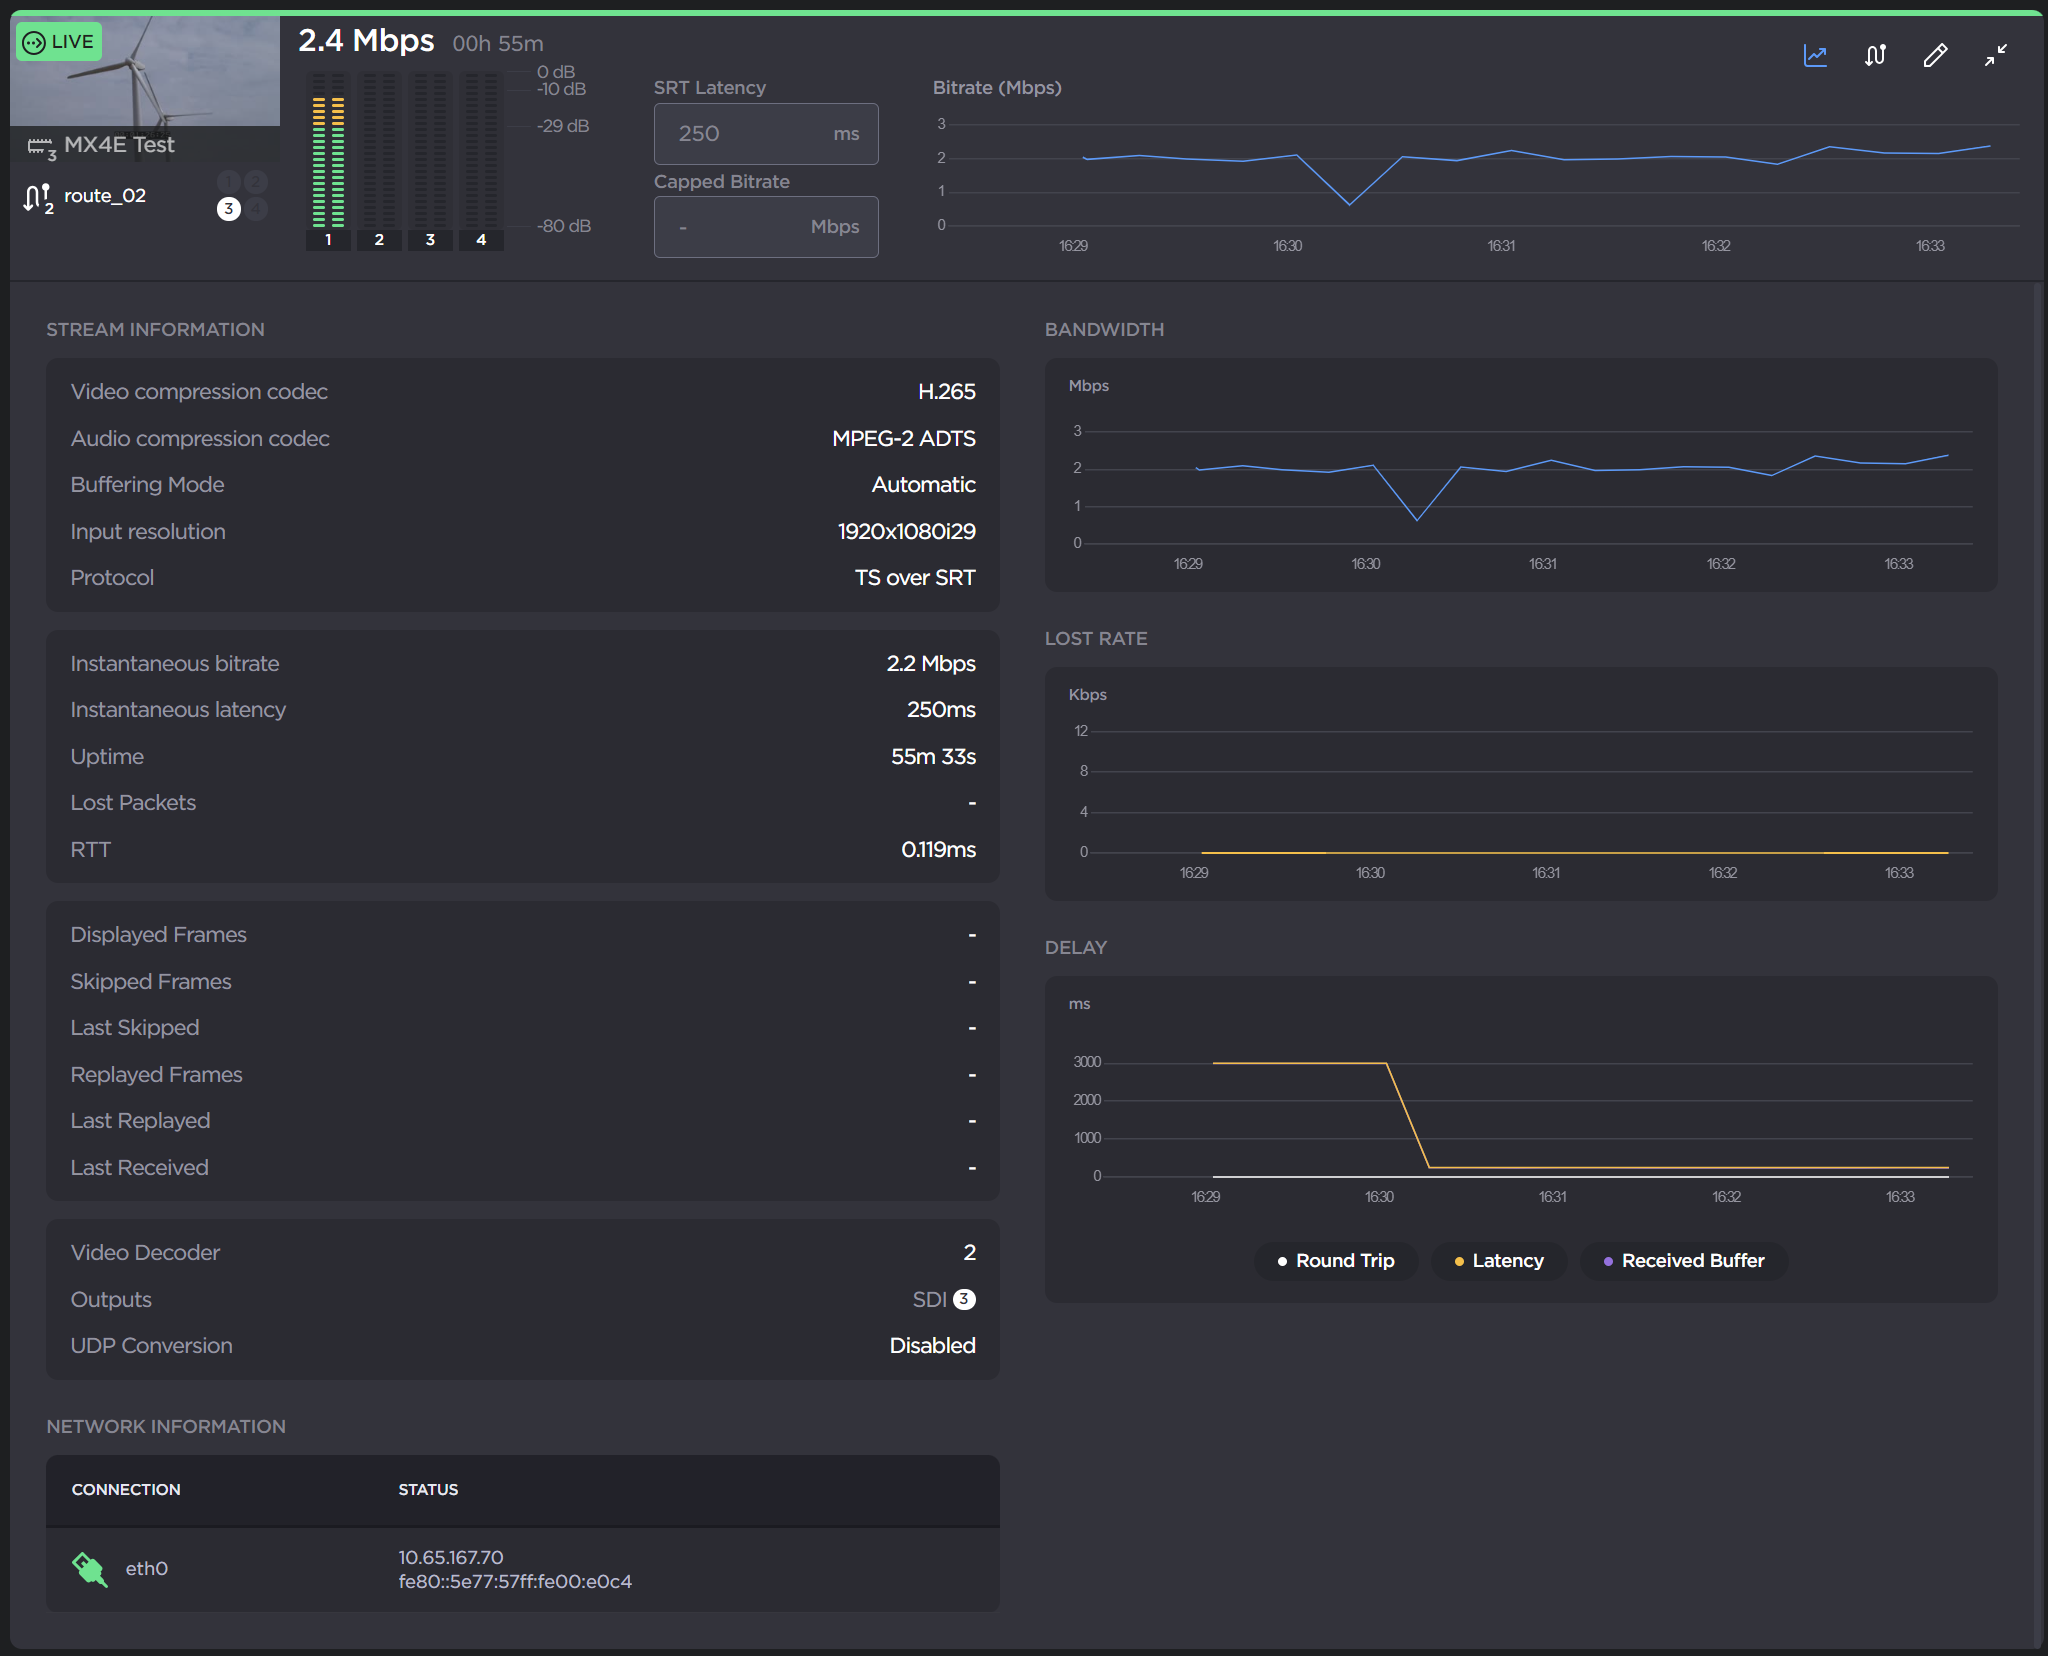
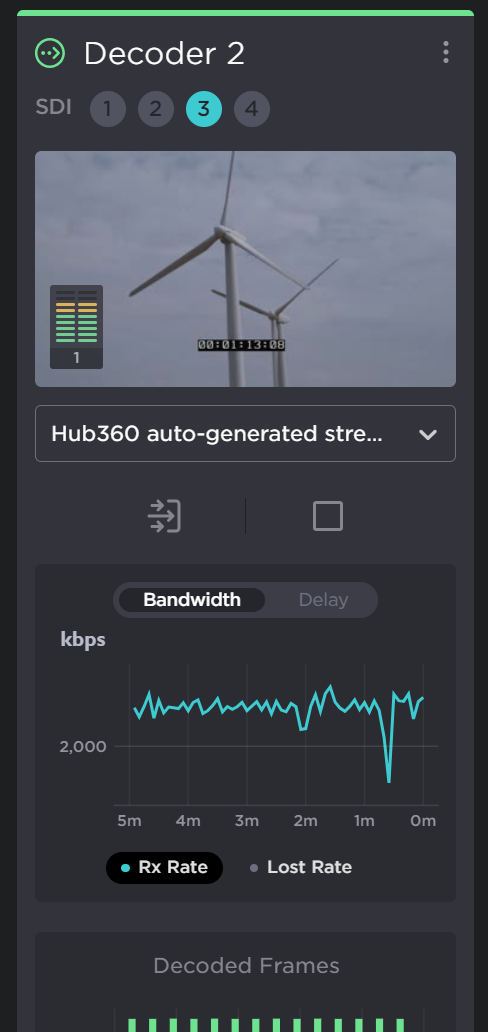
Likewise, clicking the button on the Makito Decoder route shows telemetry for the received SRT stream. See Viewing Destination Status for more details.
You can also monitor the streams on the Dashboards of the Encoder and Decoder web interfaces. Makito Encoder:
Makito Decoder:
Congratulations! You have successfully created an SRT stream between your Makito Encoder and Decoder.
JavaScript errors detected
Please note, these errors can depend on your browser setup.
If this problem persists, please contact our support.