To create a route, you click the New Route button. Next, you are presented with an assistant, or wizard, that takes you through the process step by step as follows:
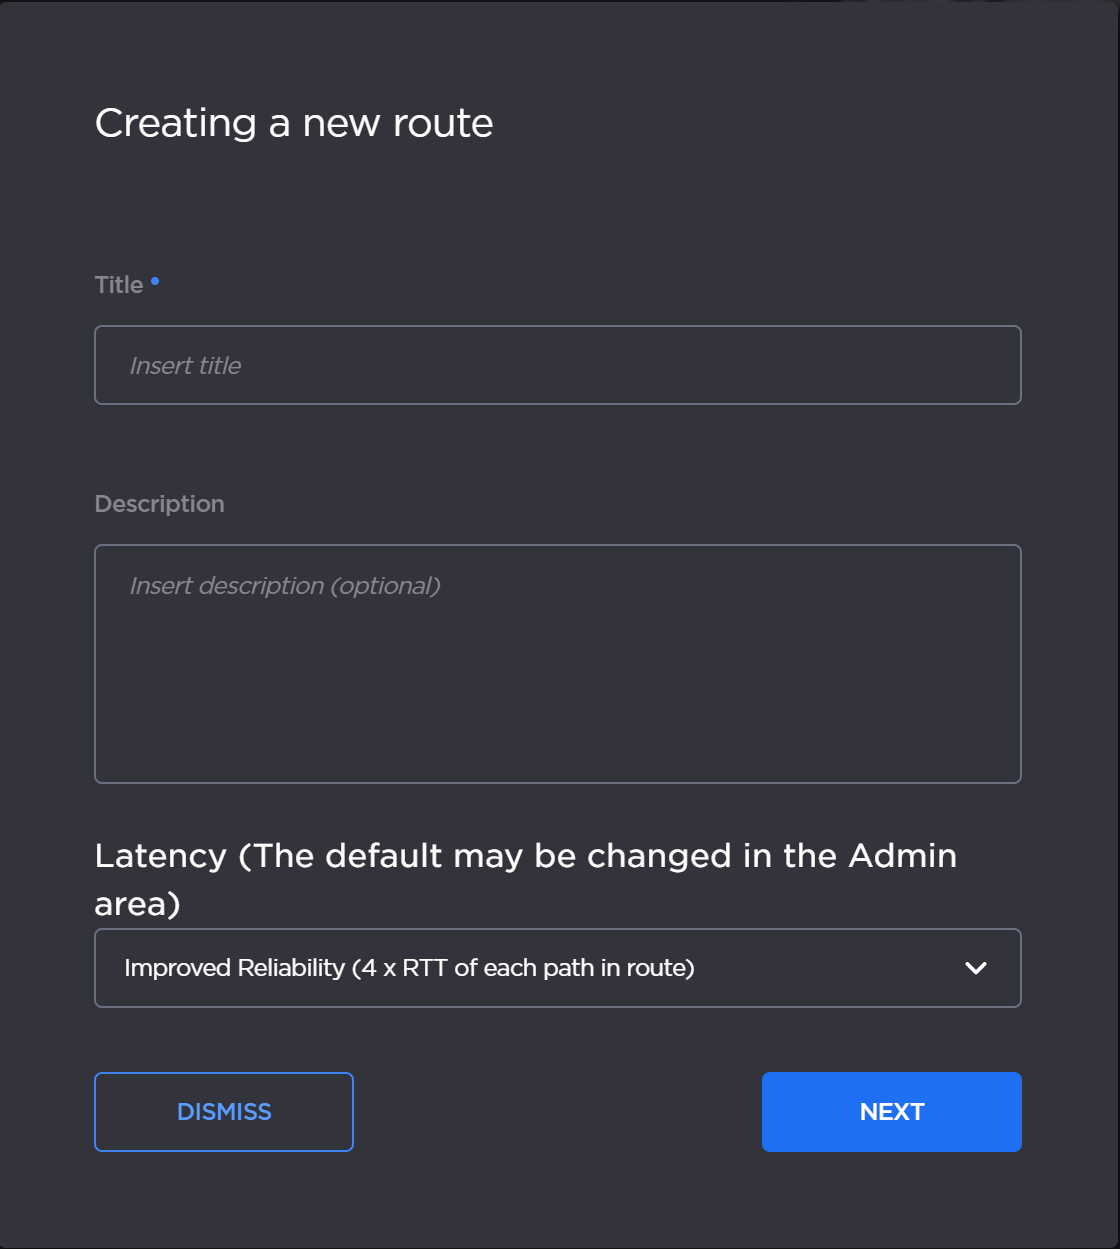
Creating a New Route
New Route
To create a route and set its latency:
Click Routes in the navigation sidebar.
When the Dashboard screen appears, click the New Route button at the top right. Or you can click the New Route button on the Routes screen.
When the dialog opens, provide a title for the new route.
You can also add an optional description for the route which will appear under the route name when the route is opened in the Routes subscreen. Long descriptions are truncated to 18 characters; however you can hover over the description to display the entire text in a popup window.
The Latency is set to the default for the subscription as specified by your administrator. To override the default, use the Latency dropdown menu.
When finished, click Next.
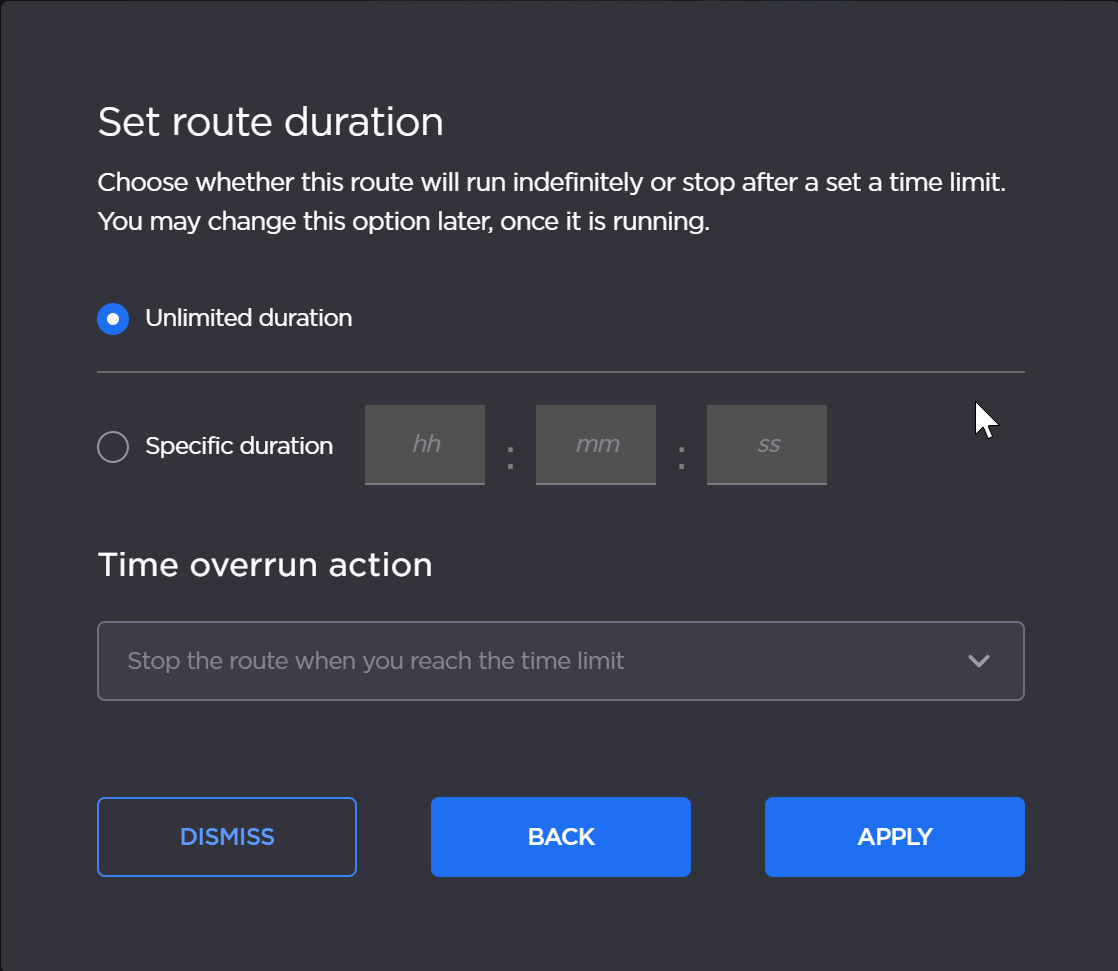
Establishing the Route Duration
Route Duration
To set the route duration:
Next, specify either an unlimited route duration or a specific duration indicated in hours, minutes and seconds (e.g., hh:mm:ss).
Note
Specified durations must be of at least 5 minutes.
If using a specific duration, use the Time Overrun Action dropdown menu to indicate what should happen if the event exceeds the specified duration:
Stop the route when you reach the time limit.
Keep the route running and send me a notification.
Click Apply. The view changes to the Route subscreen.
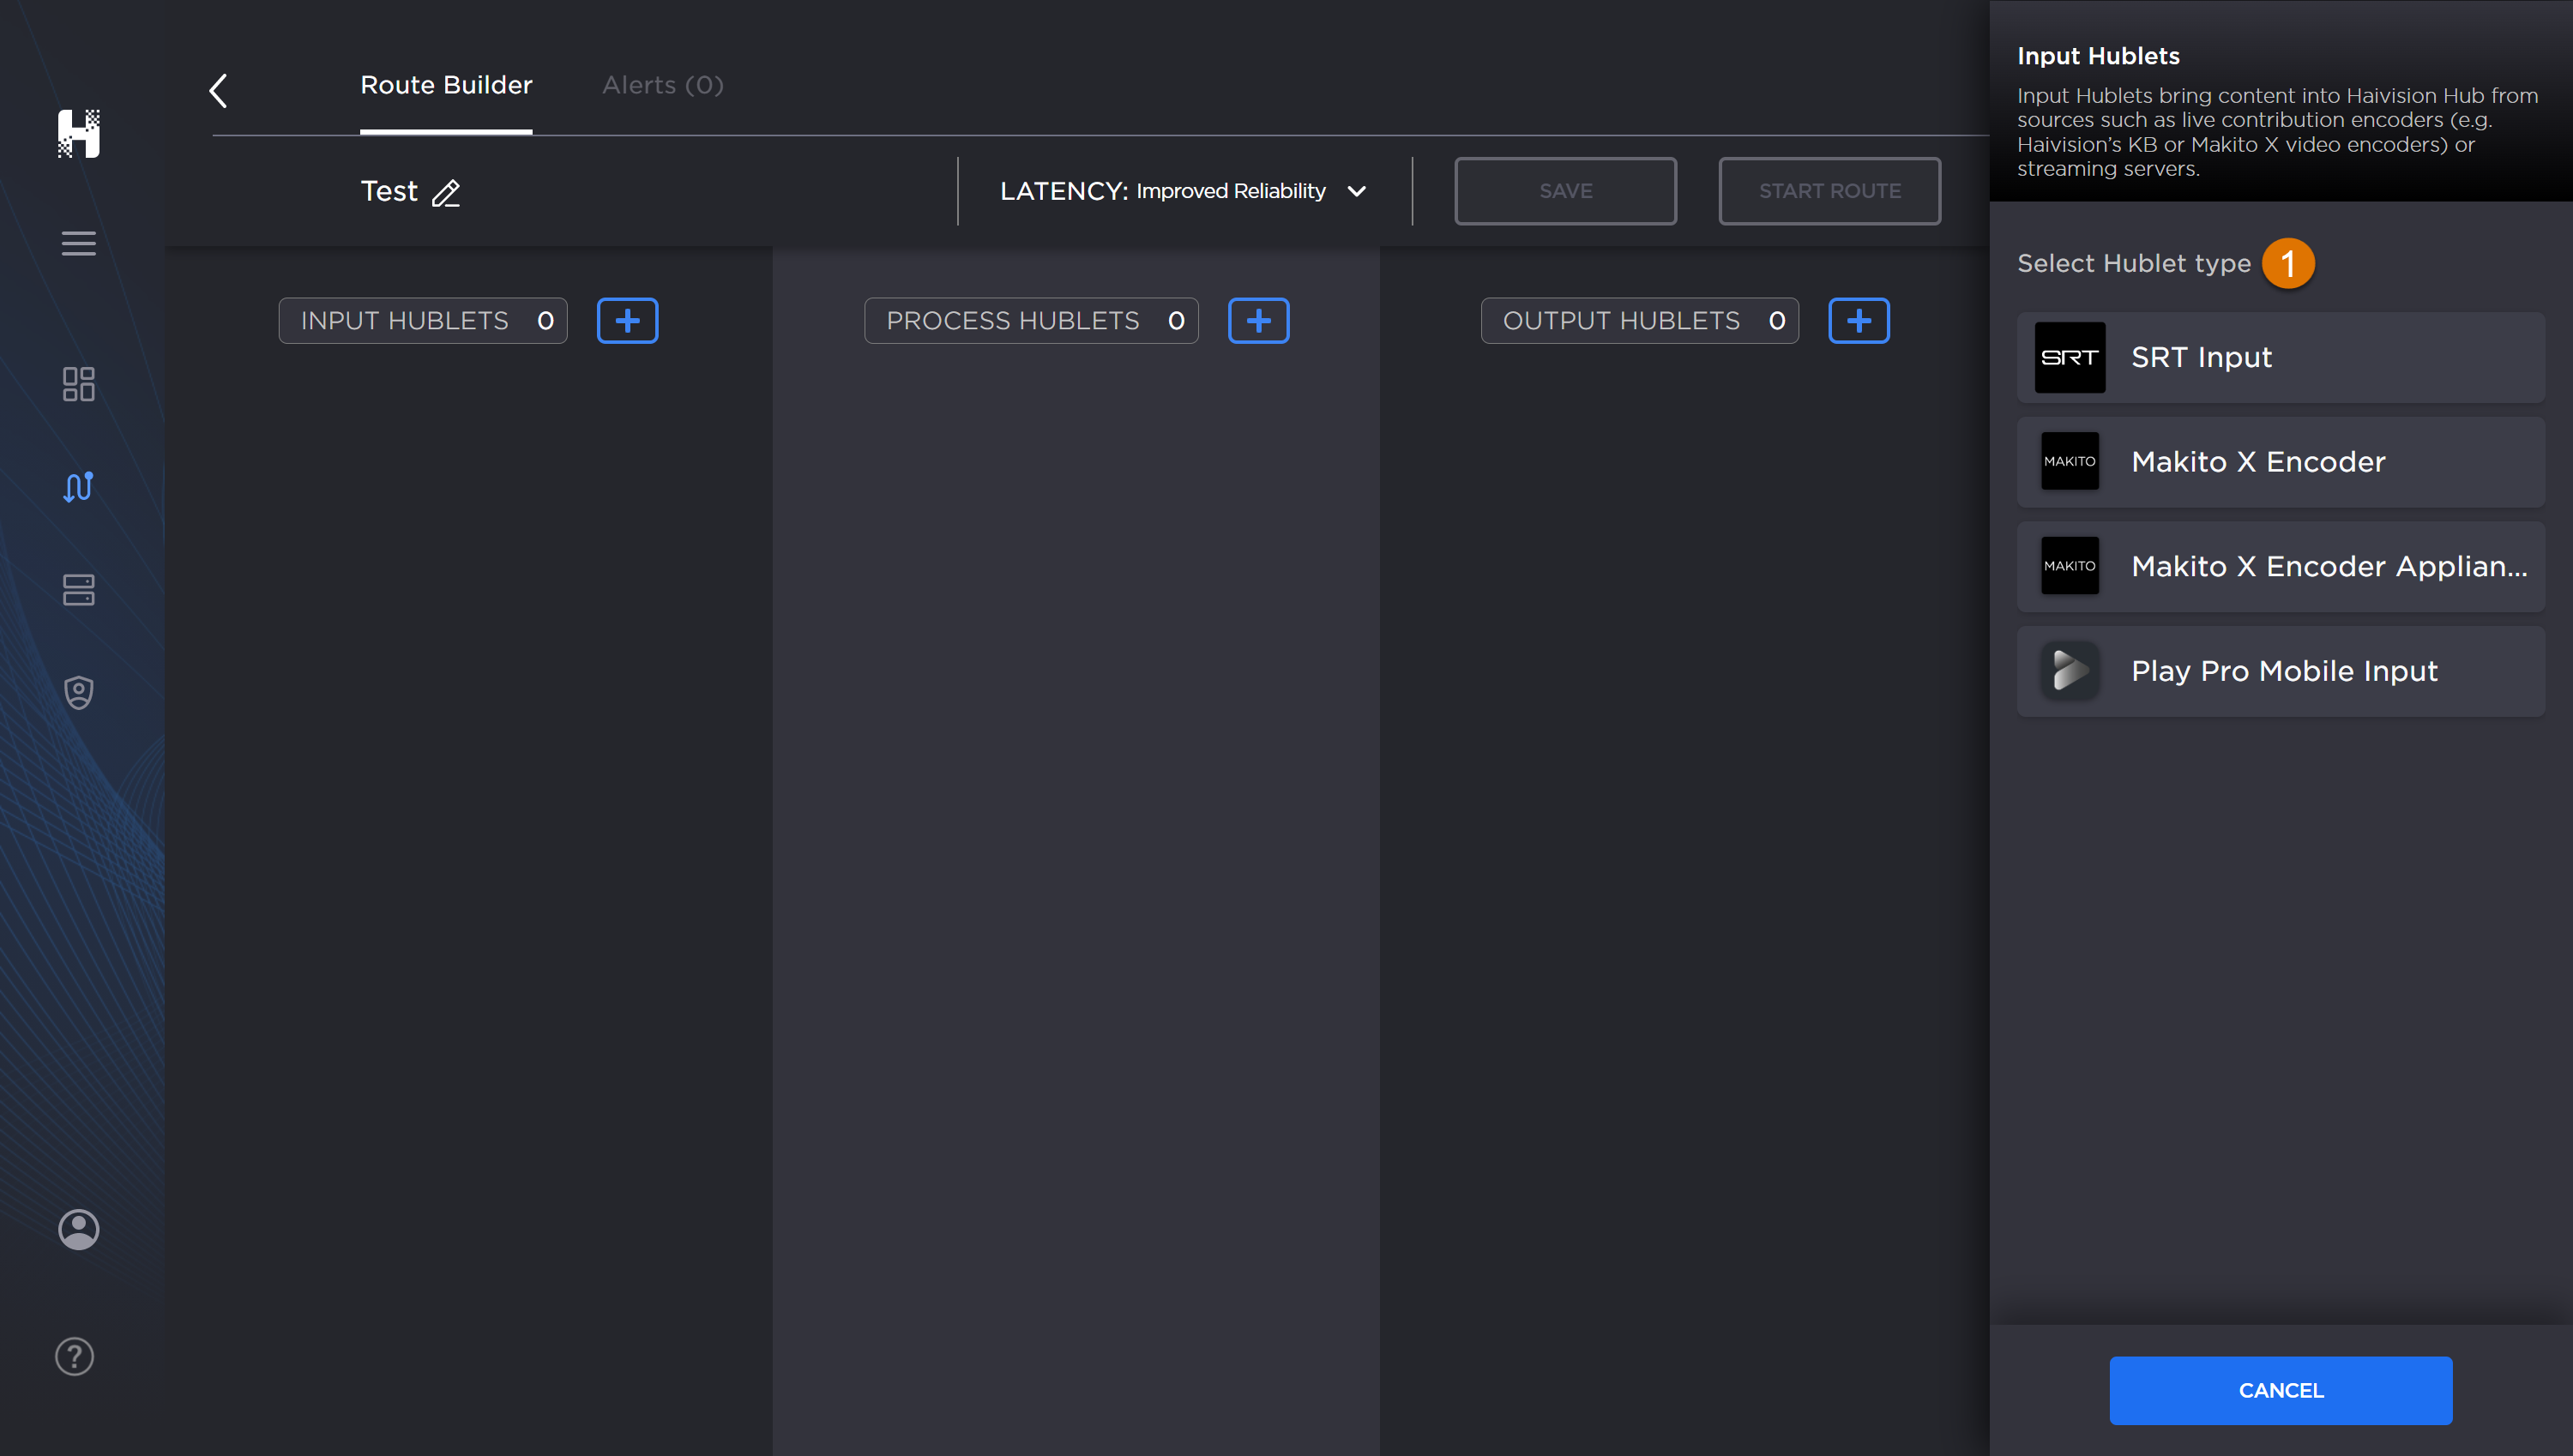
Before you can save your route, you will need to create at least one Input Hublet and one Output Hublet and then connect them.
In the Hublet view, click the + button next to the Input Hublets.
When the dialog opens, select the Hublet type such as LIVE contribution encoders or streaming servers.
Important
The RTMP Input Hublet has two modes: Client and Server. Server mode will provide you with an ingest URL once the route is started. This URL will be used every time the route is started. See the Creating a Route using RTMP Input Example for more information.
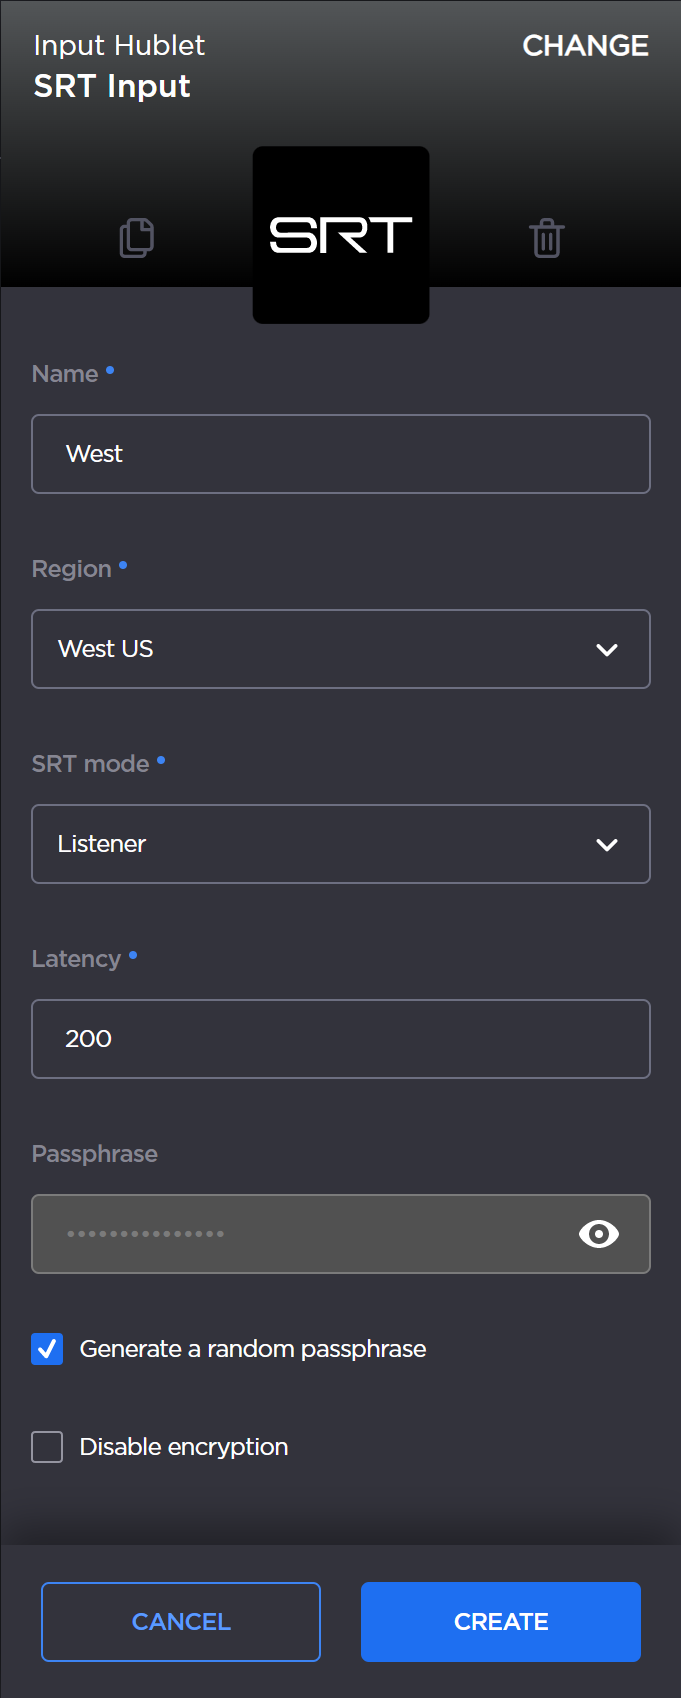
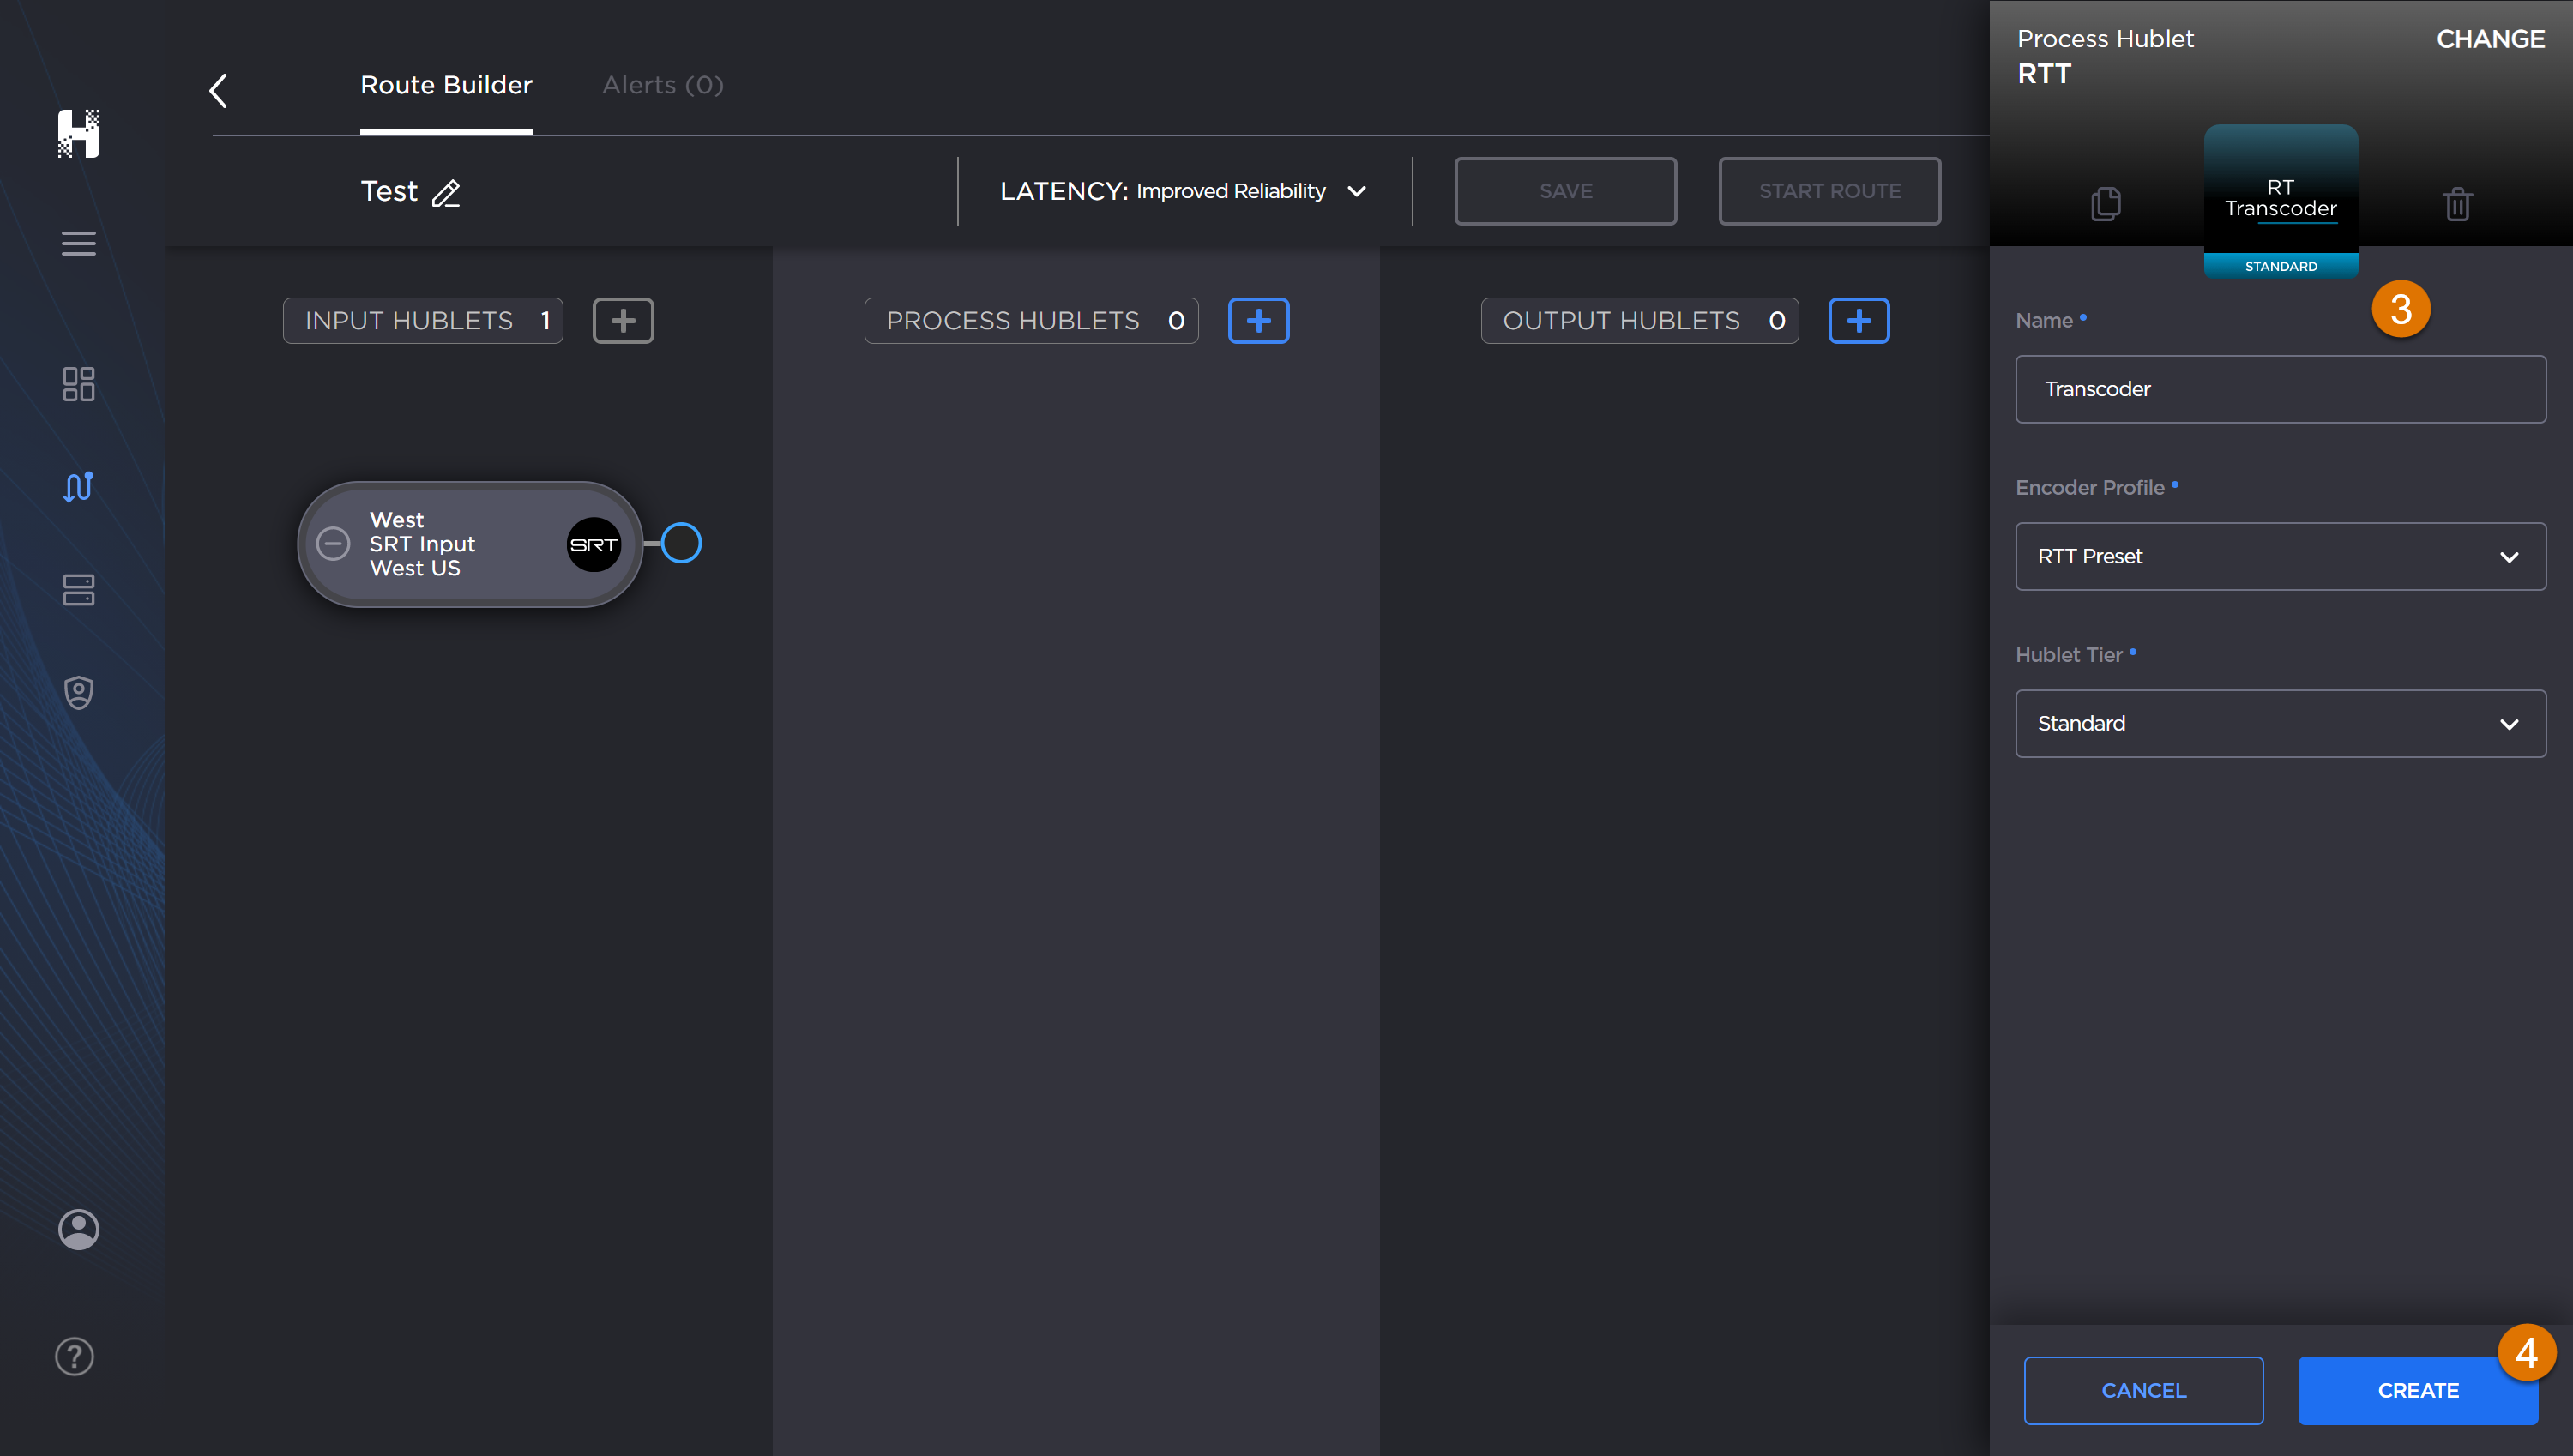
When the panel appears, provide the Hublet specifics. Mandatory fields are indicated with asterisks.
Note
You may need to scroll the panel to view all the fields.
Sample Hublet panel.
When finished, click the Create button.
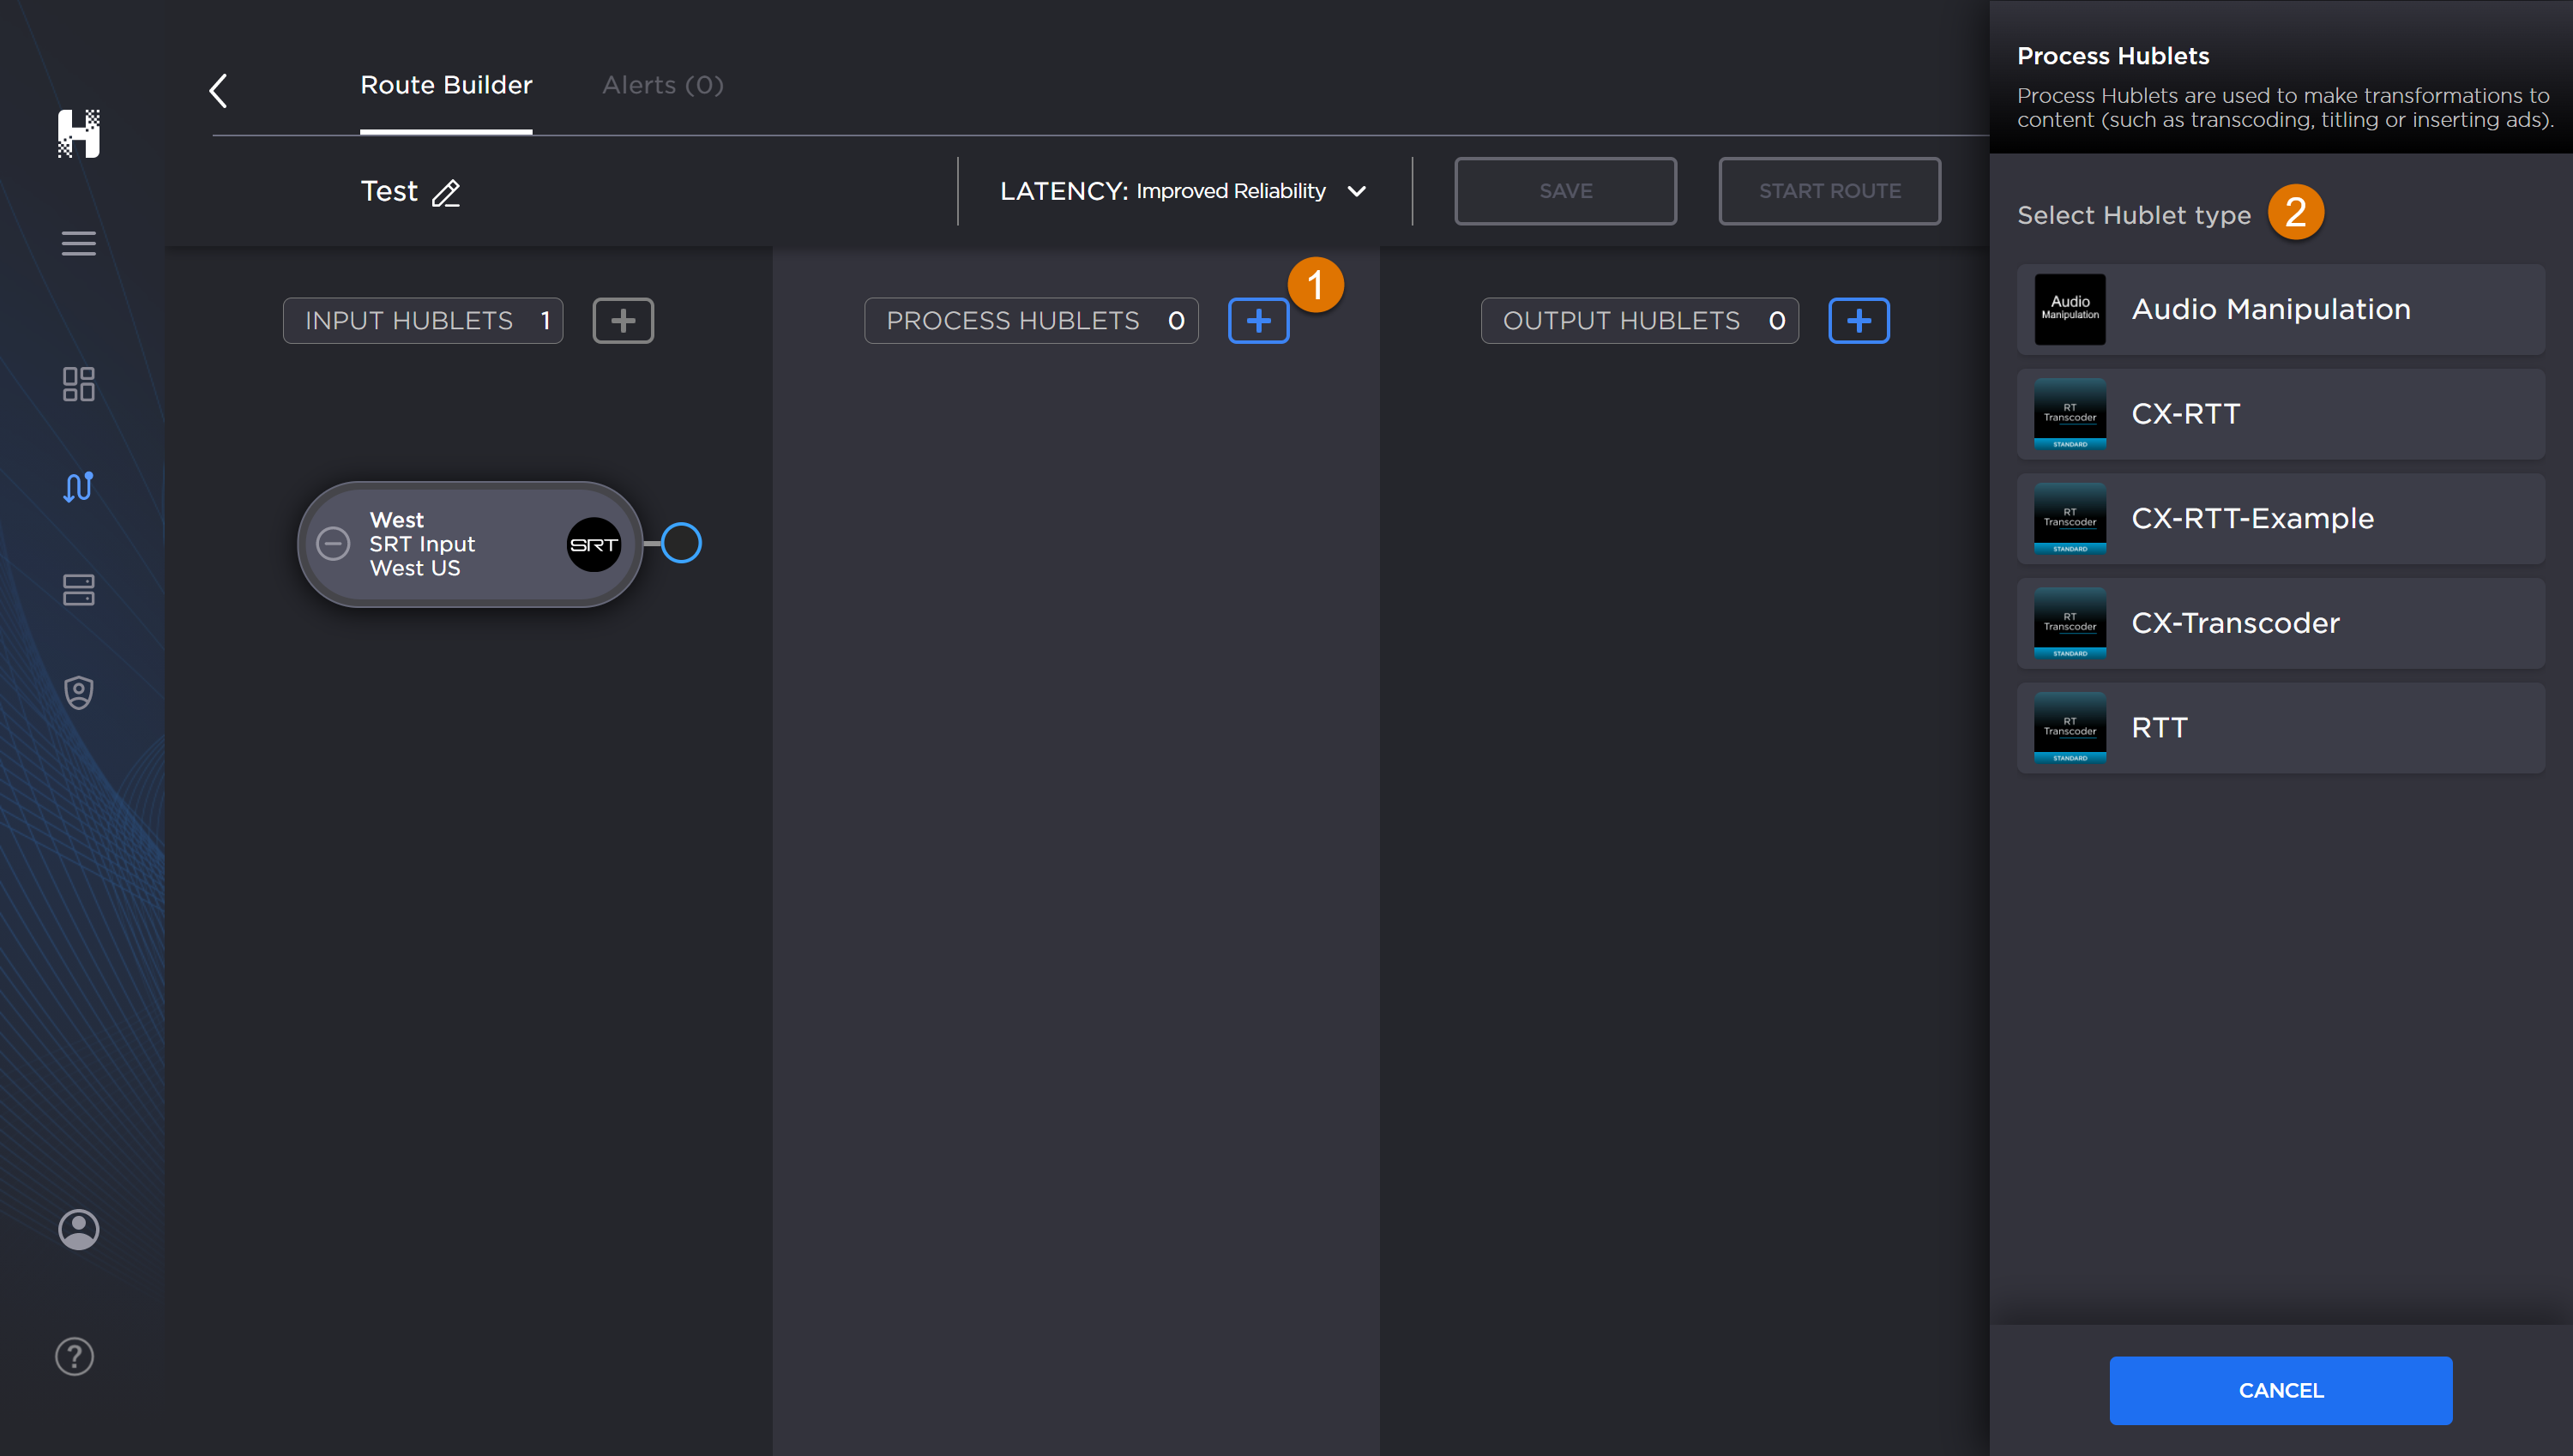
Creating a Process Hublet
Process Hublet
Process Hublets receive content from an Input Hublet, make transformations to the content (such as transcoding, titling or ad insertion), and then deliver it to one or more Output Hublets.
Your Subscription admins can create presets to streamline creation Process Hublets. Work with them to ensure that you have the Hublet preset type that you need.
Note
If you want to add a Hublet to an existing route, see Adding a Hublet to a Running Route. NOTE: Currently, only an Output Hublet can be added to a running route.
To create a Process Hublet:
In the Hublet view, click the + button next to the Process Hublets.
When the Process Hublet panel opens, select the Hublet type you want to use to transform the content (e.g., transcoding, titling, inserting ads, etc).
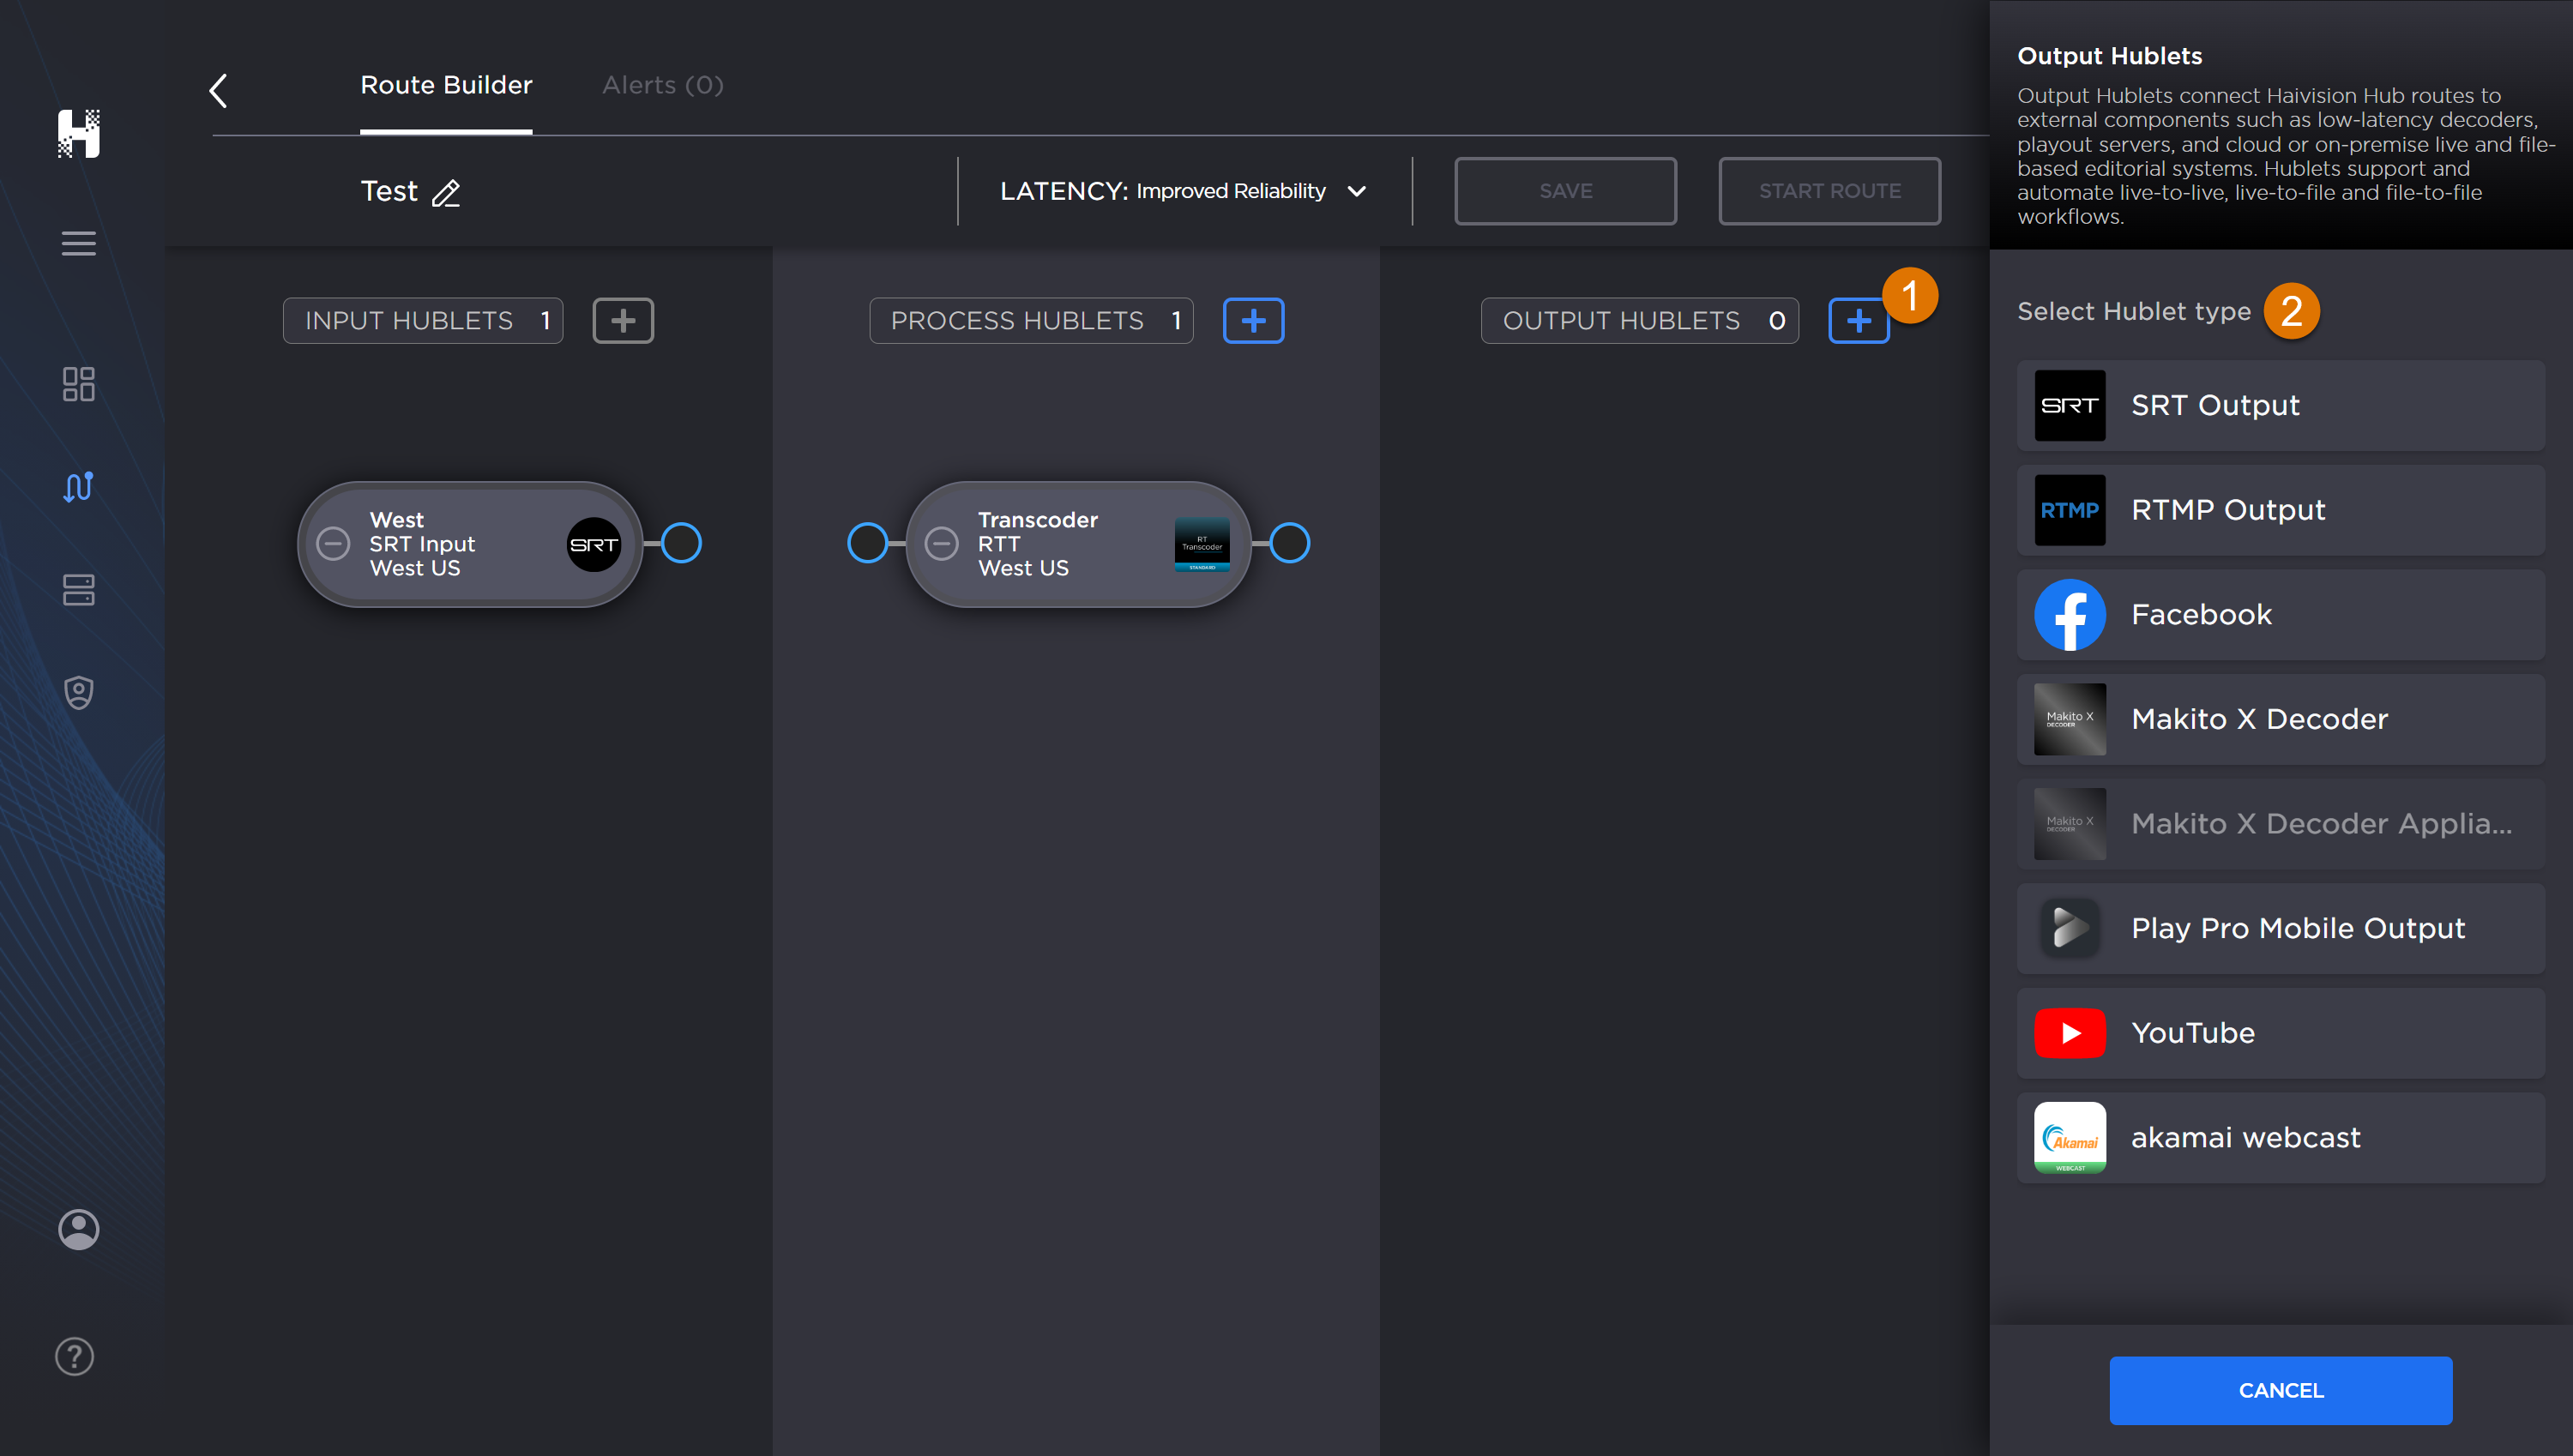
In the Hublet view, click the + button next to Output Hublets.
When the dialog opens, select the Hublet type for the external components to which you want to connect (such as low-latency decoders, playout servers and so forth to support LIVE-to-LIVE, LIVE-to-file, and file-to-file workflows.
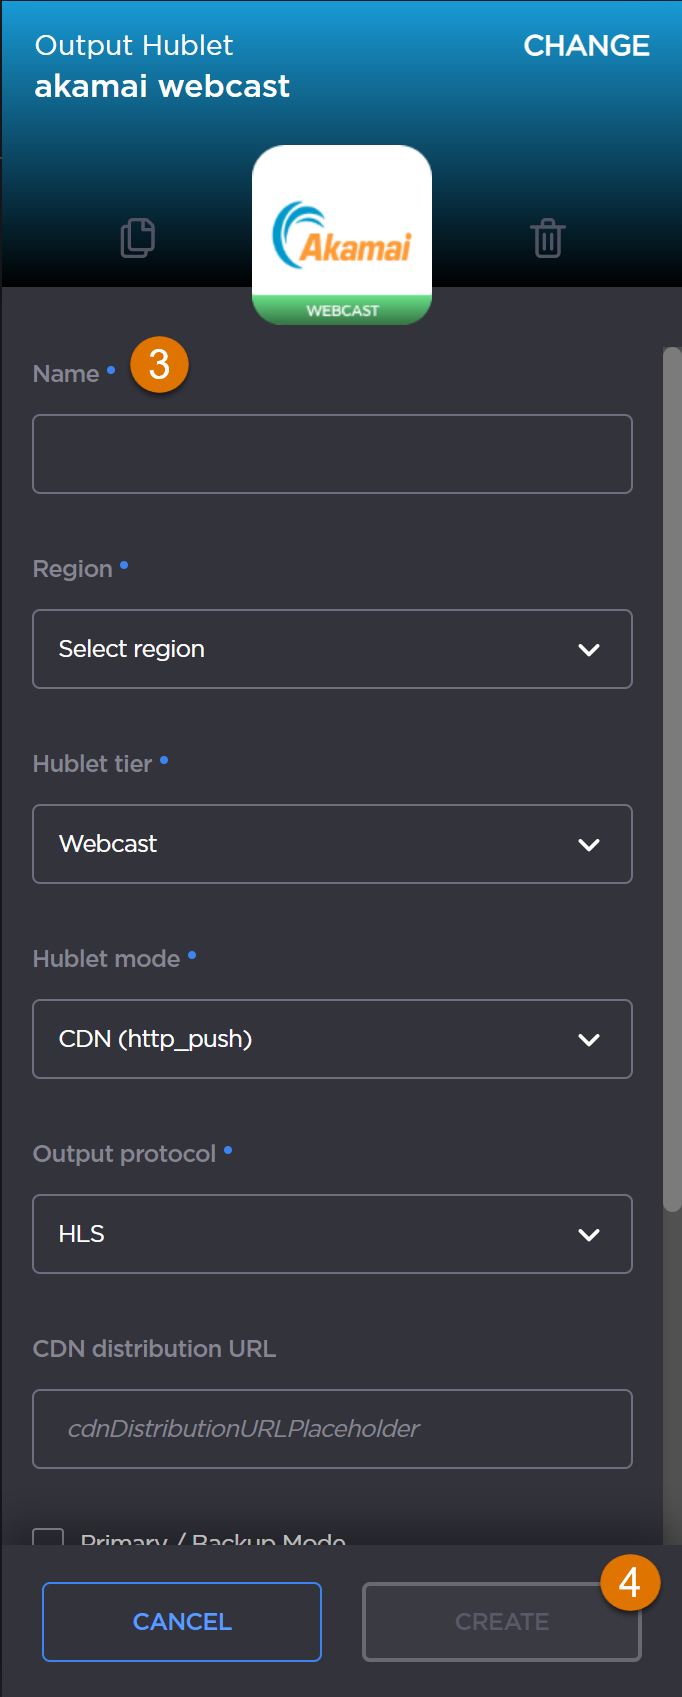
Next, provide the Hublet specifics when prompted. Asterisks indicate mandatory fields.
Note
You may need to scroll the panel to view all the fields.
When finished, click the Create button.
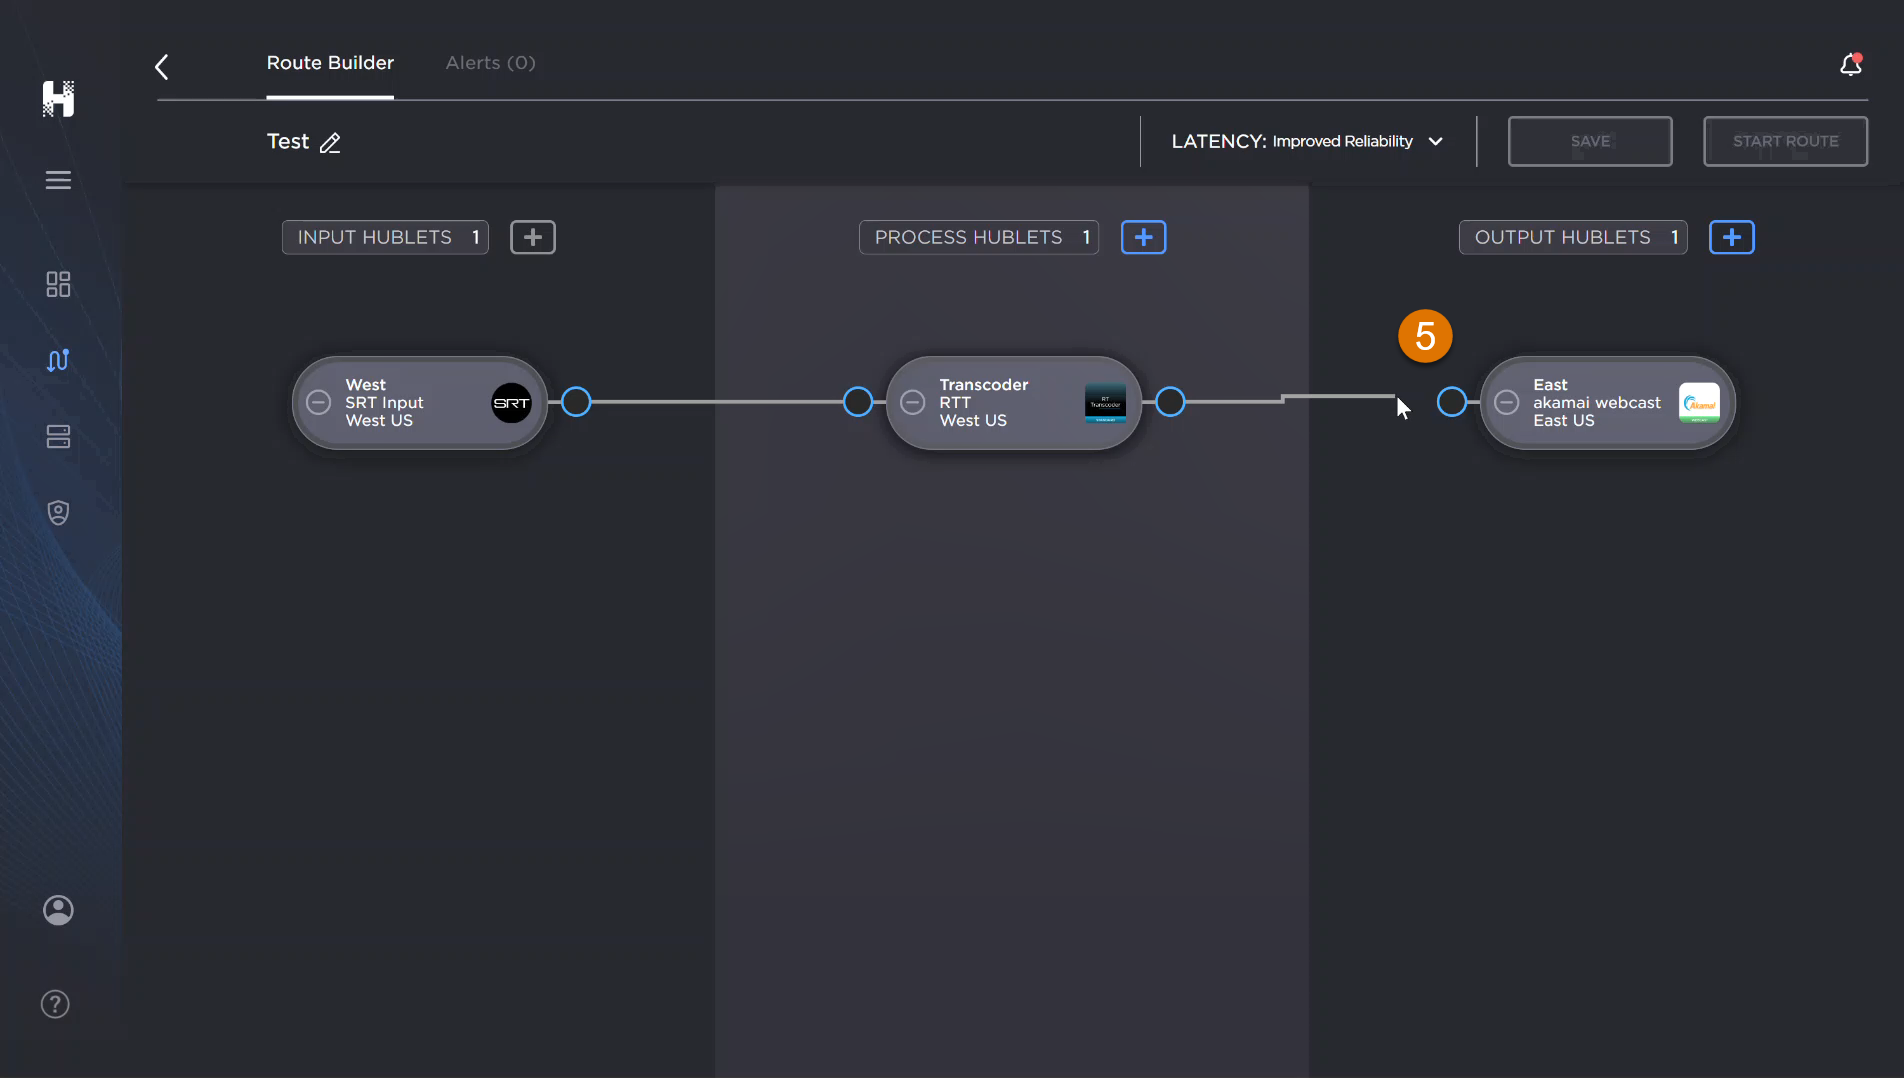
Click each Hublet endpoint and drag to the next Hublet endpoint to connect the route.
Click the Save button to keep your changes.
When prompted, confirm that you want to save your route.
Connecting Hublets
Connecting Hublets
To connect Hublets:
Click the Routes option in the navigation sidebar.
In the listing, locate the route where you want to connect a Hublet and click the route's name for that listing.
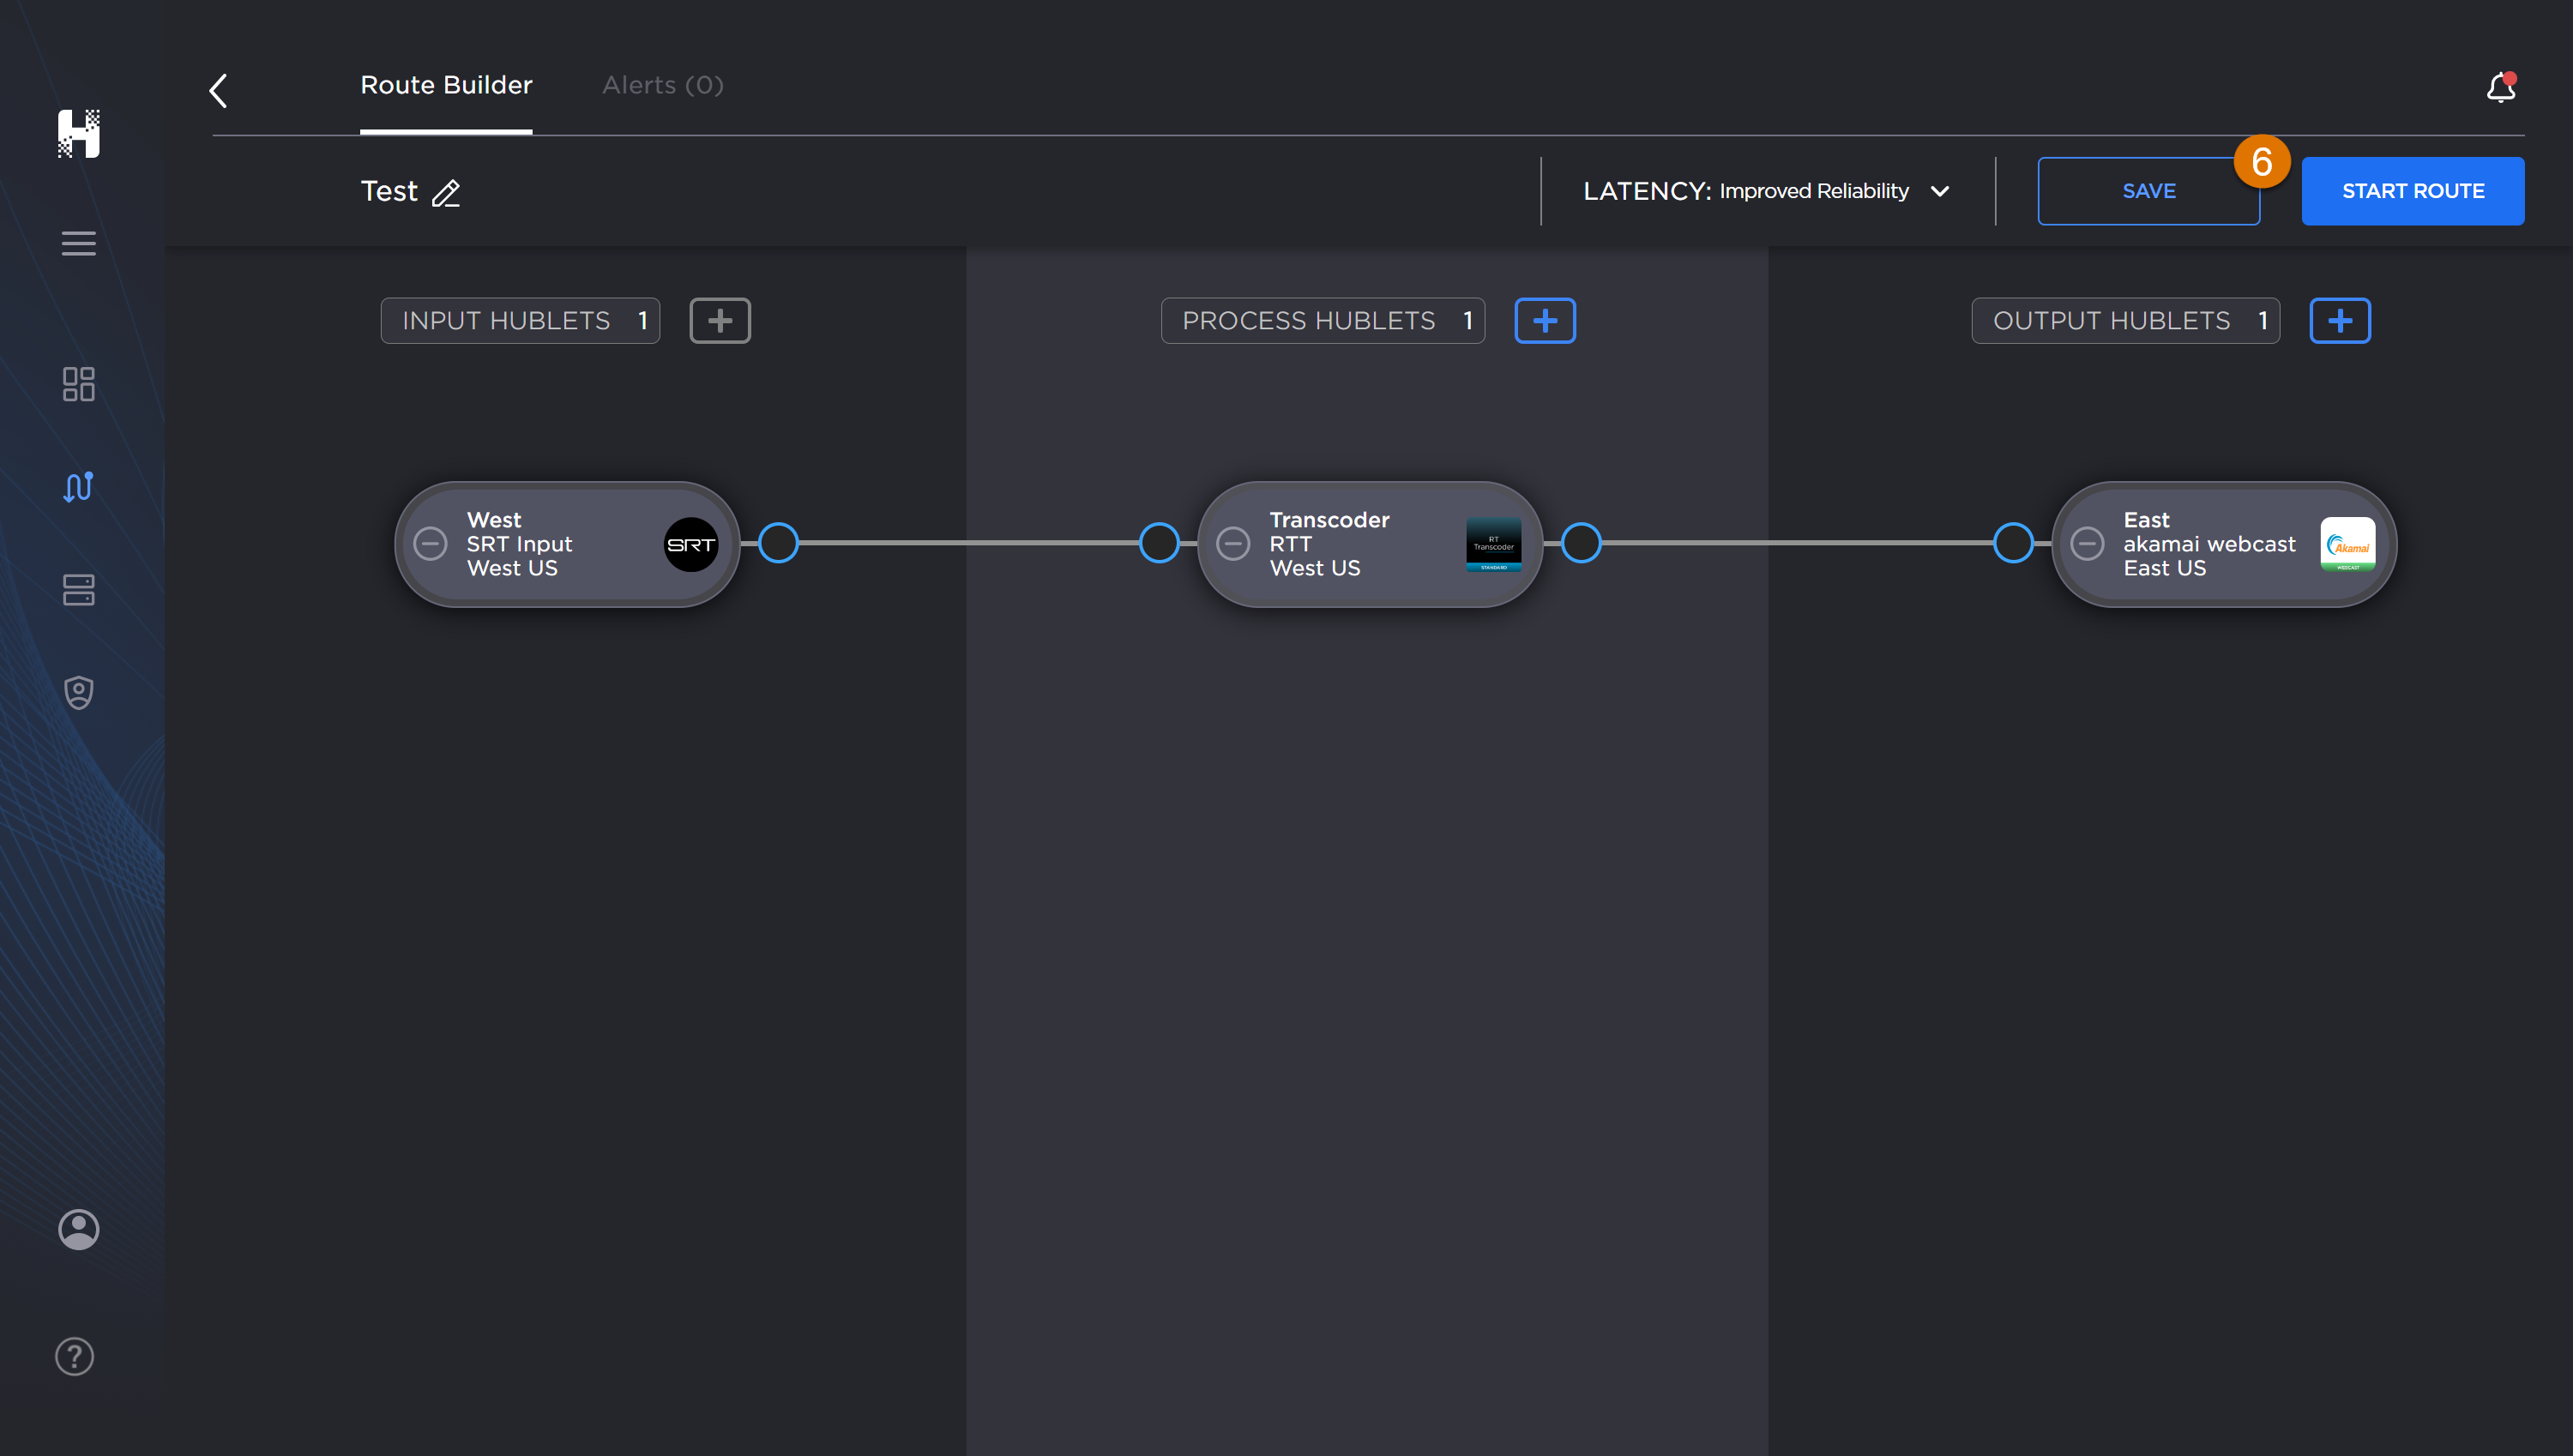
When the Route Builder tab opens, click the Hublet endpoint and drag your cursor to the next Hublet endpoint in the route as appropriate.
When finished, click the Save or Start Route button as necessary.
When prompted, click the Confirm checkbox and the Yes button.
JavaScript errors detected
Please note, these errors can depend on your browser setup.
If this problem persists, please contact our support.