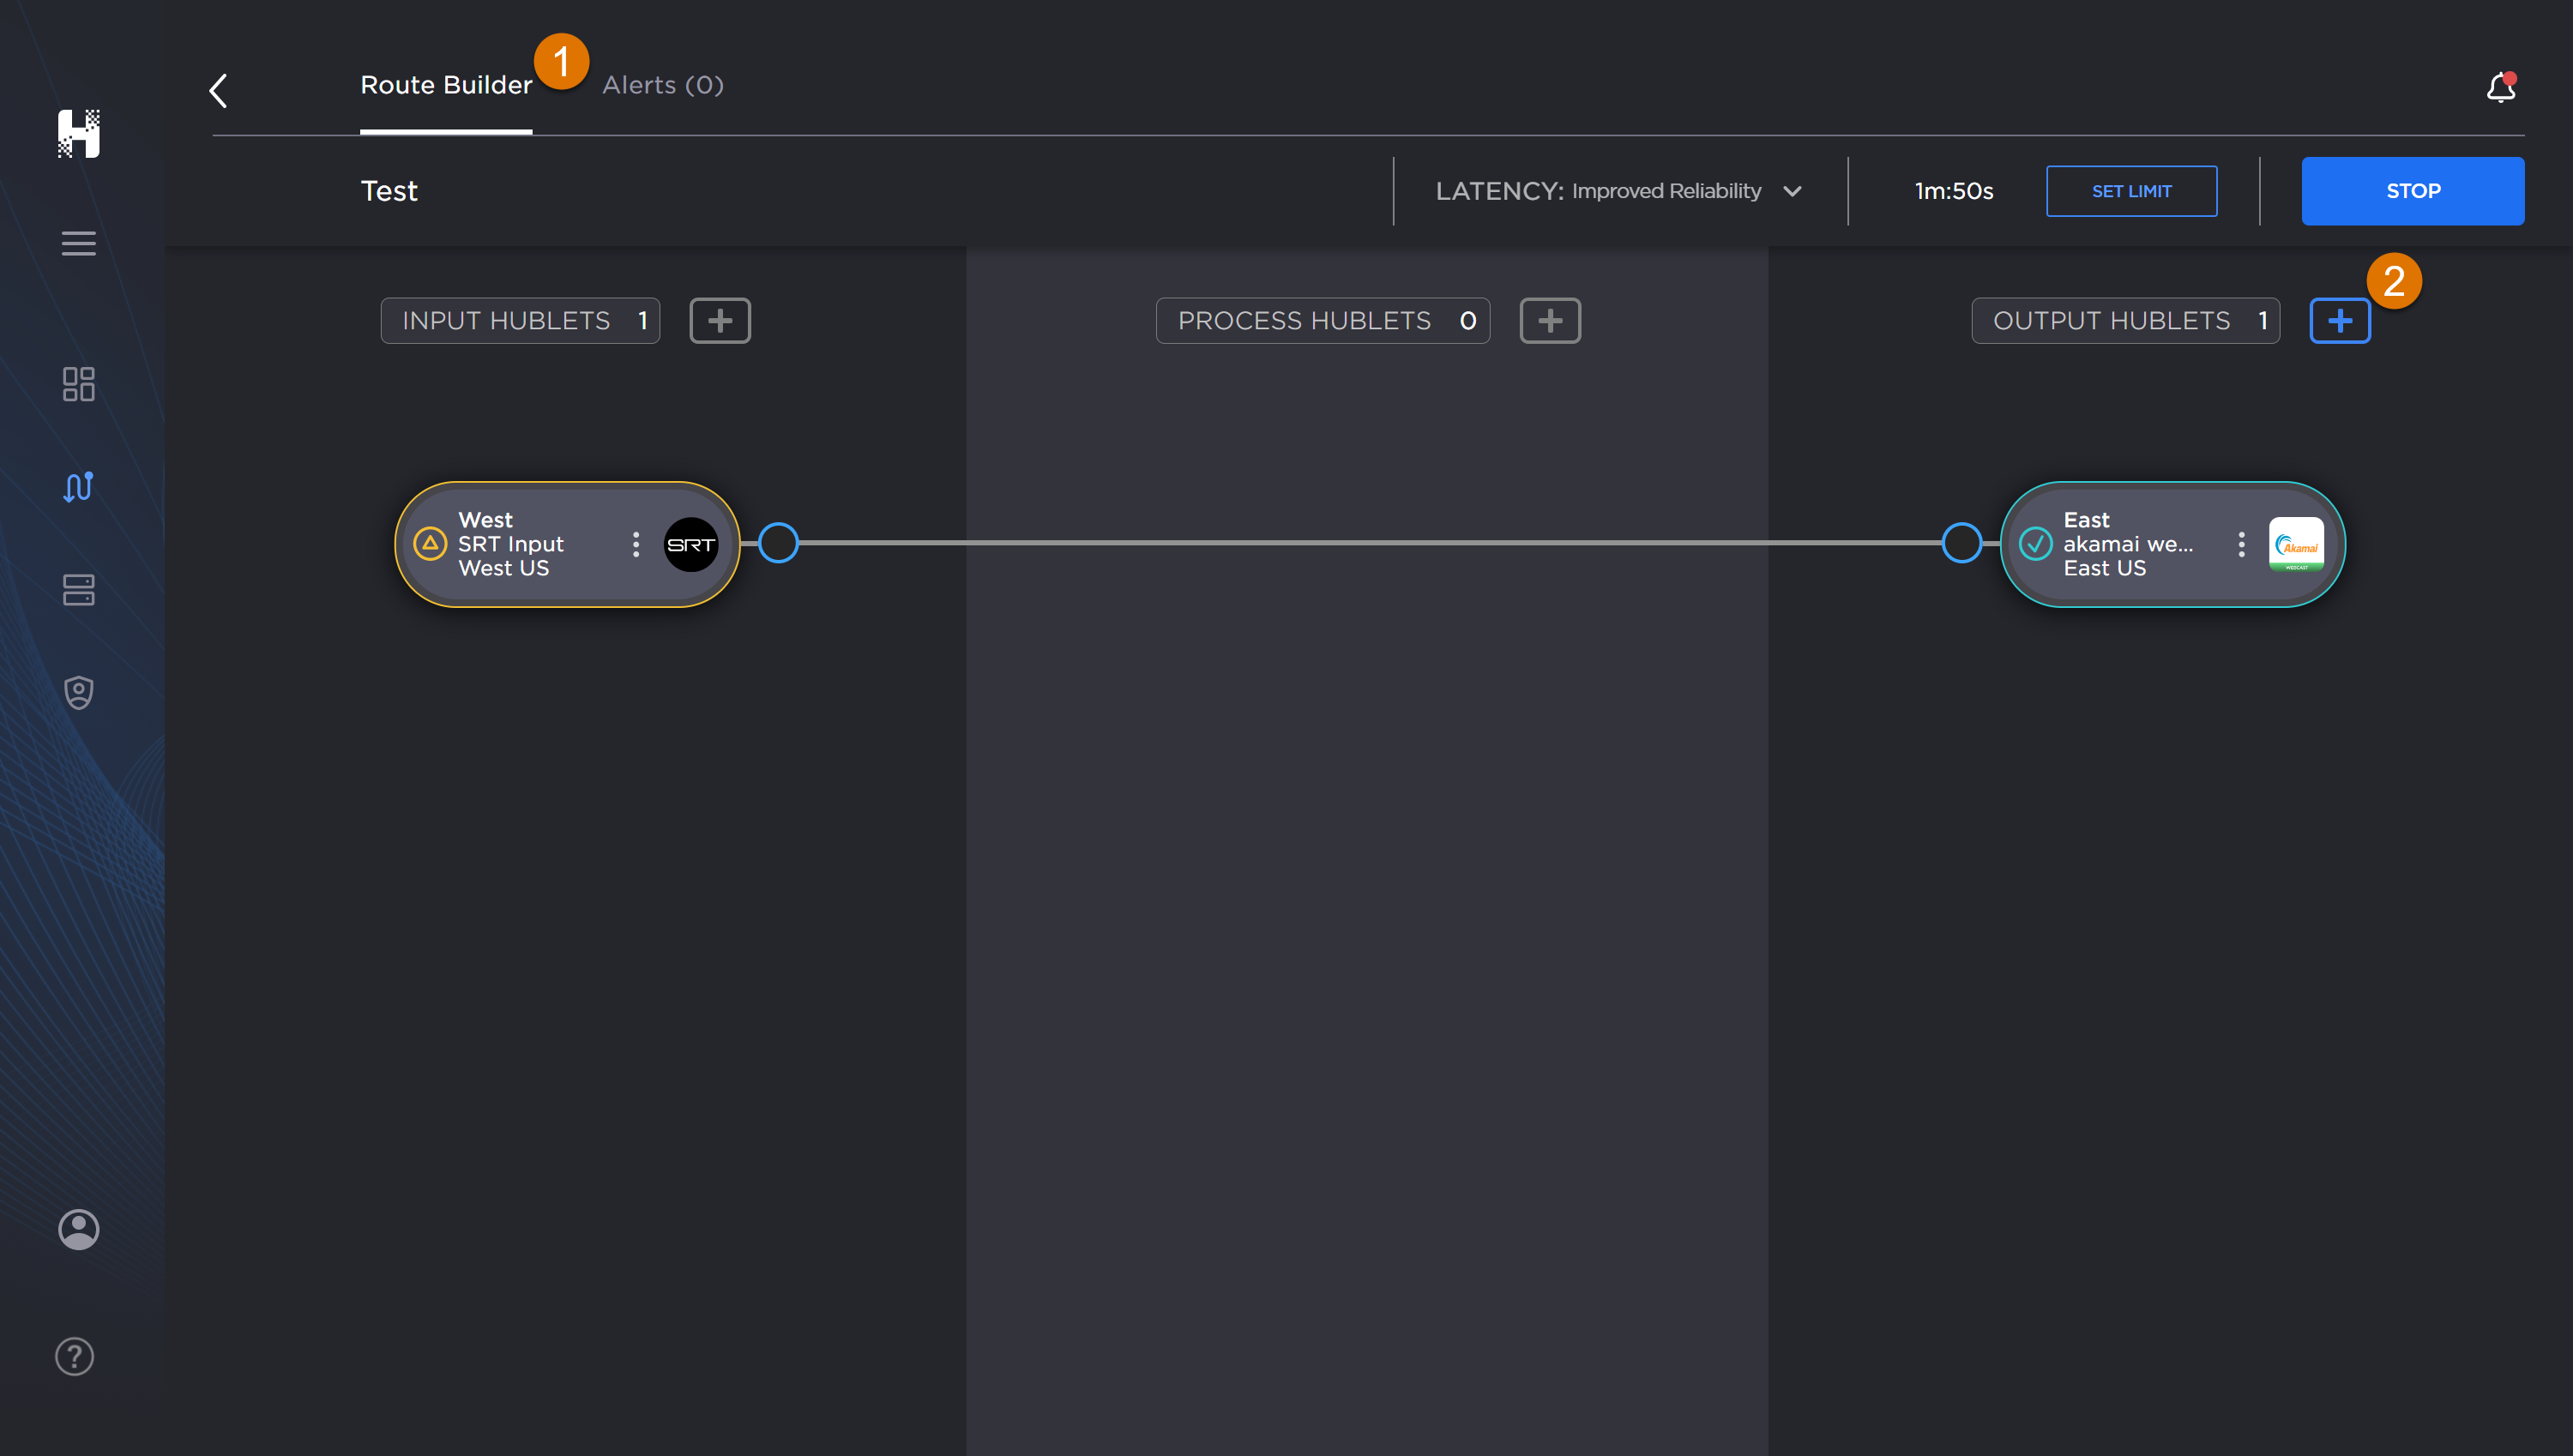
Hublets represent plugins to the workflow. They are indicated by the endpoints on the route.
When viewing the Hublets, the color coding and the symbols map to the health of the element in the route. For instance, the colors change when content is streaming through a Hublet or if there's a conflict.
Inactive
Active
Streaming
Issues
Errors
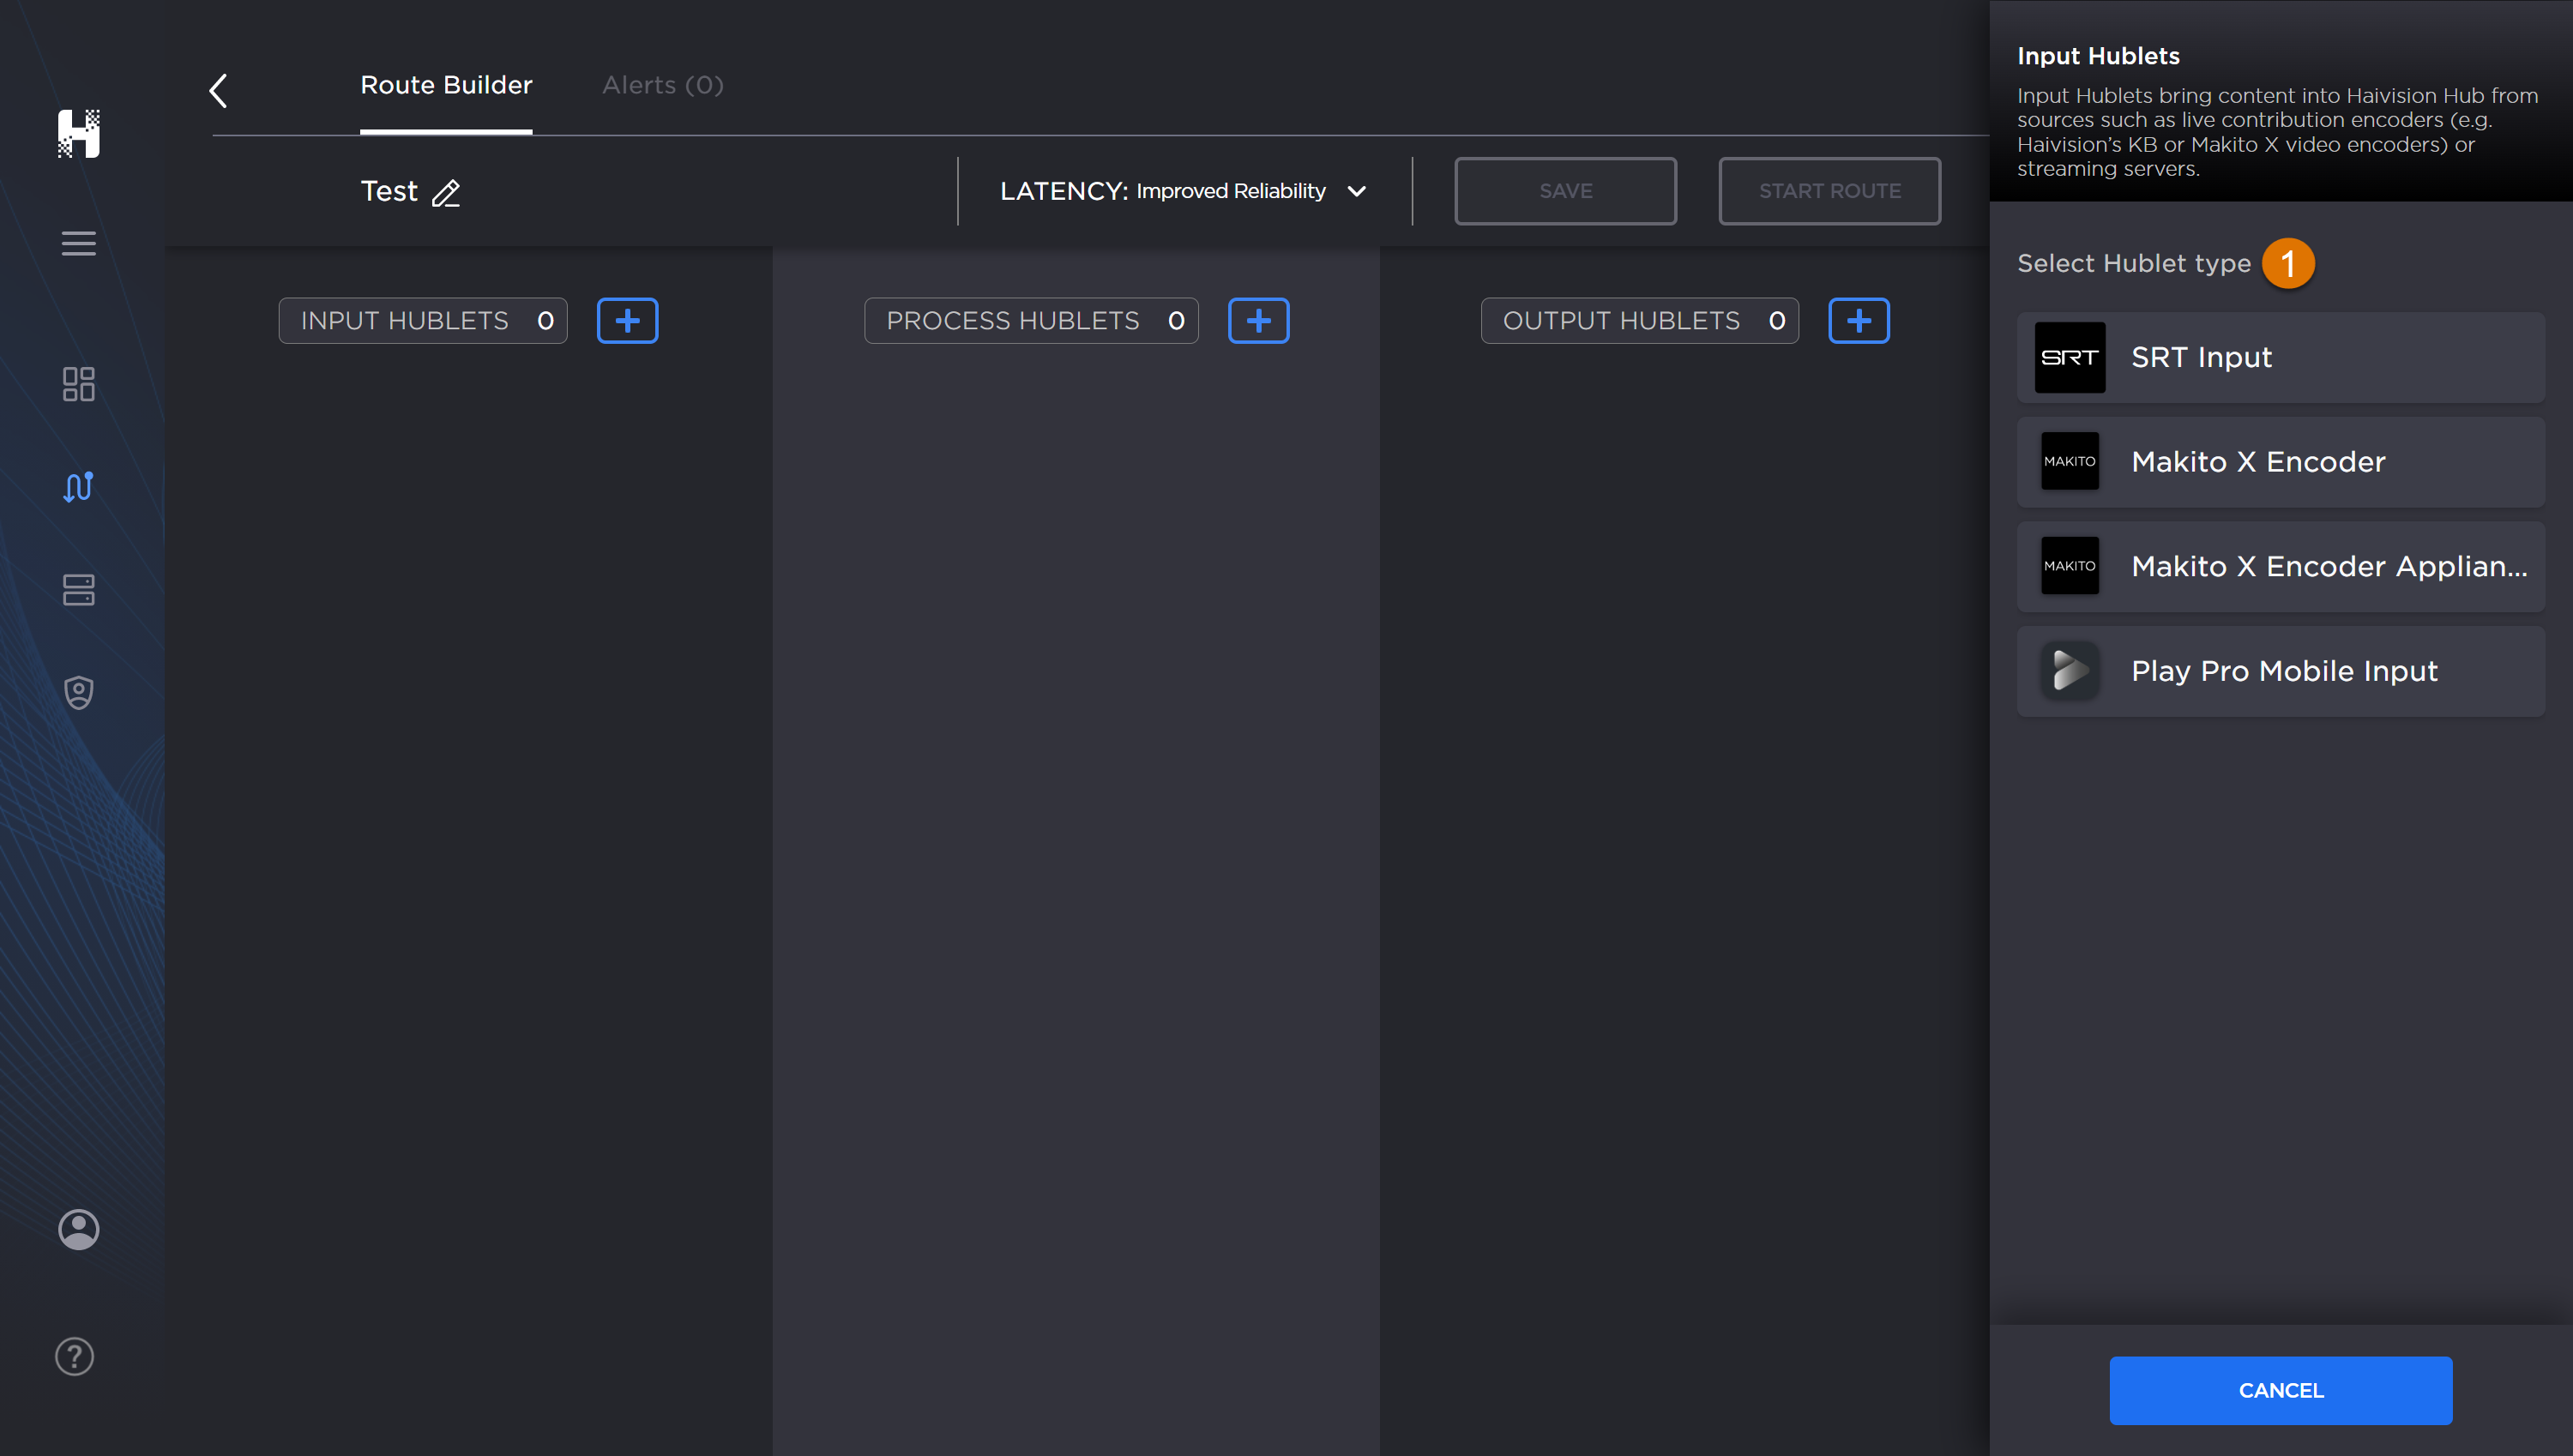
Input Hublet
Creating an Input Hublet
Note
If you want to add an Input Hublet to an existing route, see Adding a Hublet to a Running Route.
To create an Input Hublet:
In the Hublet view, click the + button next to the Input Hublets.
When the dialog opens, select the Hublet type such as LIVE contribution encoders or streaming servers.
Important
The RTMP Input Hublet has two modes: Client and Server. Server mode will provide you with an ingest URL once the route is started. This URL will be used every time the route is started. See the Creating a Route using RTMP Input Example for more information.
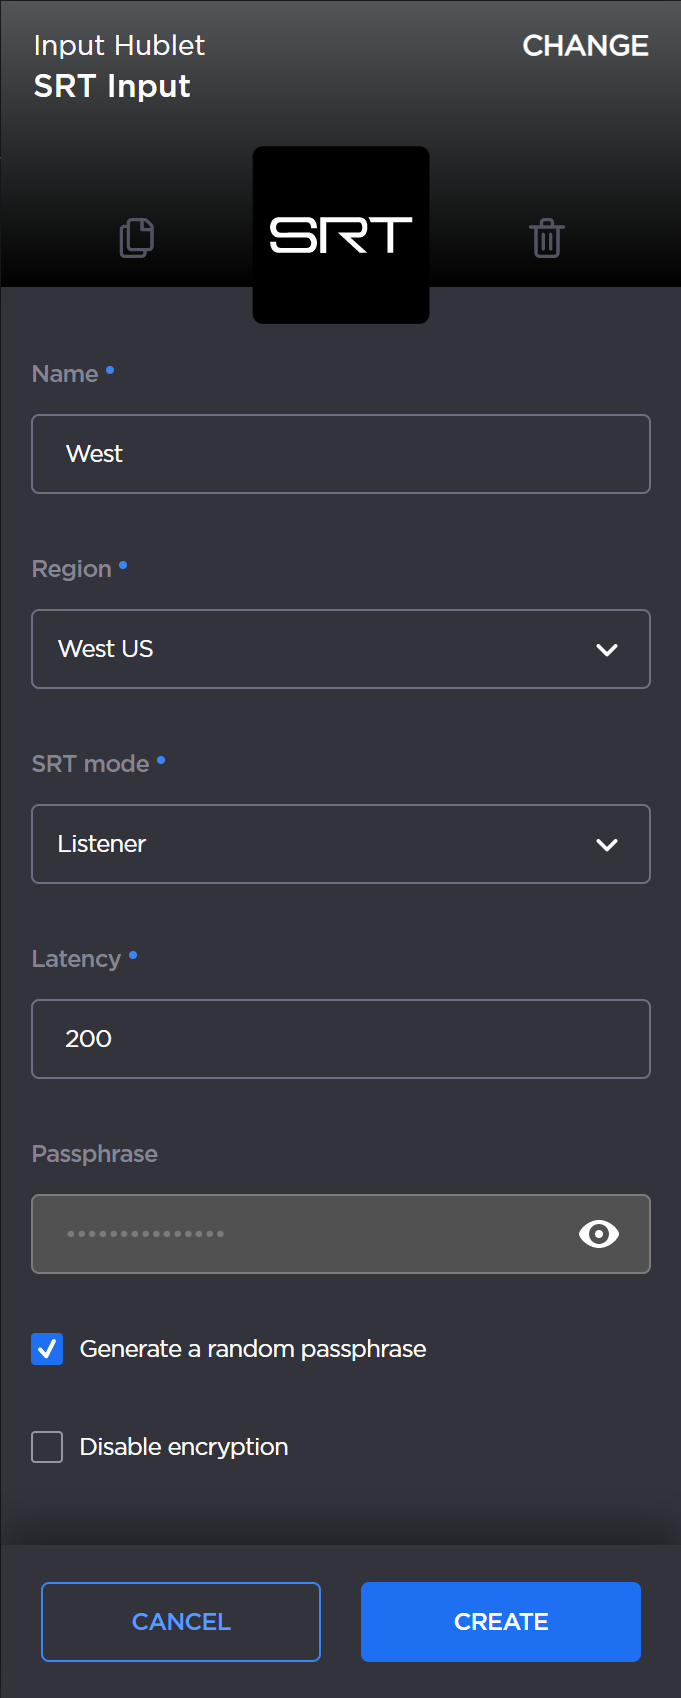
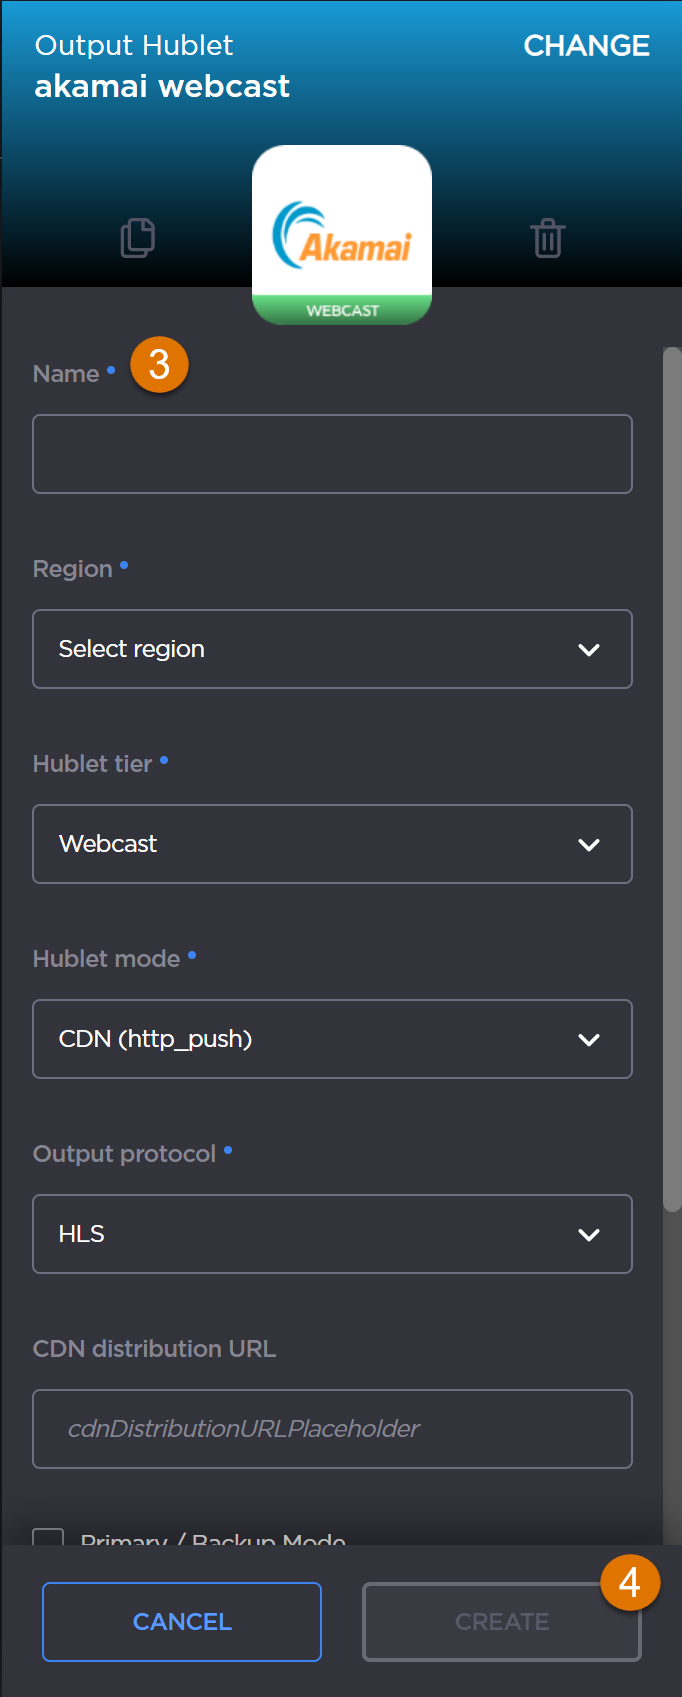
When the panel appears, provide the Hublet specifics. Mandatory fields are indicated with asterisks.
Note
You may need to scroll the panel to view all the fields.
Sample Hublet panel.
When finished, click the Create button.
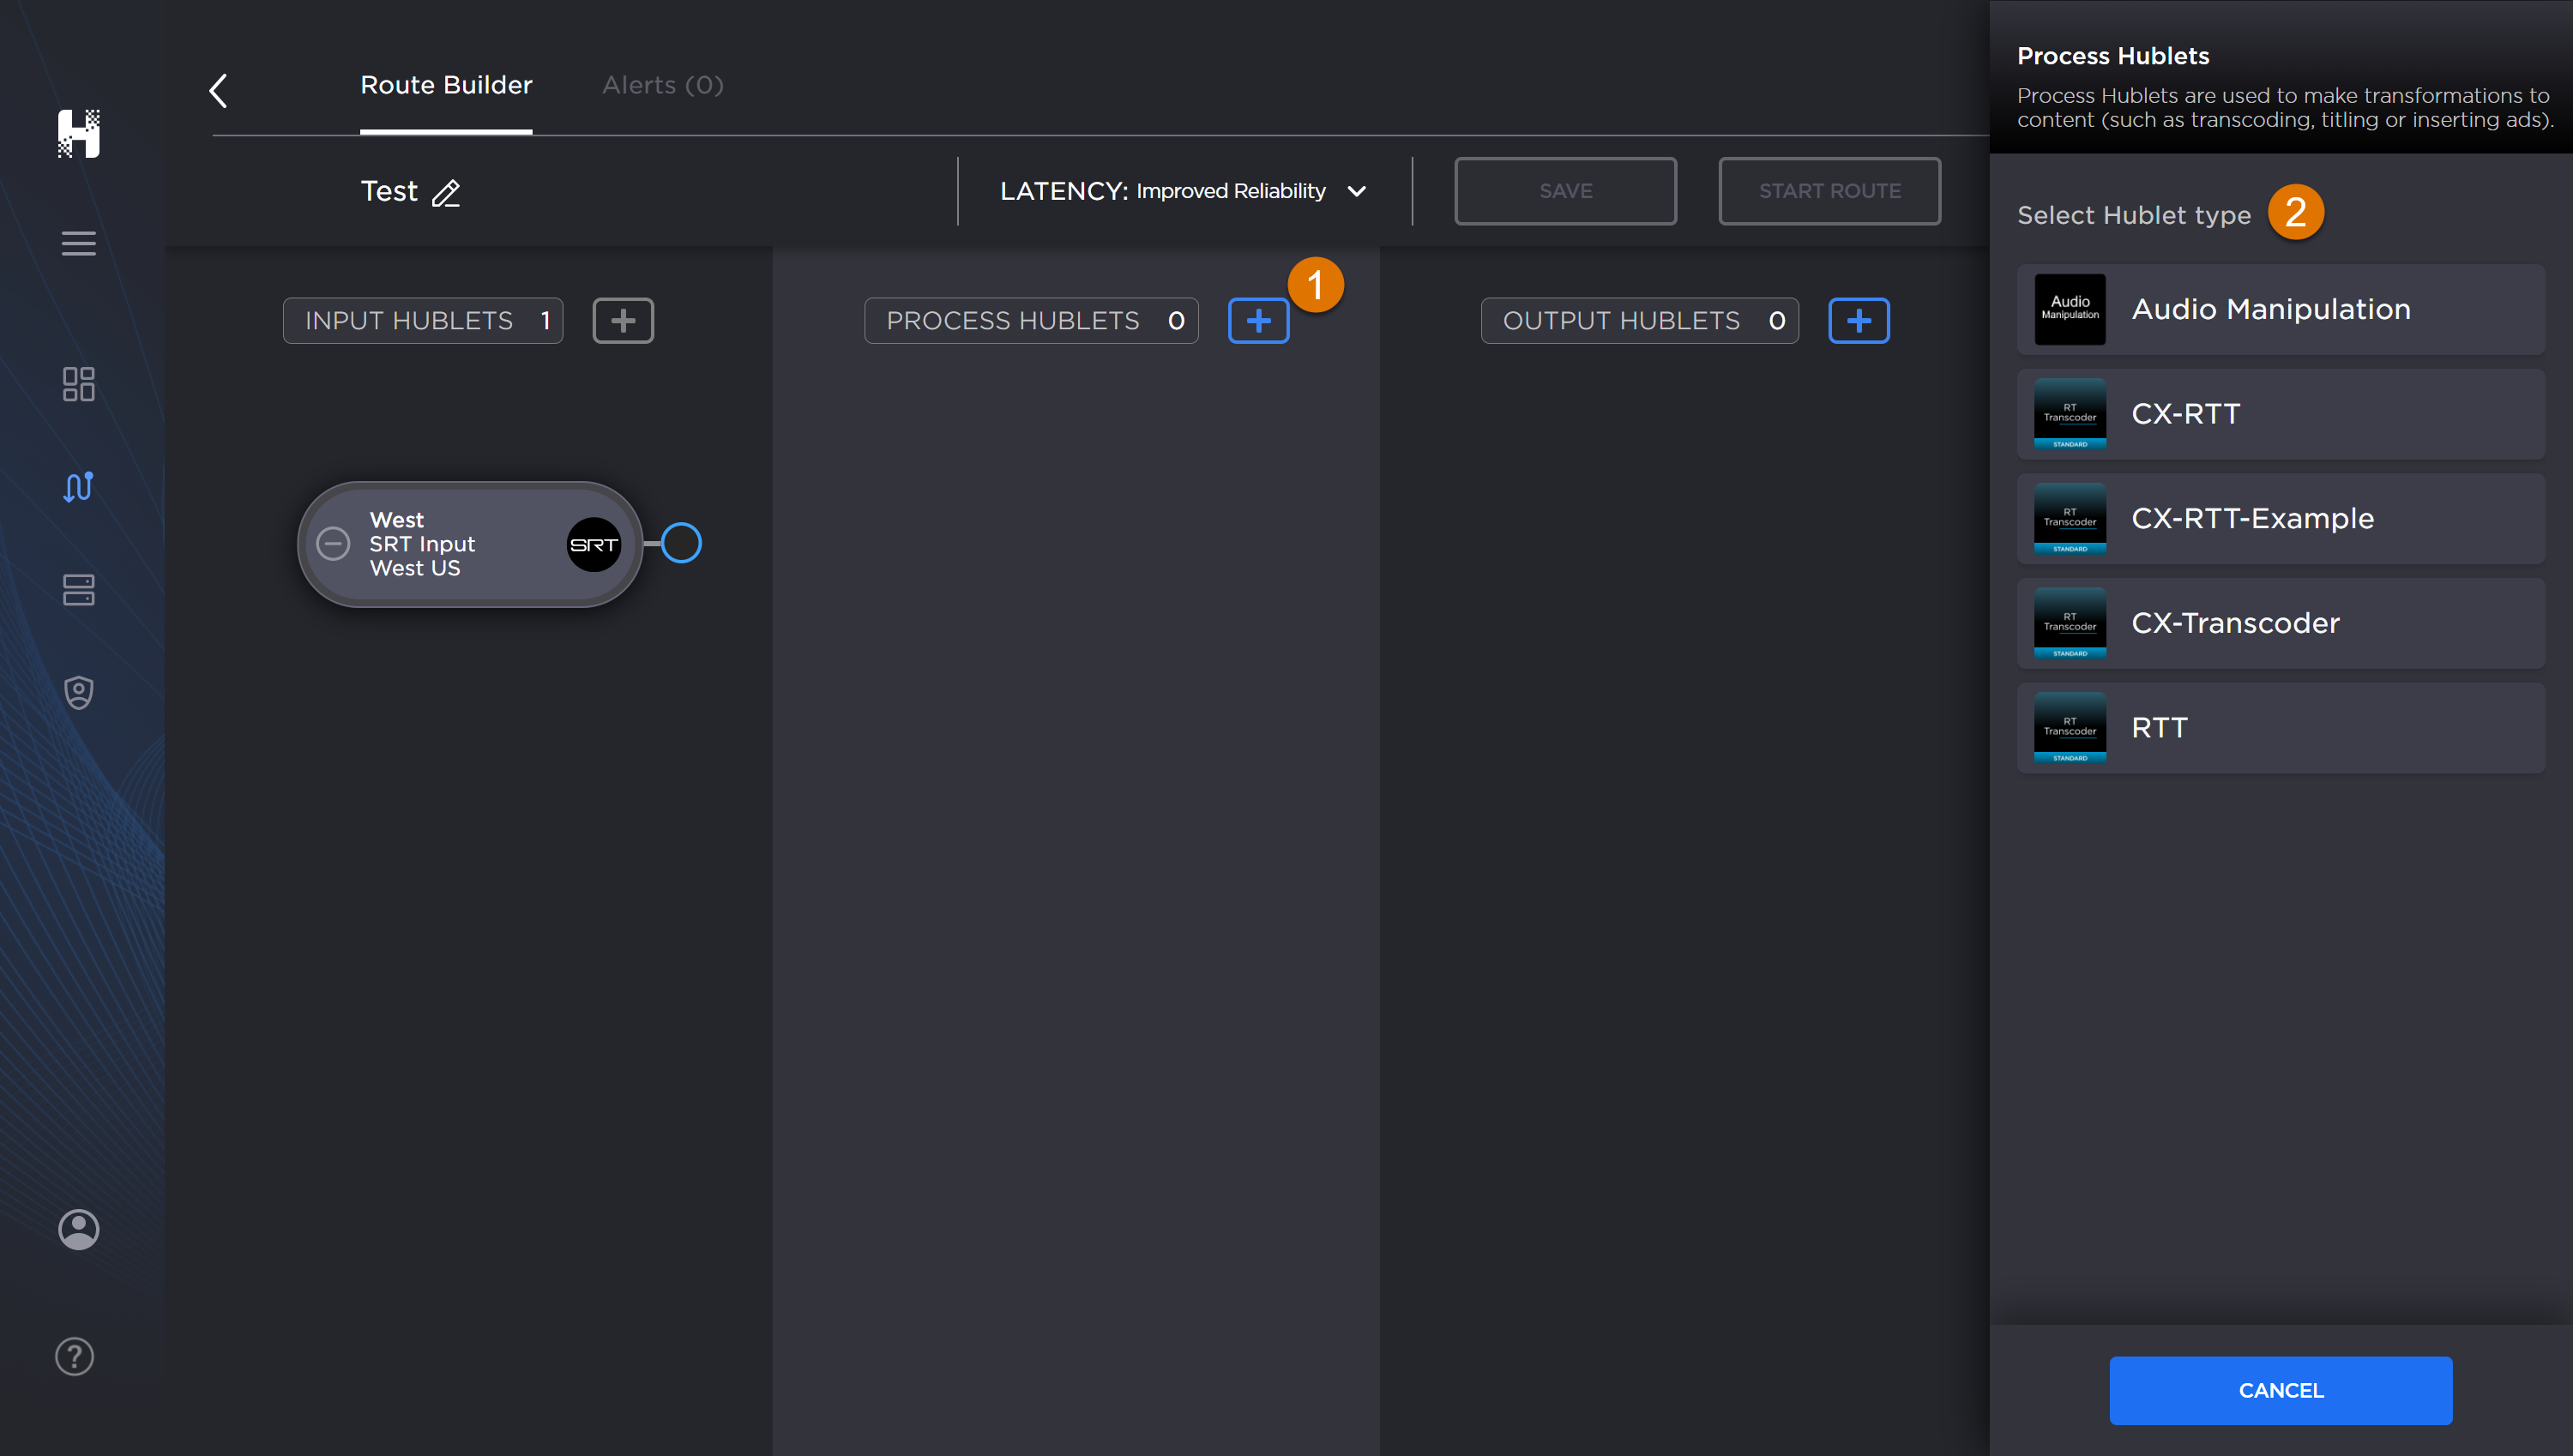
Process Hublet
Creating a Process Hublet
Process Hublets receive content from an Input Hublet, make transformations to the content (such as transcoding, titling or ad insertion), and then deliver it to one or more Output Hublets.
Your Subscription admins can create presets to streamline creation Process Hublets. Work with them to ensure that you have the Hublet preset type that you need.
Note
If you want to add a Hublet to an existing route, see Adding a Hublet to a Running Route. NOTE: Currently, only an Output Hublet can be added to a running route.
To create a Process Hublet:
In the Hublet view, click the + button next to the Process Hublets.
When the Process Hublet panel opens, select the Hublet type you want to use to transform the content (e.g., transcoding, titling, inserting ads, etc).
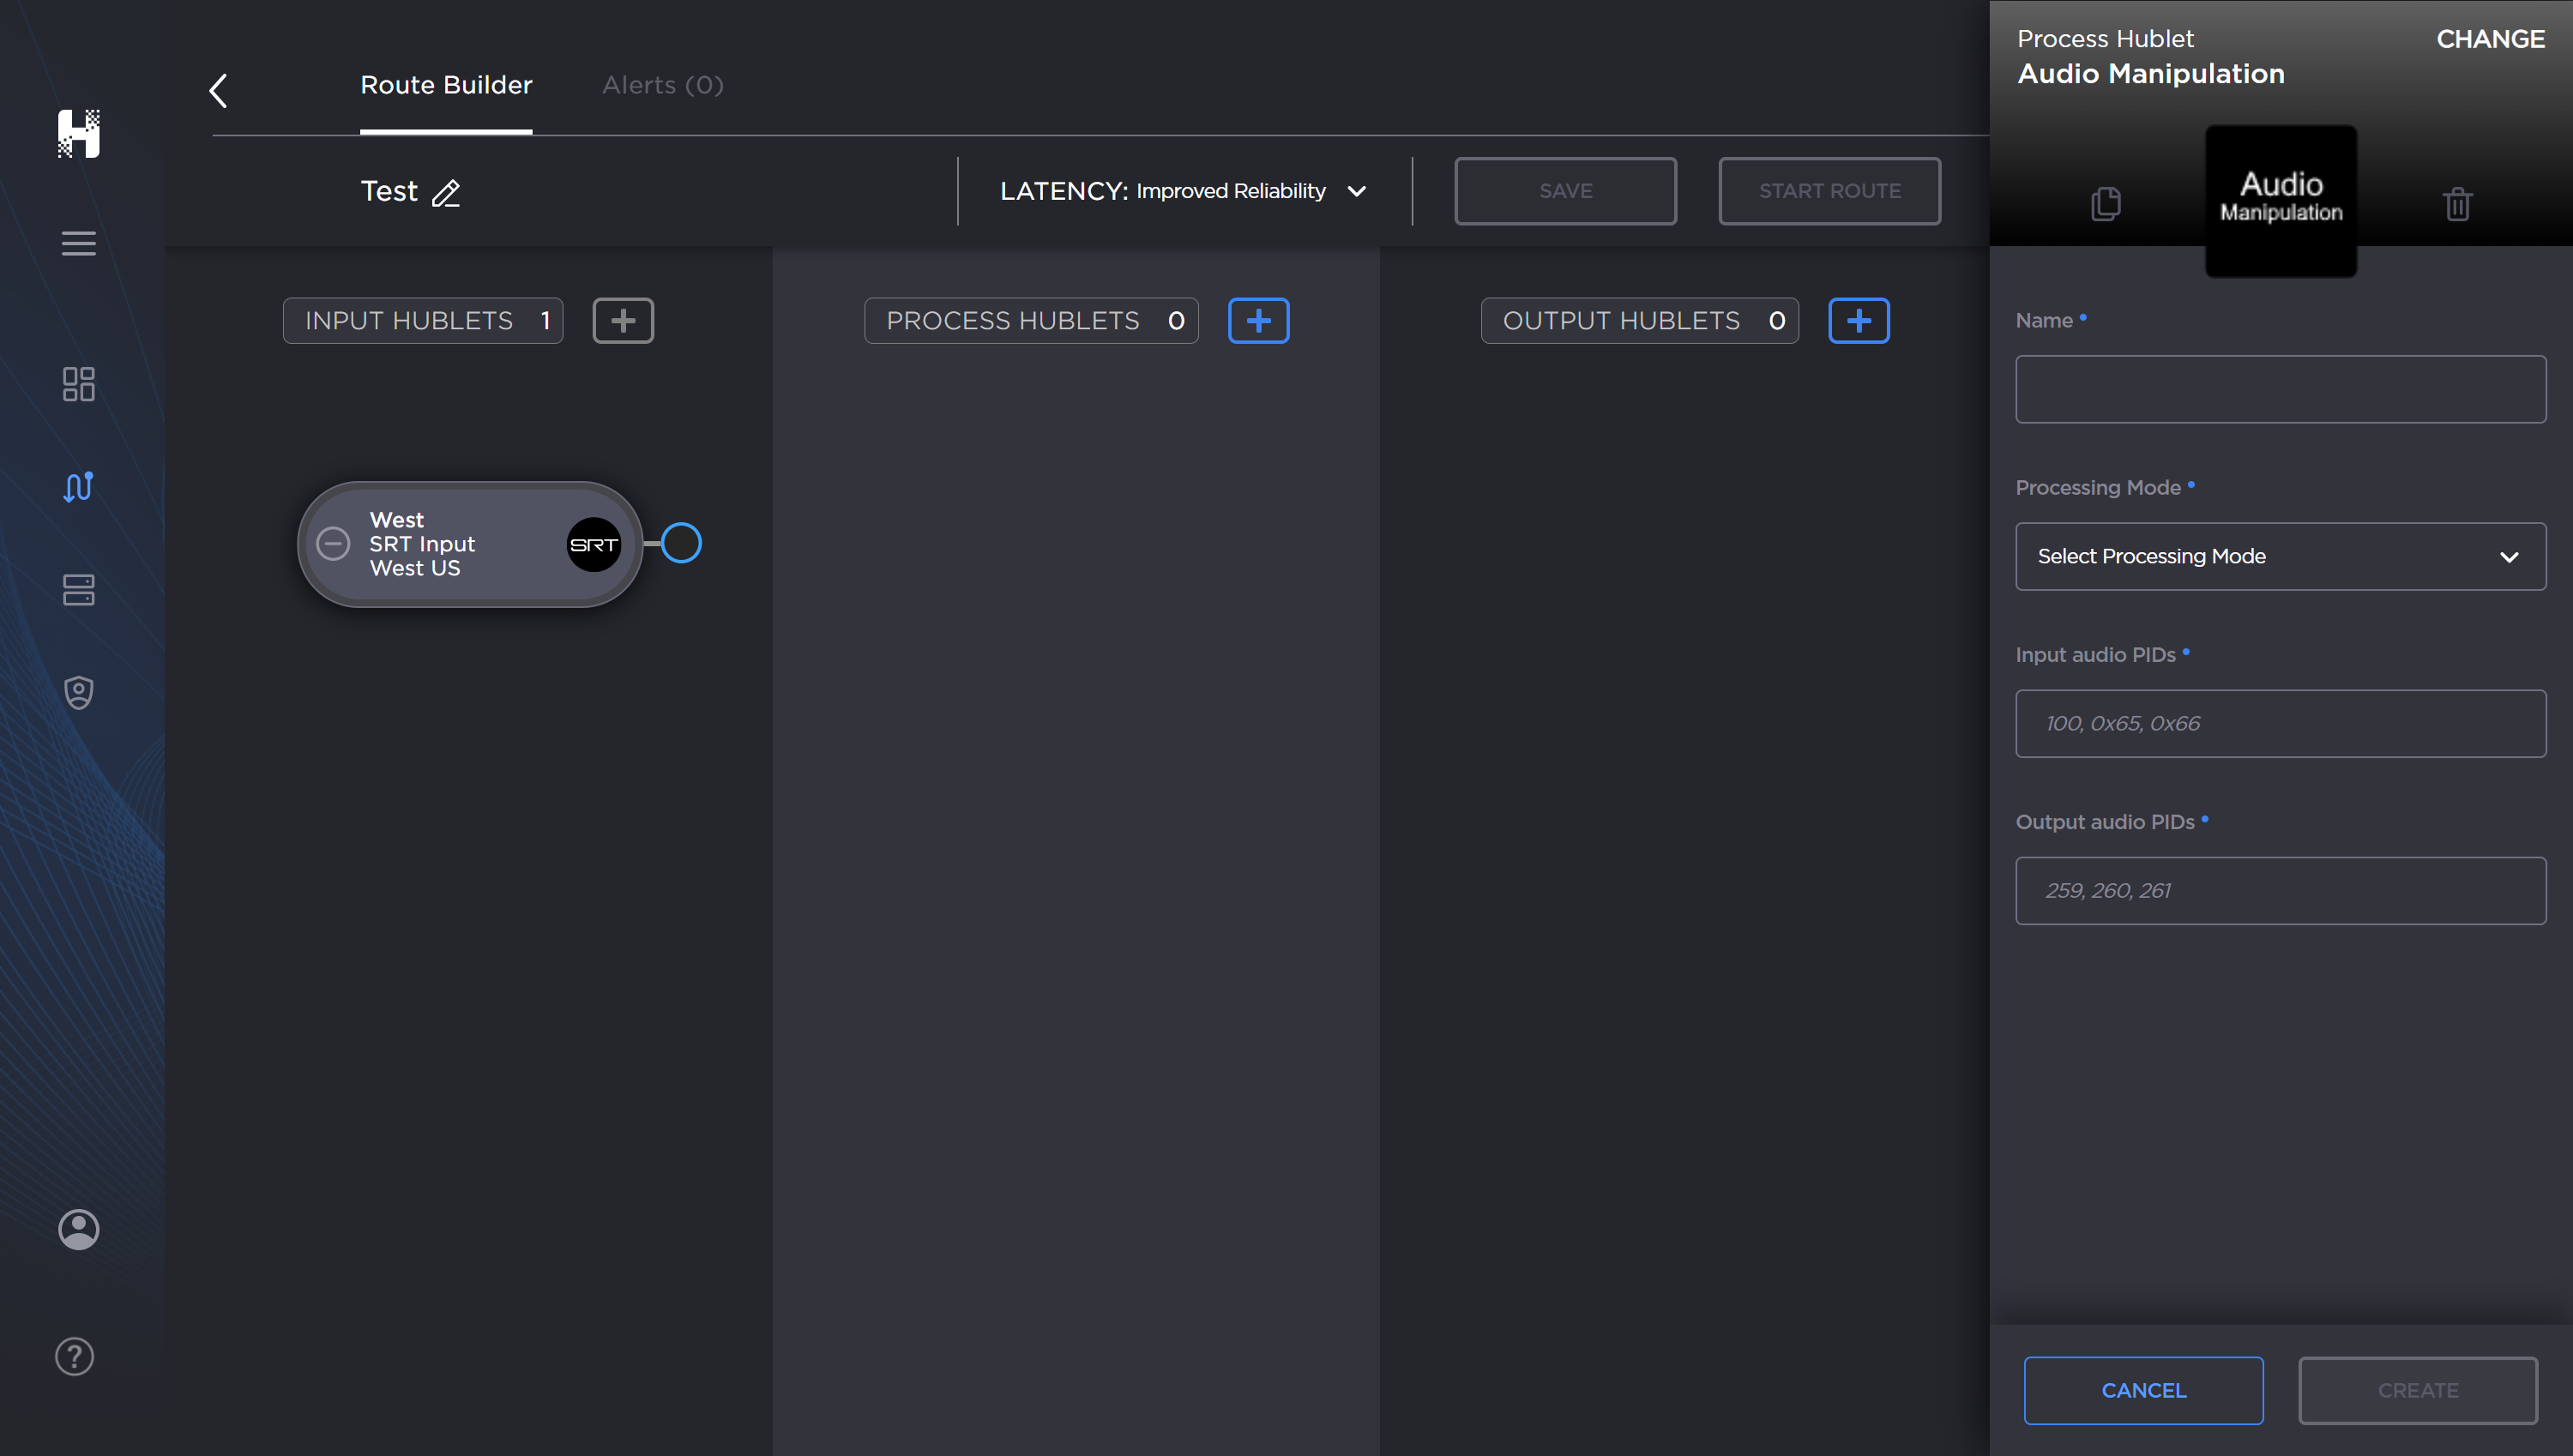
Next, provide the Hublet specifics as prompted.
When finished, click Create .
Creating an Audio Manipulation Process Hublet
TheAudio Manipulation Hublet allows you to alter the configuration for incoming MPEG TS audio packet identifiers (PIDs) in order to create an output with a new PID structure.
When using this Hublet, only audio PIDs can be changed. Video and Transport Stream (TS) service information is passed through to the output.
When creating an Audio Manipulation Hublet, you will need to know the incoming audio PID to which you want to make changes:
Audio PIDs are accepted in both Hex and Decimal formats.
PIDs must be between 32 and 8190.
Processing Modes
There are currently two audio processing modes available:
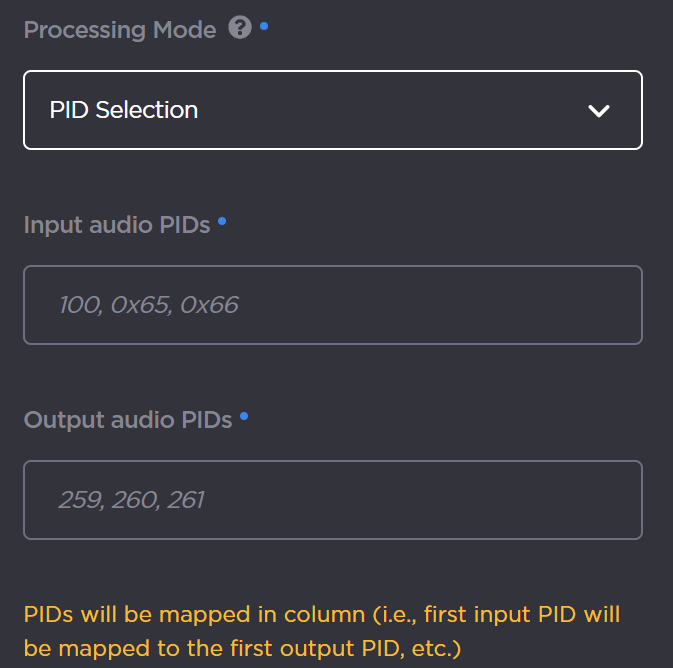
PID Selection – This mode covers two scenarios: PID filtering and/or PID remapping. In the event where an incoming transport stream (TS) contains multiple audio PIDs, you may want to remove several of the audio PIDs and create an output with a single audio.
Tip
Useful for RTMP workflows where only a single audio is supported.
To filter out the audio PIDs–specify valid Input audio PIDs that you would like to keep and confirm them in the Output audio PIDs section. The number of Input PIDs needs to match the number of Output PIDs.
To change/remap the input PID – define a different PID in the Output audio PIDs field. When remapping, PIDs are mapped in column, where the first input PID is mapped to the first output PID, and so forth.
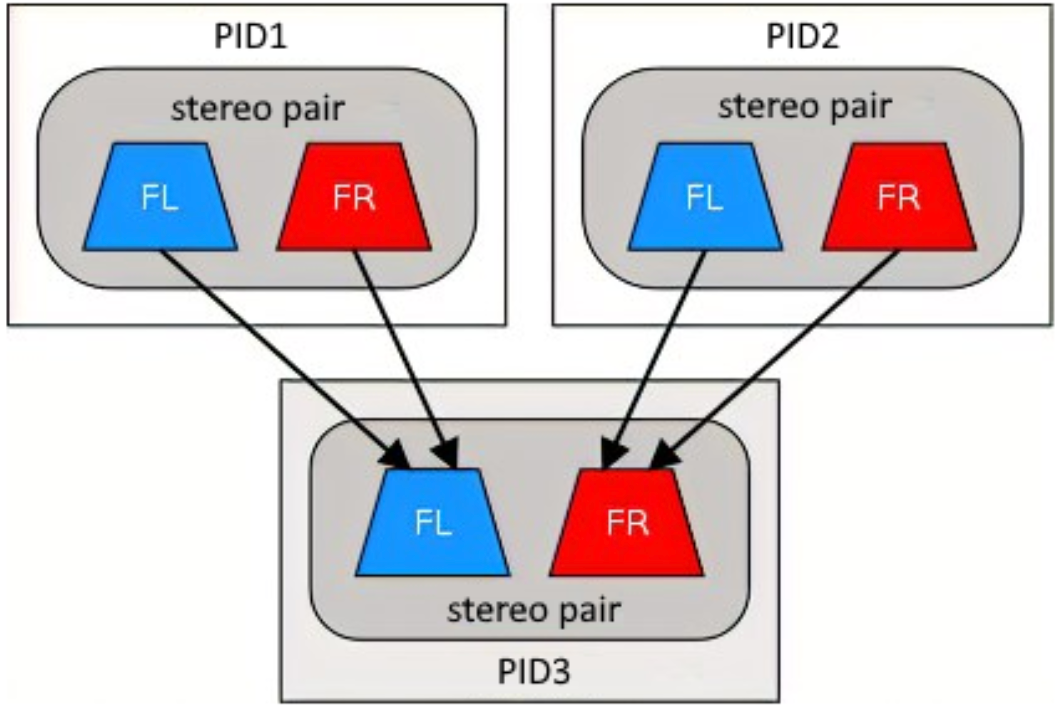
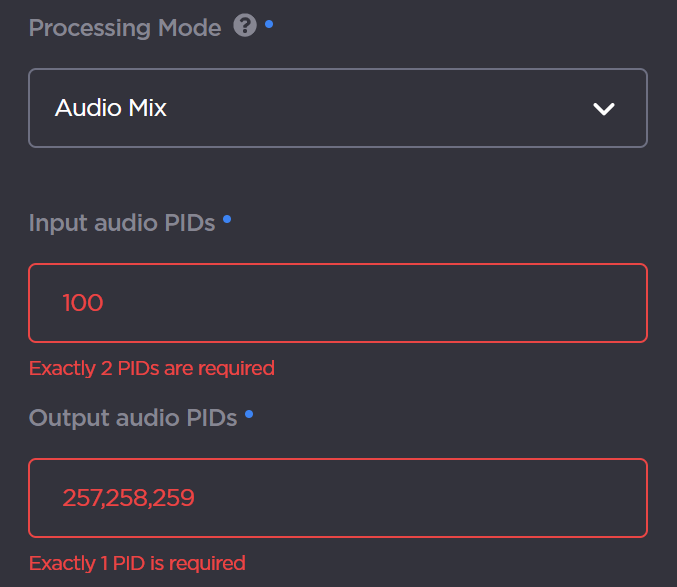
Audio Mix– This mode allows you to combine two stereo input PIDs into one stereo output PID. In this mode, you can define a maximum of two (2) valid audio PIDs and a single output PID. The output TS will contain a single, mixed audio PID and an original video PID.
PID Selection Processing Mode
Audio Mix Processing Mode
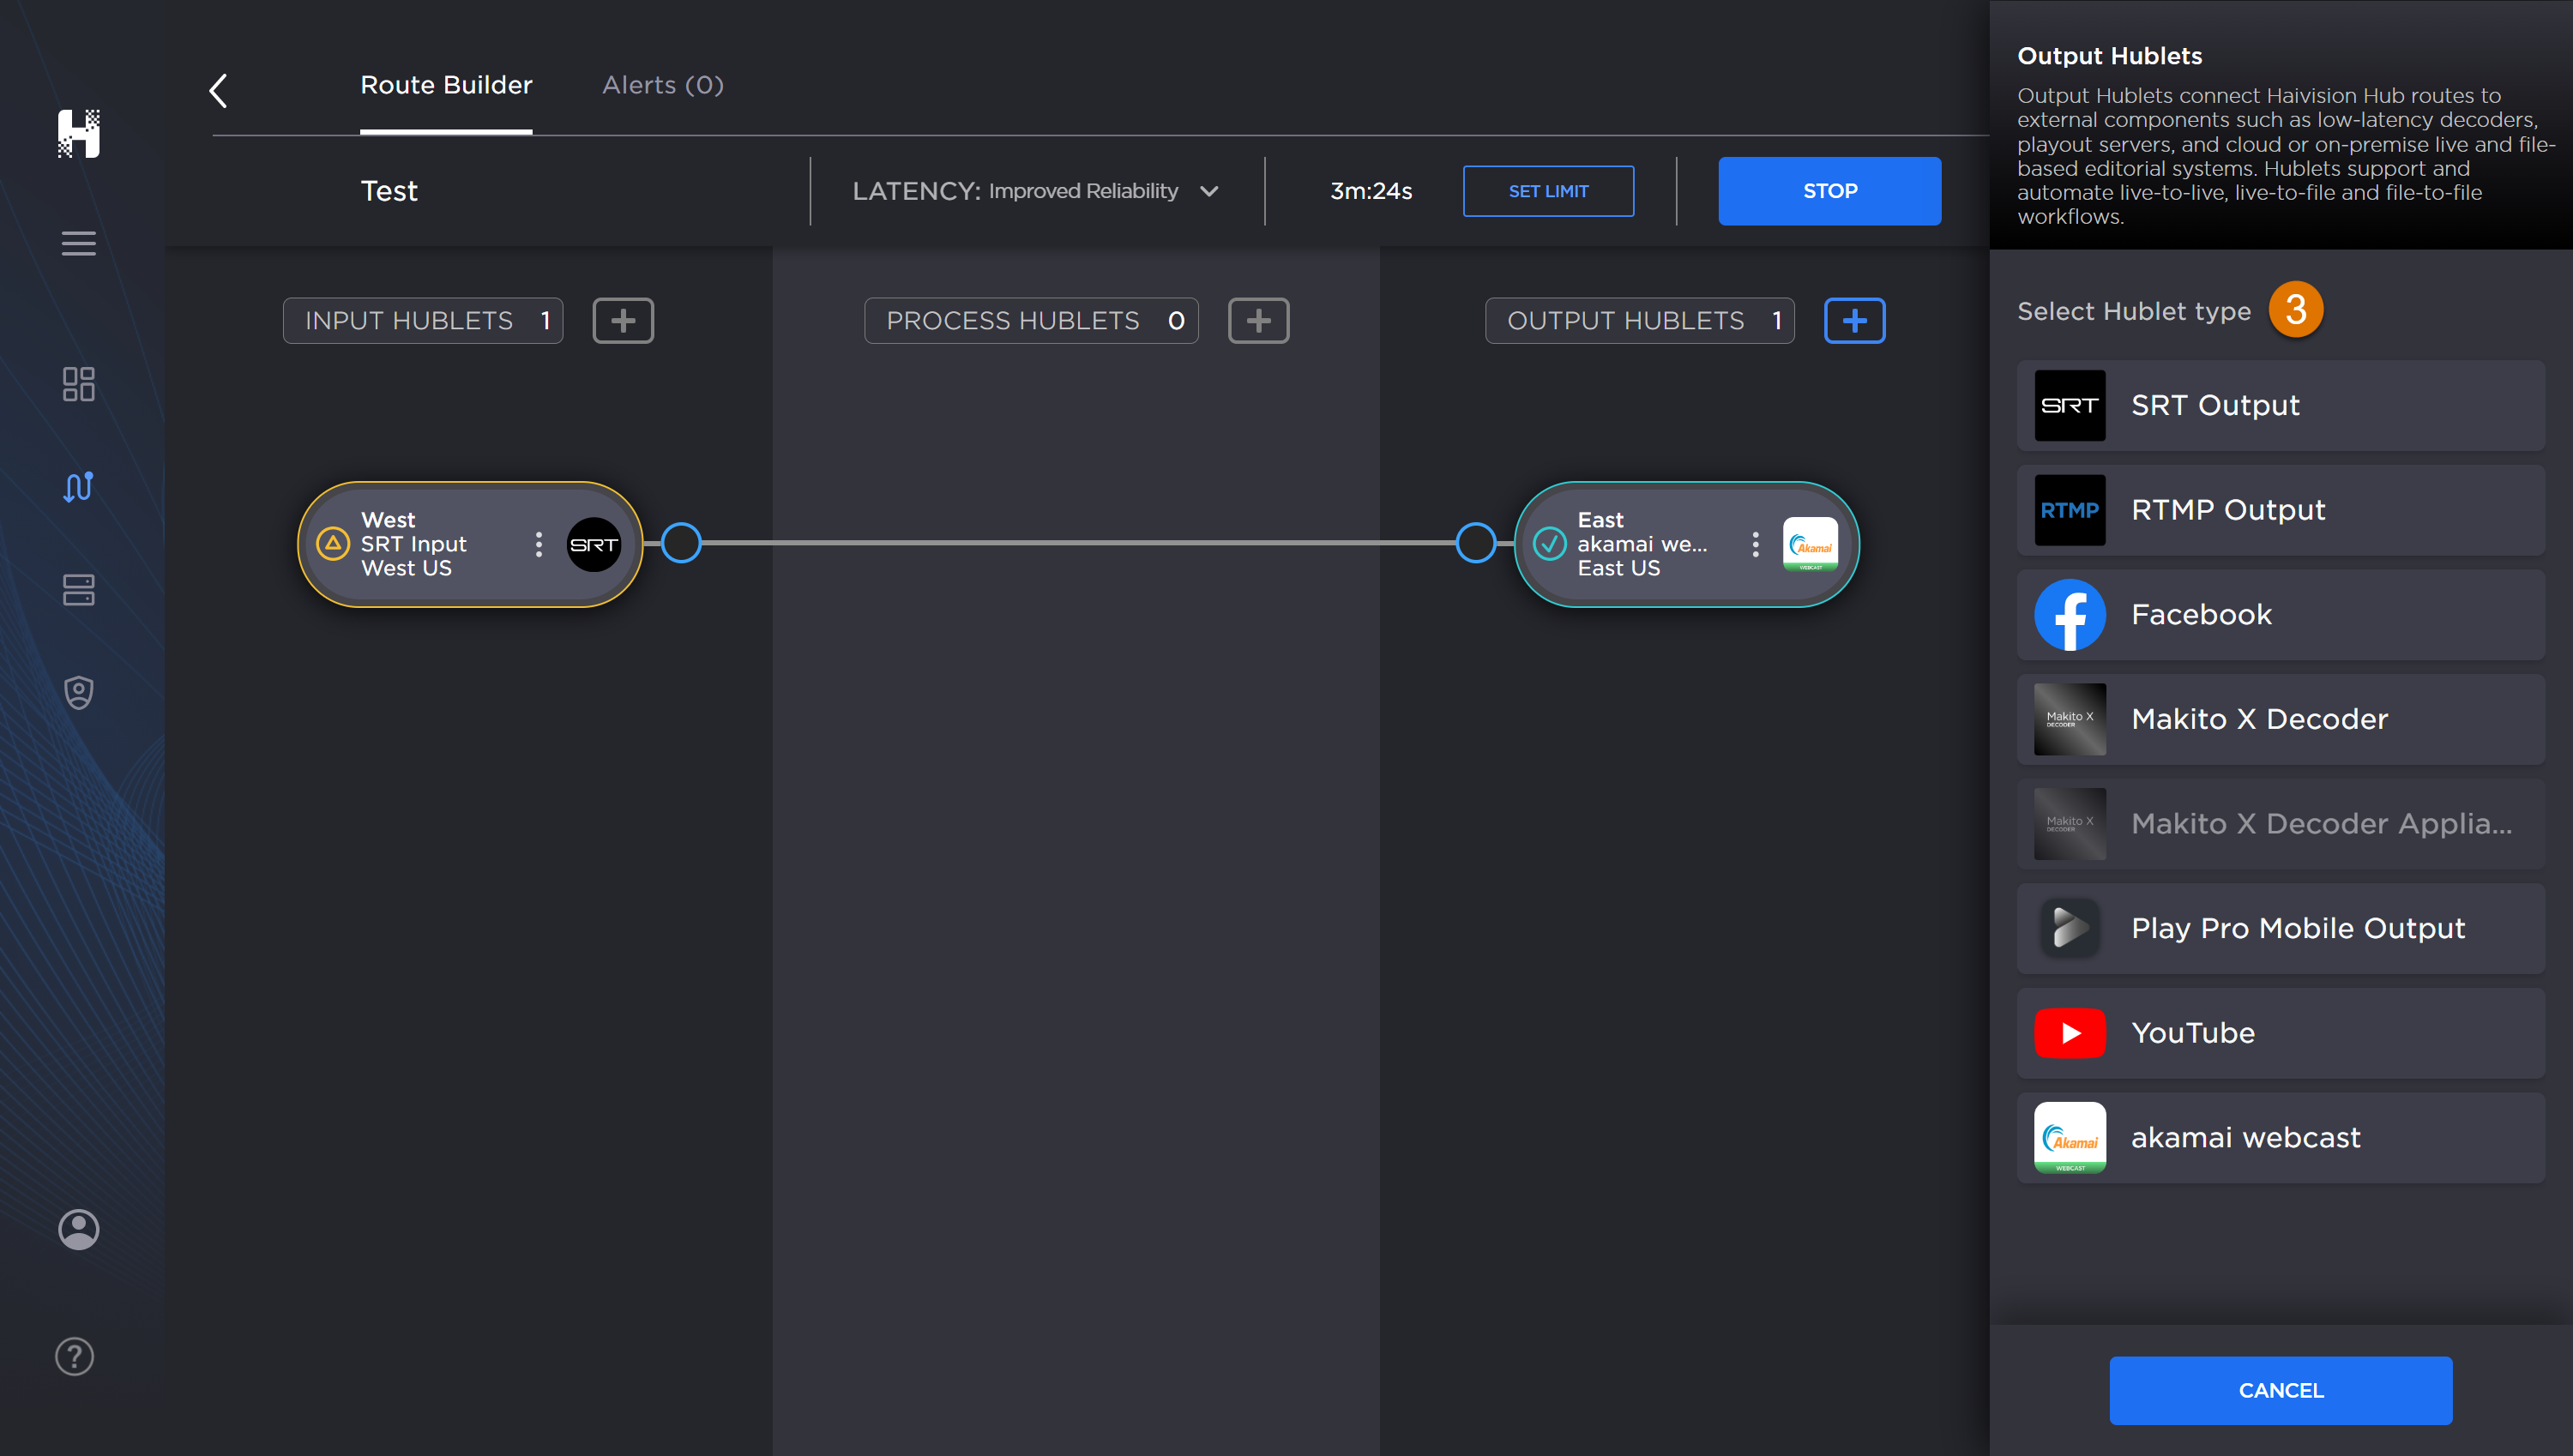
Output Hublet
Creating an Output Hublet
If you want to add an Output Hublet to an existing route, see Adding a Hublet to a Running Route.
To create the Output Hublet:
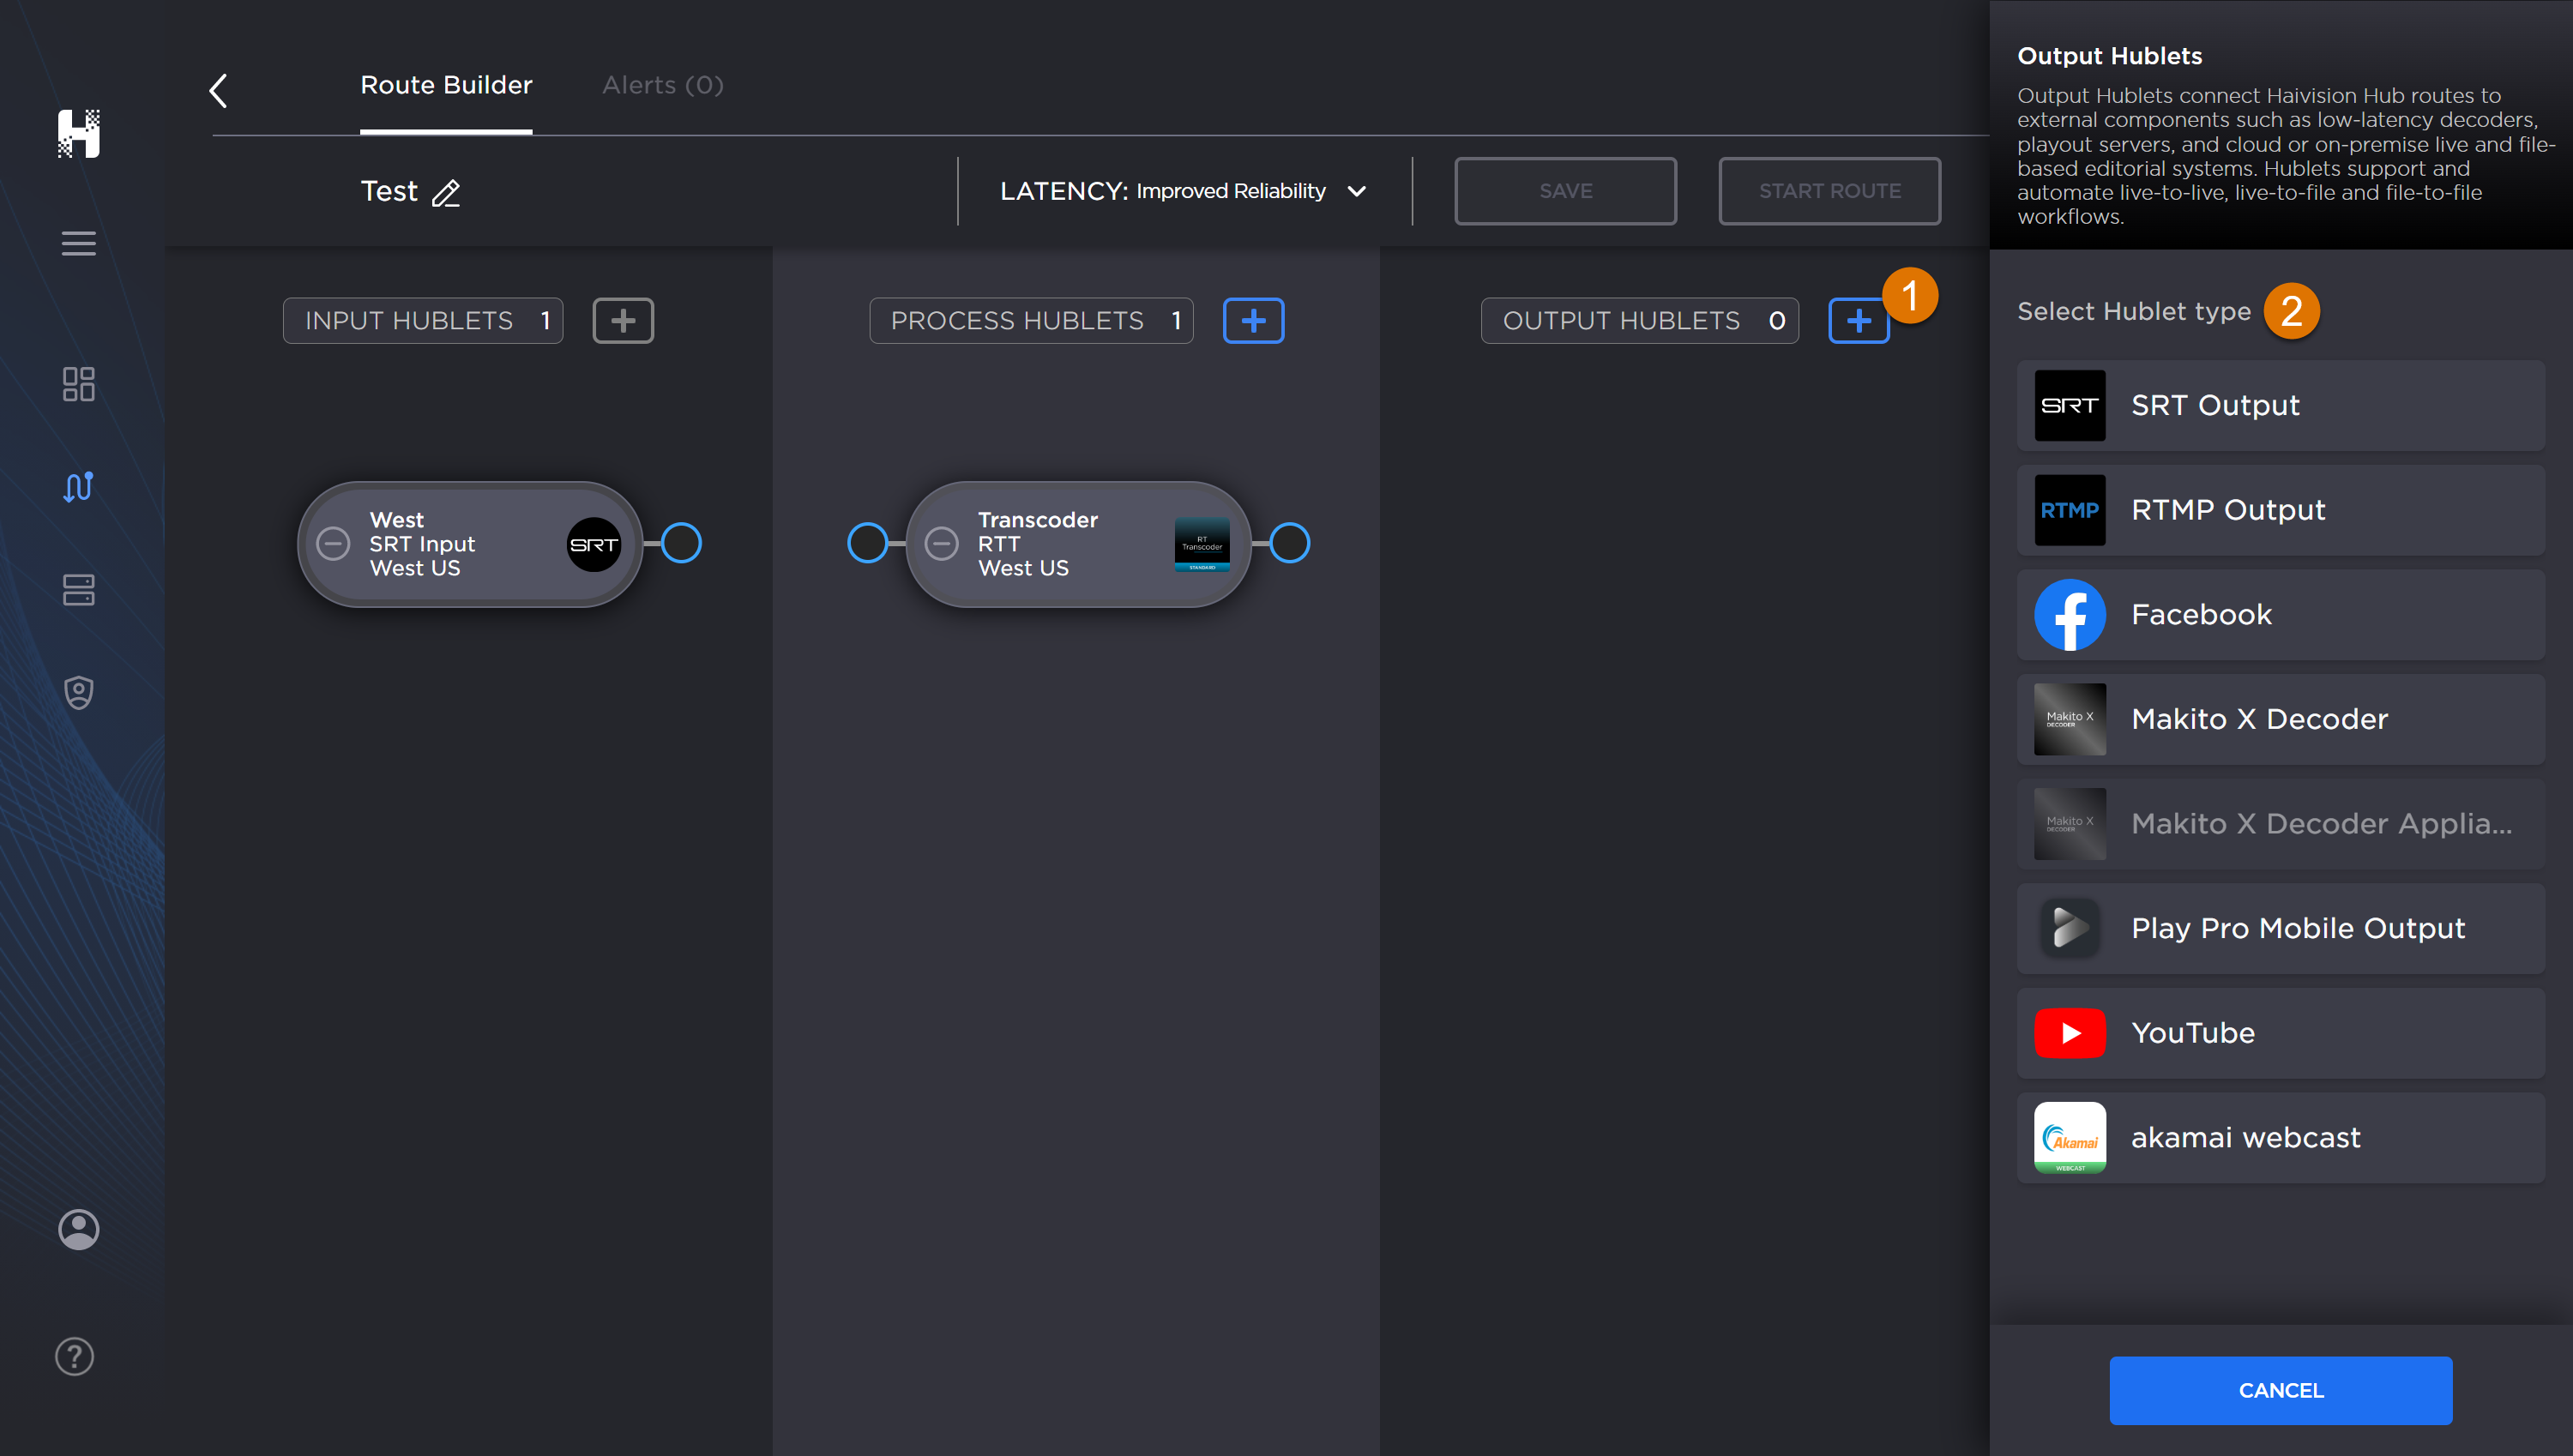
In the Hublet view, click the + button next to Output Hublets.
When the dialog opens, select the Hublet type for the external components to which you want to connect (such as low-latency decoders, playout servers and so forth to support LIVE-to-LIVE, LIVE-to-file, and file-to-file workflows.
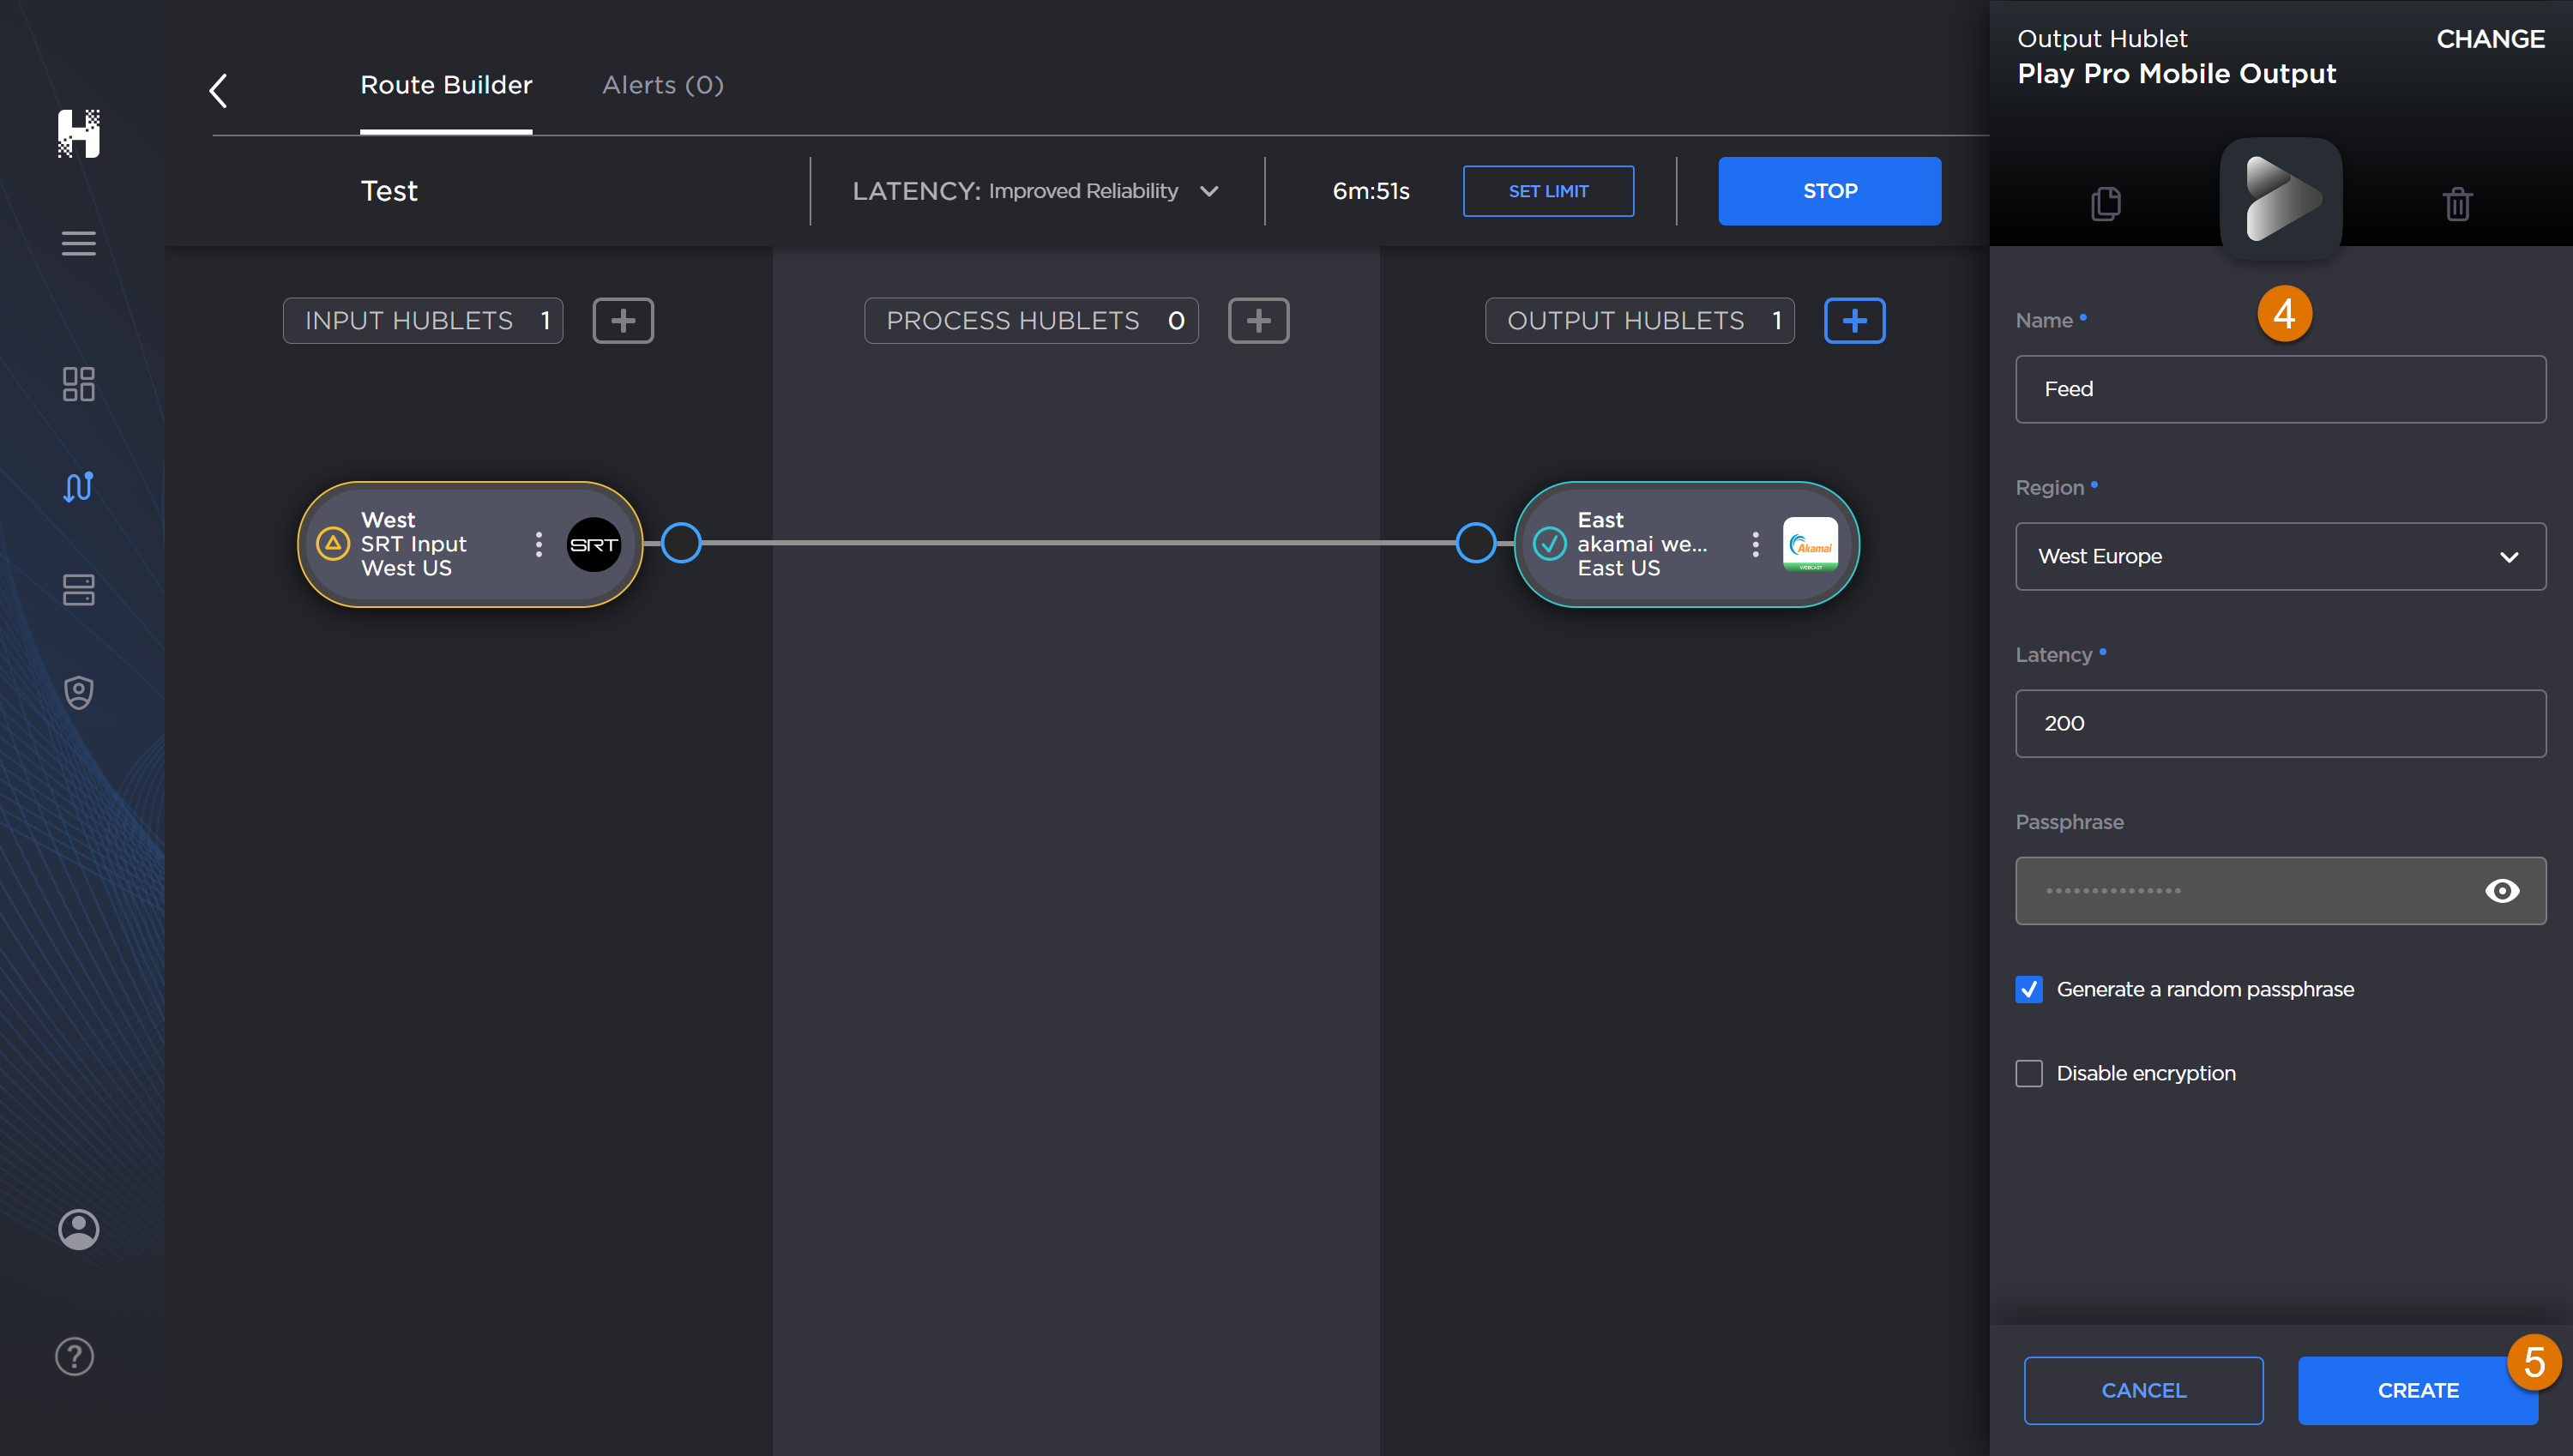
Next, provide the Hublet specifics when prompted. Asterisks indicate mandatory fields.
Note
You may need to scroll the panel to view all the fields.
When finished, click the Create button.
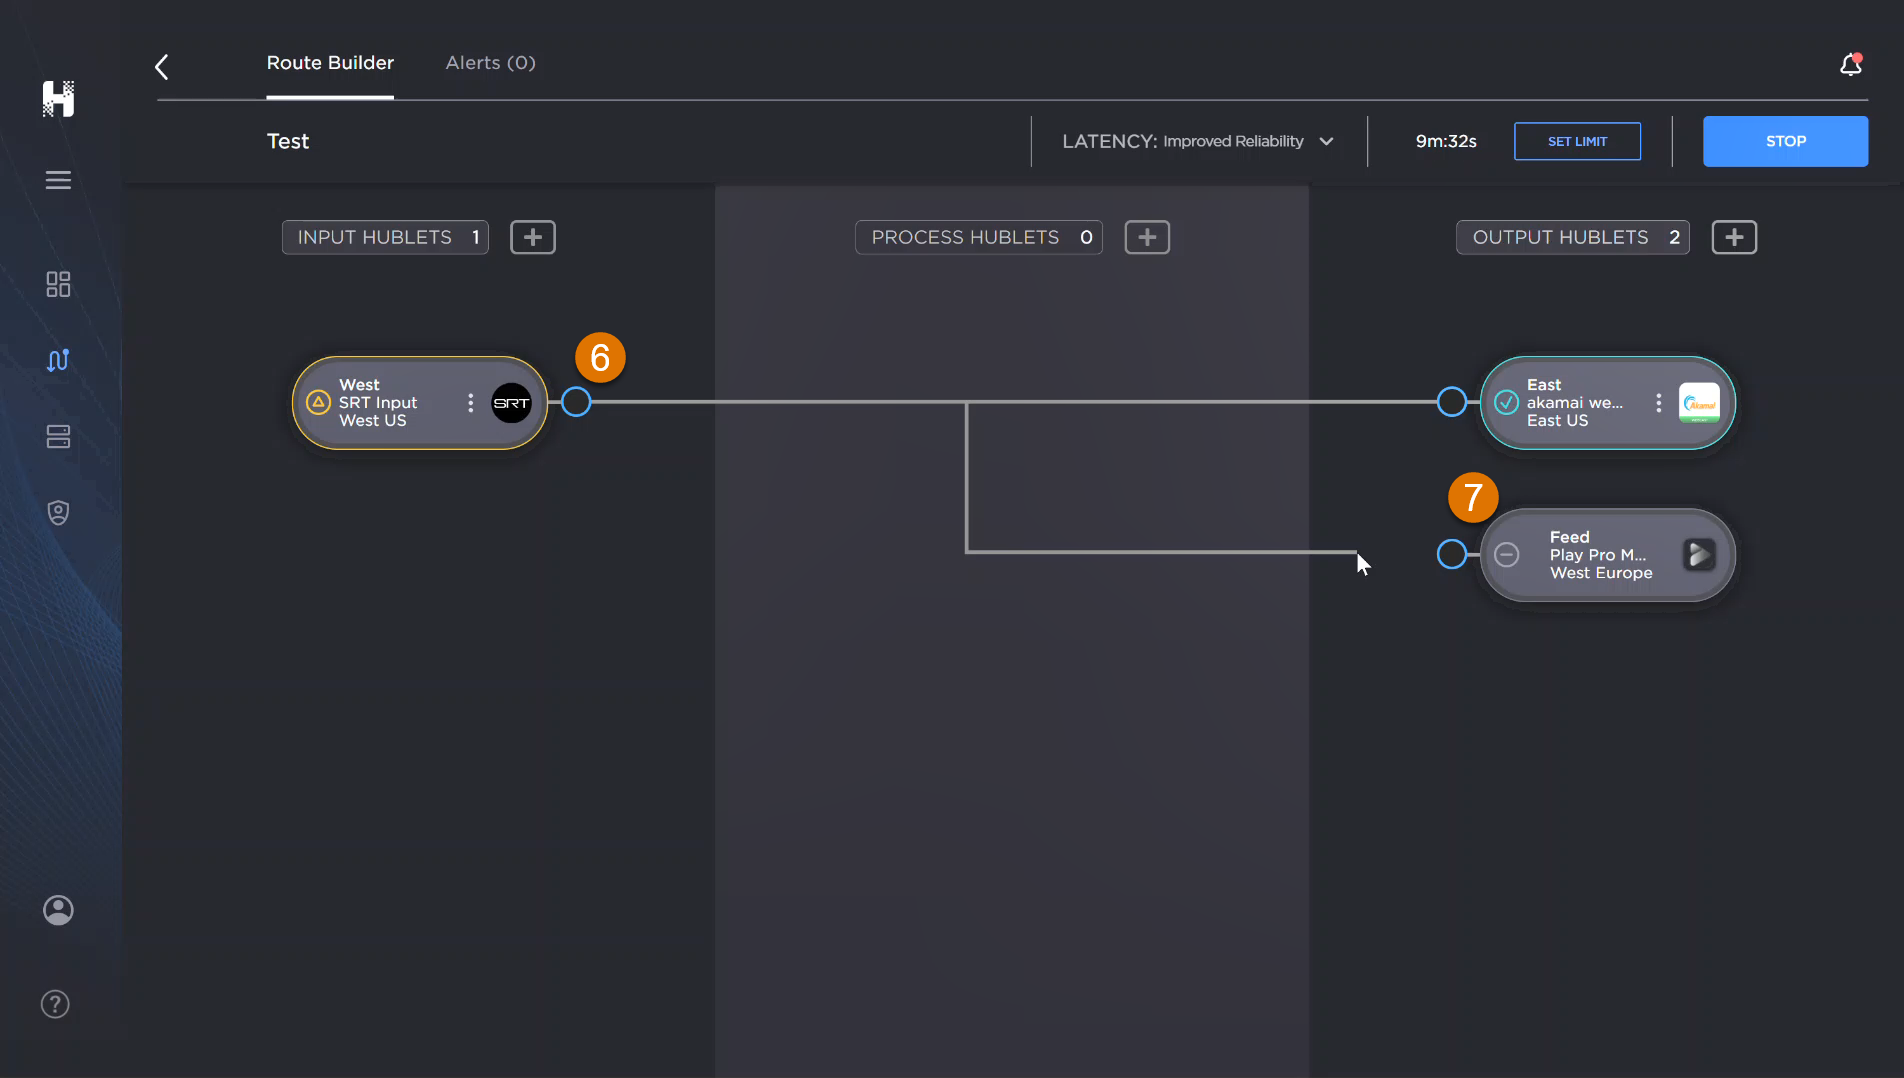
Click each Hublet endpoint and drag to the next Hublet endpoint to connect the route.
Click the Save button to keep your changes.
When prompted, confirm that you want to save your route.
Adding a Hublet to a Running Route
Adding a Hublet to a Running Route
Important
Currently, you can only add an Output Hublet to a running route.
To add an Output Hublet to a running route:
Click theRoutesoption on the navigation sidebar.
In the listing, locate the active route where you want to add a Hublet and click the route's name.
When the Route Builder tab opens, click the+button next to the Output Hublet.
When the panel opens, select the Hublet type such as LIVE contribution encoders or streaming servers.
Once the selected Hublet panel appears, provide the specifics and click the Create button . Mandatory fields are indicated with asterisks.
You may need to scroll the panel to view all the fields.
Click the endpoint of the Input Hublet and drag the cursor to the endpoint of the newly added Output Hublet to connect it to the route.
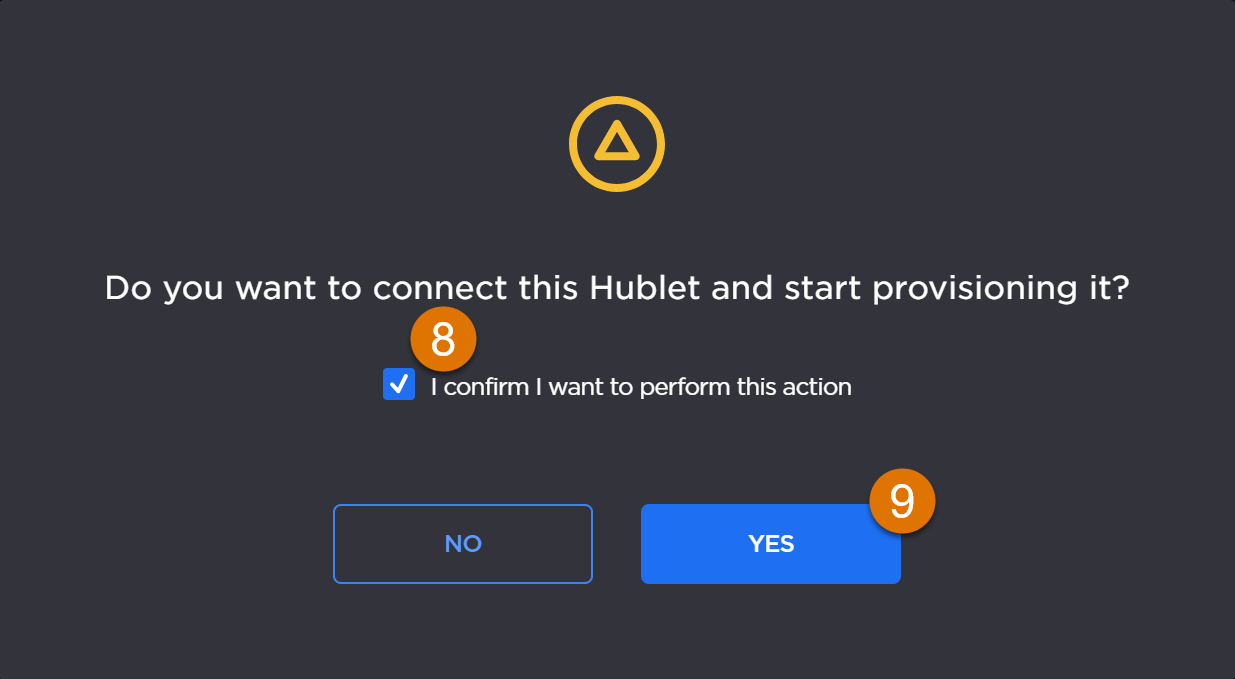
When prompted, click the checkbox to confirm connecting the Hublet and then click the Yes button.