Installing a Certificate
Certificates are required on the Makito X Series to allow access to the system via HTTPS, and to authenticate network communications.
The device is capable of generating a self-signed X.509 certificate (autocert) based on hostname, domain, and IP address. This self-signed certificate is automatically created when either the https or audit service is started the first time (normally using the factory default IP address). If the hostname or IP address is later changed or if the certificate end-date is within 10 days, and no other certificate has been installed and selected, the self-signed certificate will be automatically recreated.
Note
By its nature, a self-signed certificate is not considered to be secure. While it can be used as part of the hardening process, this should only be done by knowledgeable administrators in a trusted environment. A trusted CA-signed certificate should be installed as soon as possible.
When hardening the Makito X Series, it is strongly recommended that you use a certificate issued by a trusted Certificate Authority (CA). If you have such a certificate you can install it on the device with the certificate command. If not, you can skip the step below and generate a certificate request on the device (see page Generating a Certificate Signing Request).
The certificate must be compatible with the configured cryptographic strength policies, The default SHA-256 with RSA 2048-bit keys generated for self-signed certificates and CSR are compatible with all the cryptographic strength policies. The generated certificate key and hash can be customized (see Appendix E: Custom Security Settings).
The following example shows how to install an X.509 PEM file certificate bundle that includes the key, certificate, and certificate chain.
To install a certificate on the Makito X Series via the Web Interface, do the following:
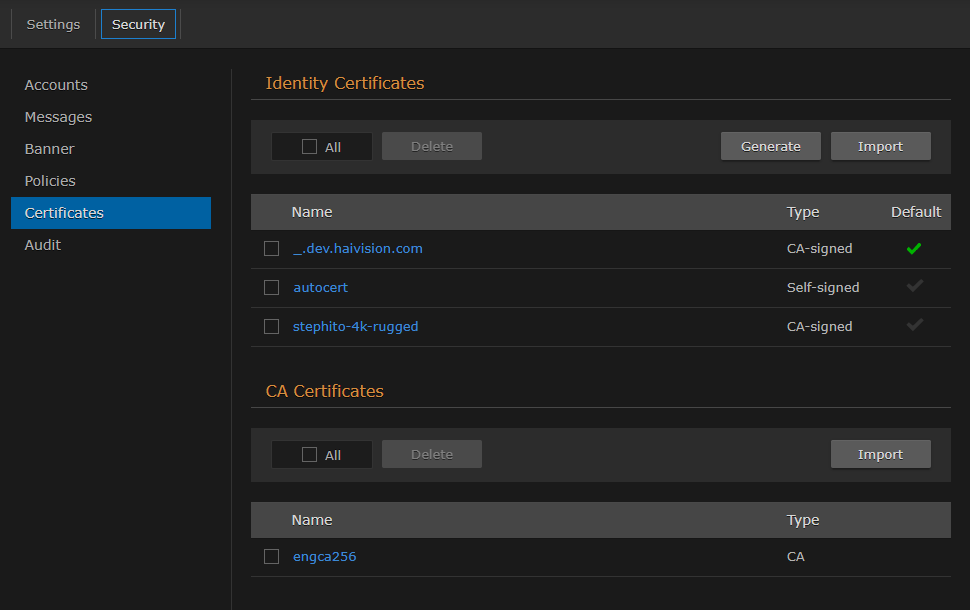
On the Administration page, click Certificates from the sidebar menu.
The Certificates page opens (as shown in the following Makito X4 Encoder example):
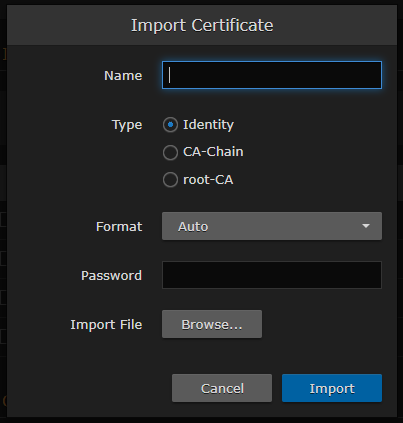
Click Import…

Provide a Name for the certificate (no spaces allowed).
If the Type of certificate is for the device to self-identify, click Identity.
If the certificate is from another device, such as an audit server, click CA-Chain if it contains a chain of certificate authorities leading to a root certificate authority, or root-CA if it is from a root level certificate authority.Choose the format of the certificate file. The Auto option will cause the device to try to determine the format from the certificate file itself.
If the certificate is encrypted, enter the Password.
Click Browse to specify the location of the certificate on your trusted PC.
Click Import.
In the list view, click the checkmark under Default to select the imported certificate so that it will be used for authentication.
For more information, see "Managing Certificates" in the associated User's Guide.
