Creating a Virtual Server
Virtual server creation varies according to the cloud platform used. Please select a tab to follow the proper procedure.
Signing in to Amazon AWS
Sign in to your AWS account: https://console.aws.amazon.com
After you have successfully logged in to the AWS portal, click Services > Compute > EC2.
Creating a virtual server
On the EC2 Dashboard, click Launch Instance.

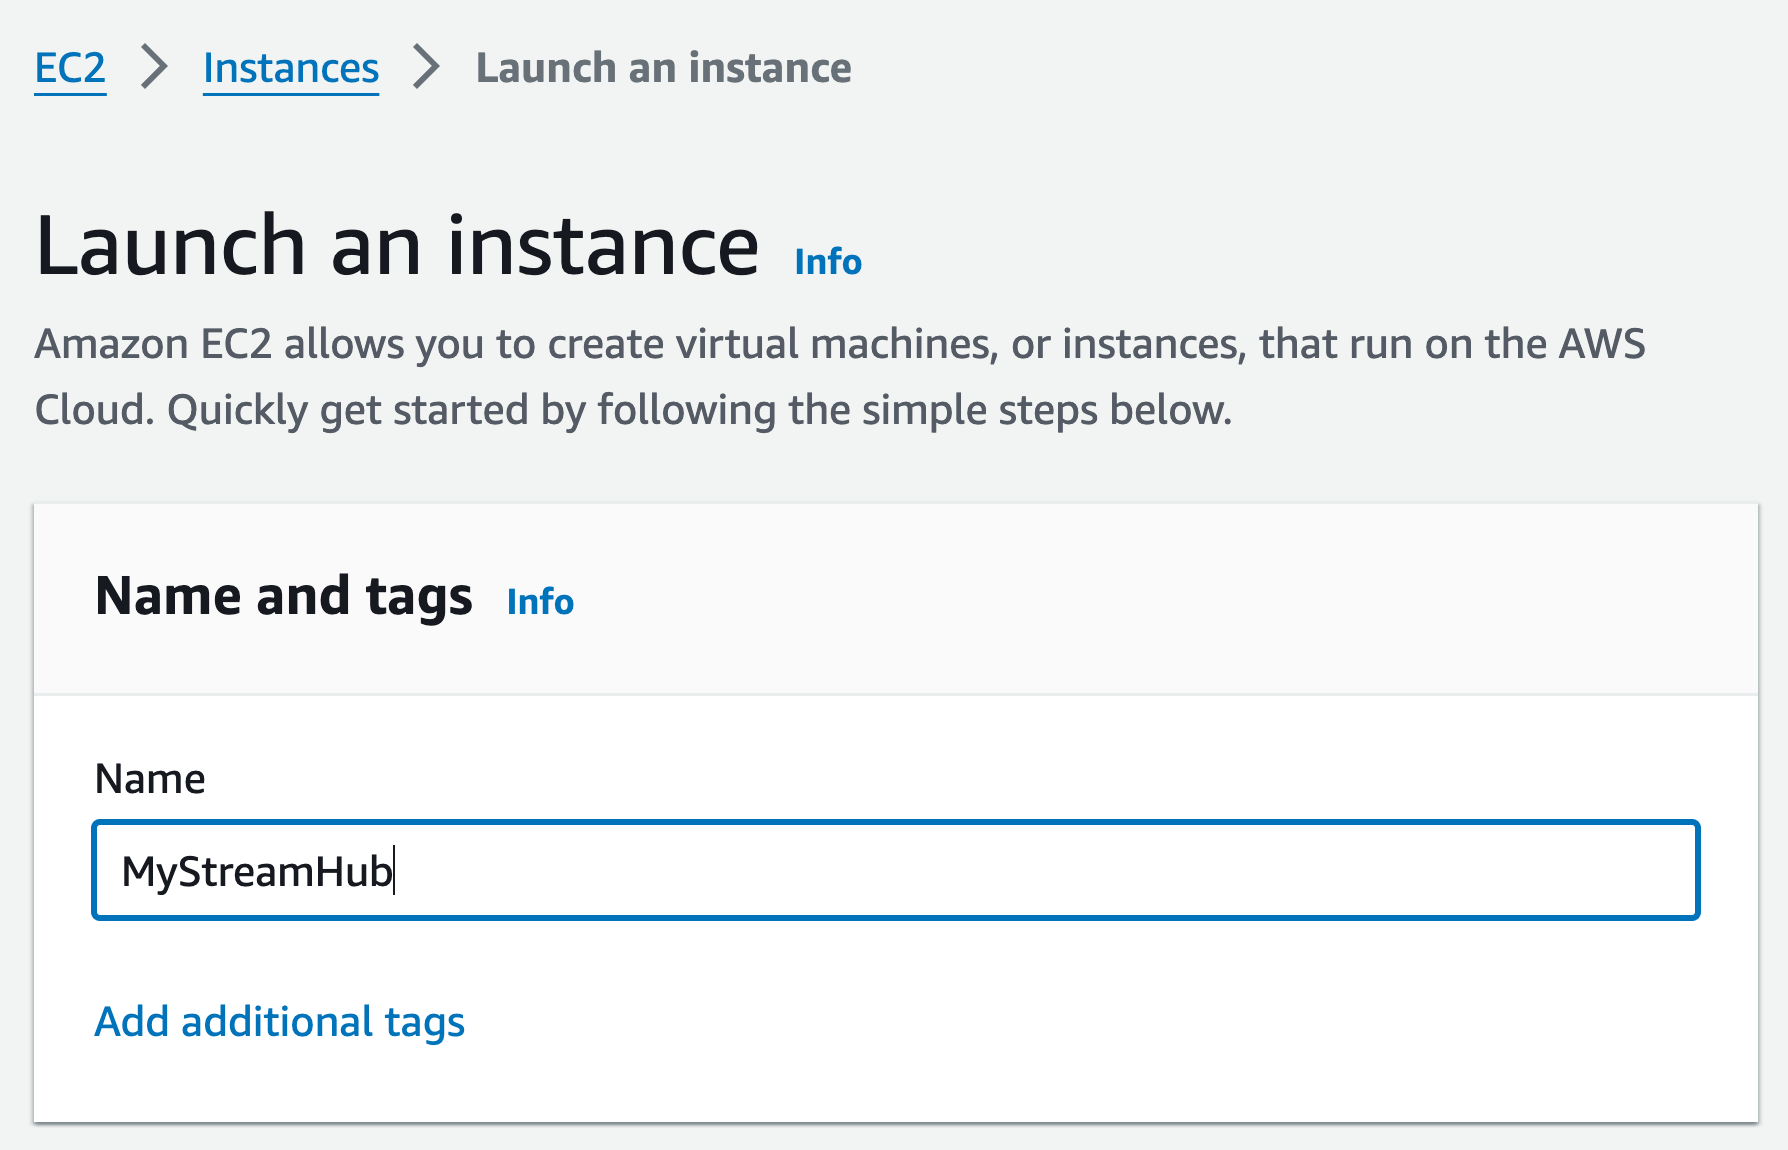
Enter the instance Name and add additional tags if necessary:
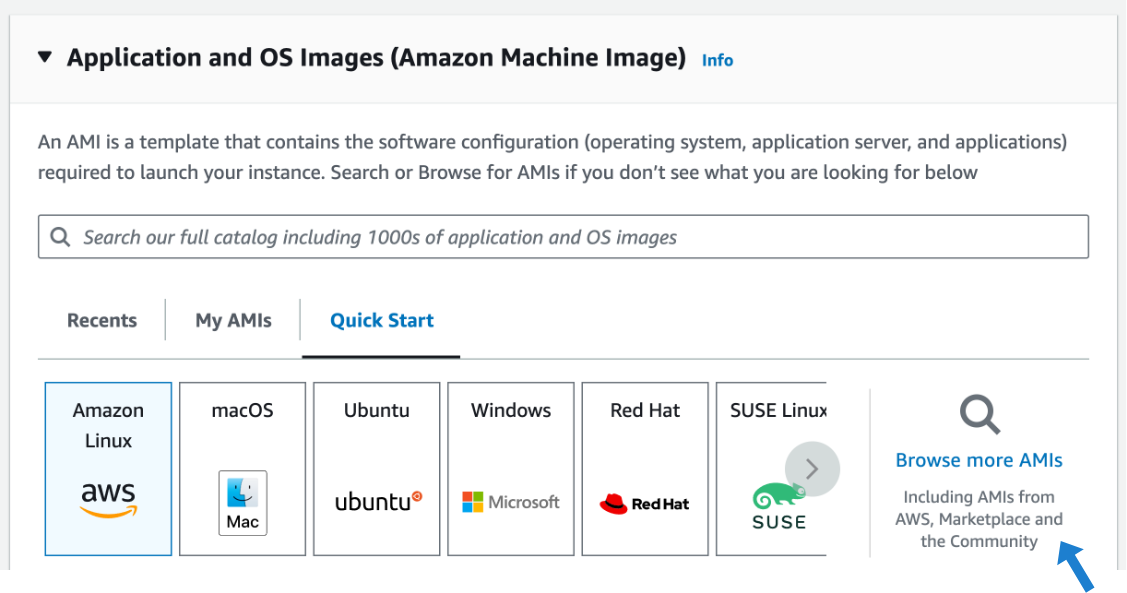
Under Application and OS Images, click Browse more AMIs:
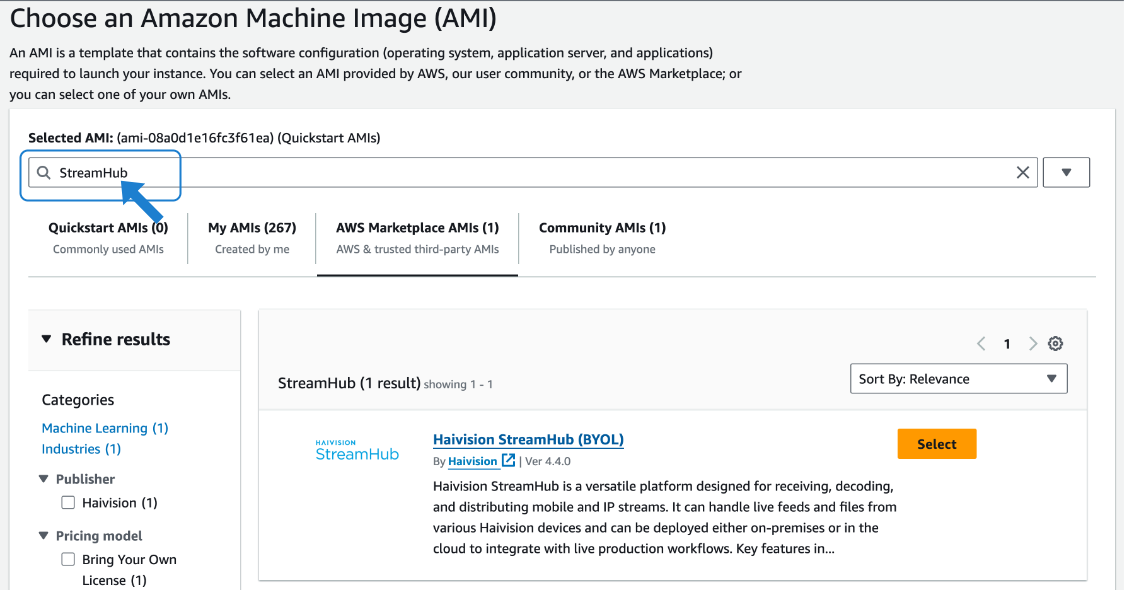
Type "StreamHub" in the search box and press Enter to find the version of the StreamHub Amazon Machine Image (AMI) you wish to use:
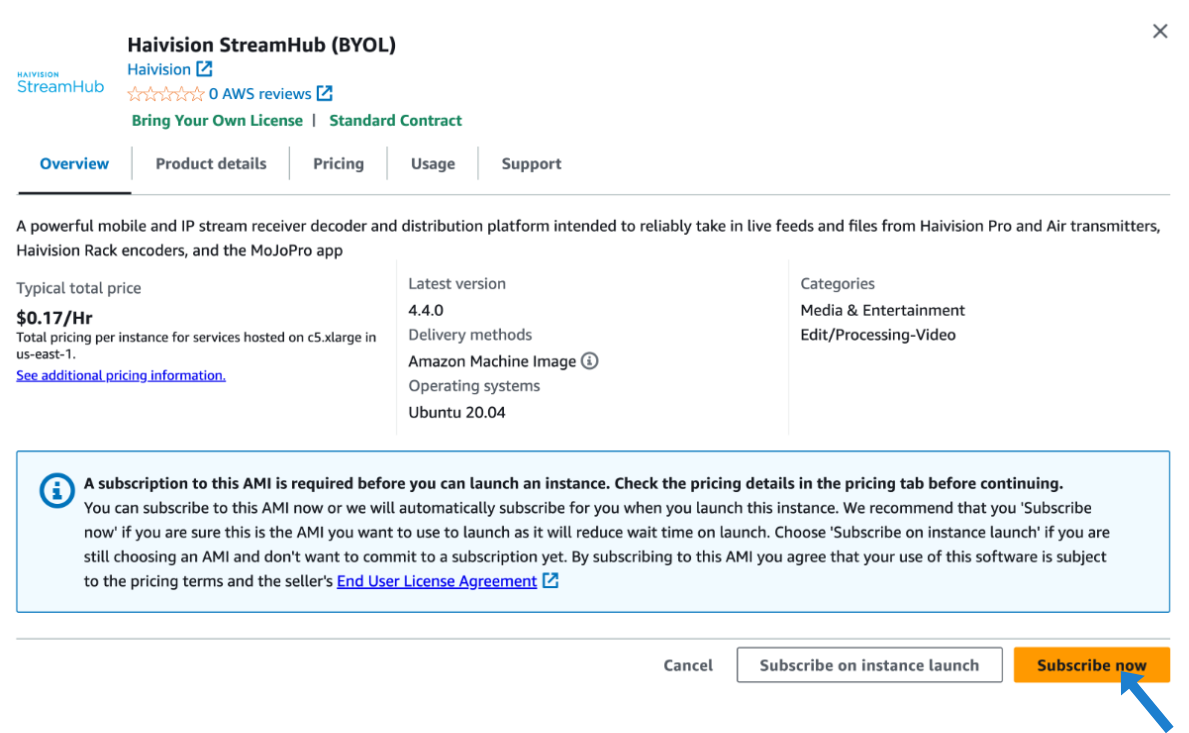
Click the Haivision StreamHub link to review product overview and pricing details, and then click Subscribe now:
Click Select. The details of your selection appear:
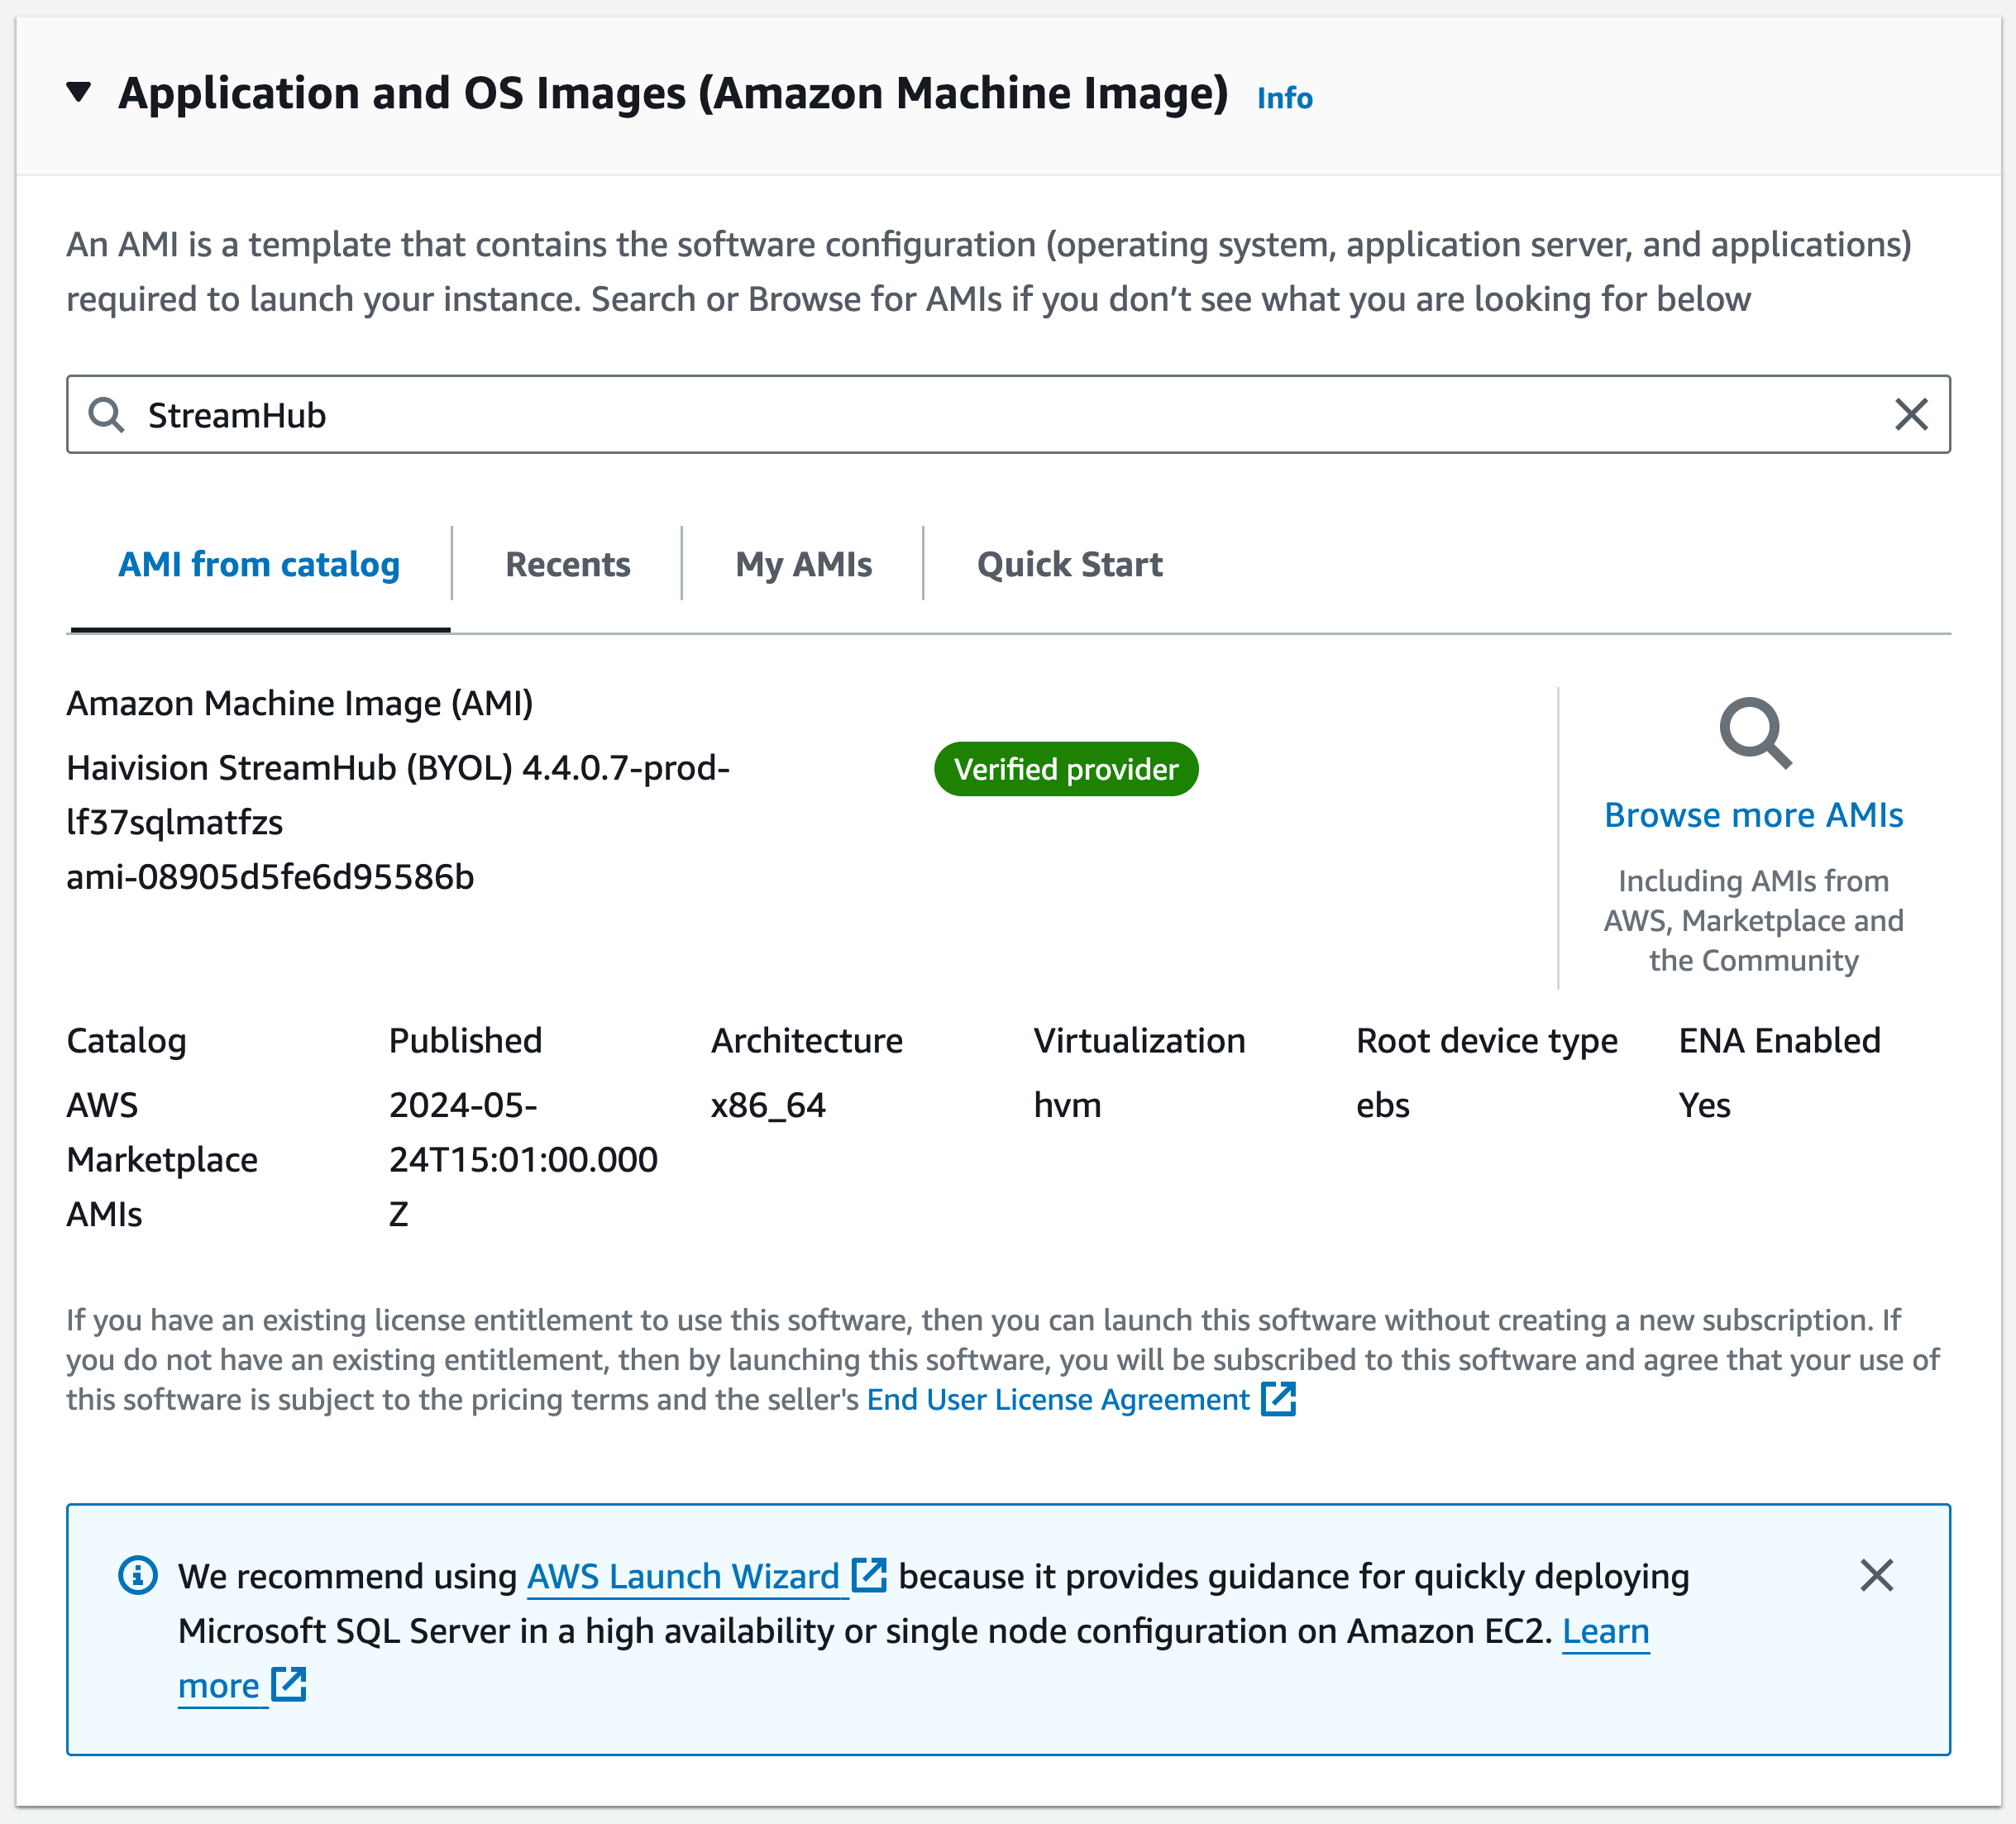
Choose an Instance Type:

Under Create key pair name, select an existing key pair or create a new one (required for SSH access to the virtual machine):
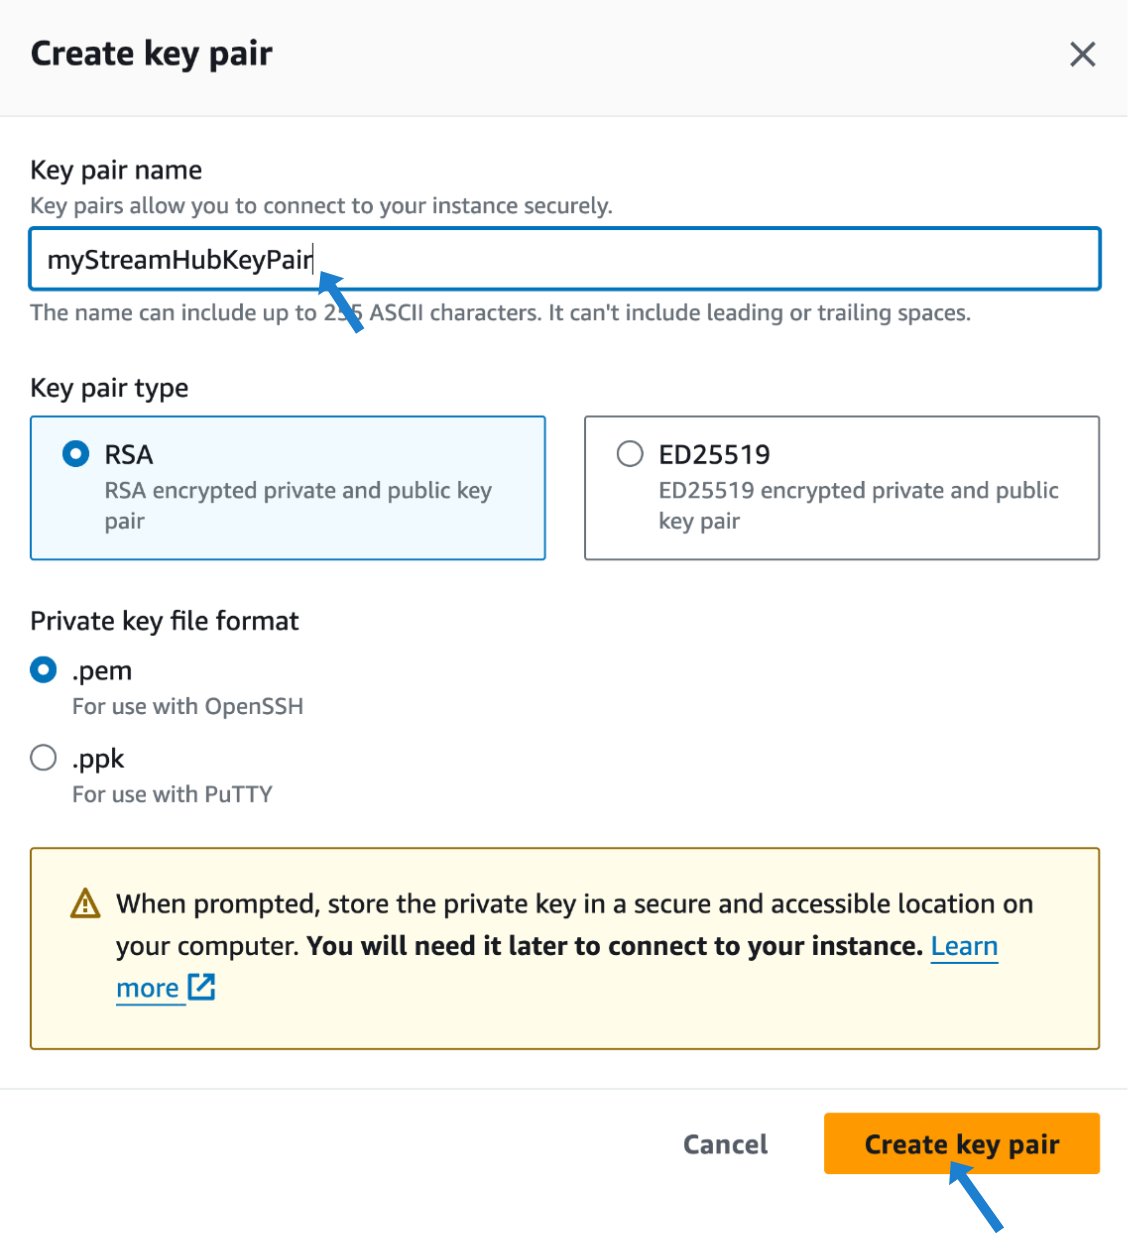

Under Network settings, click Edit:
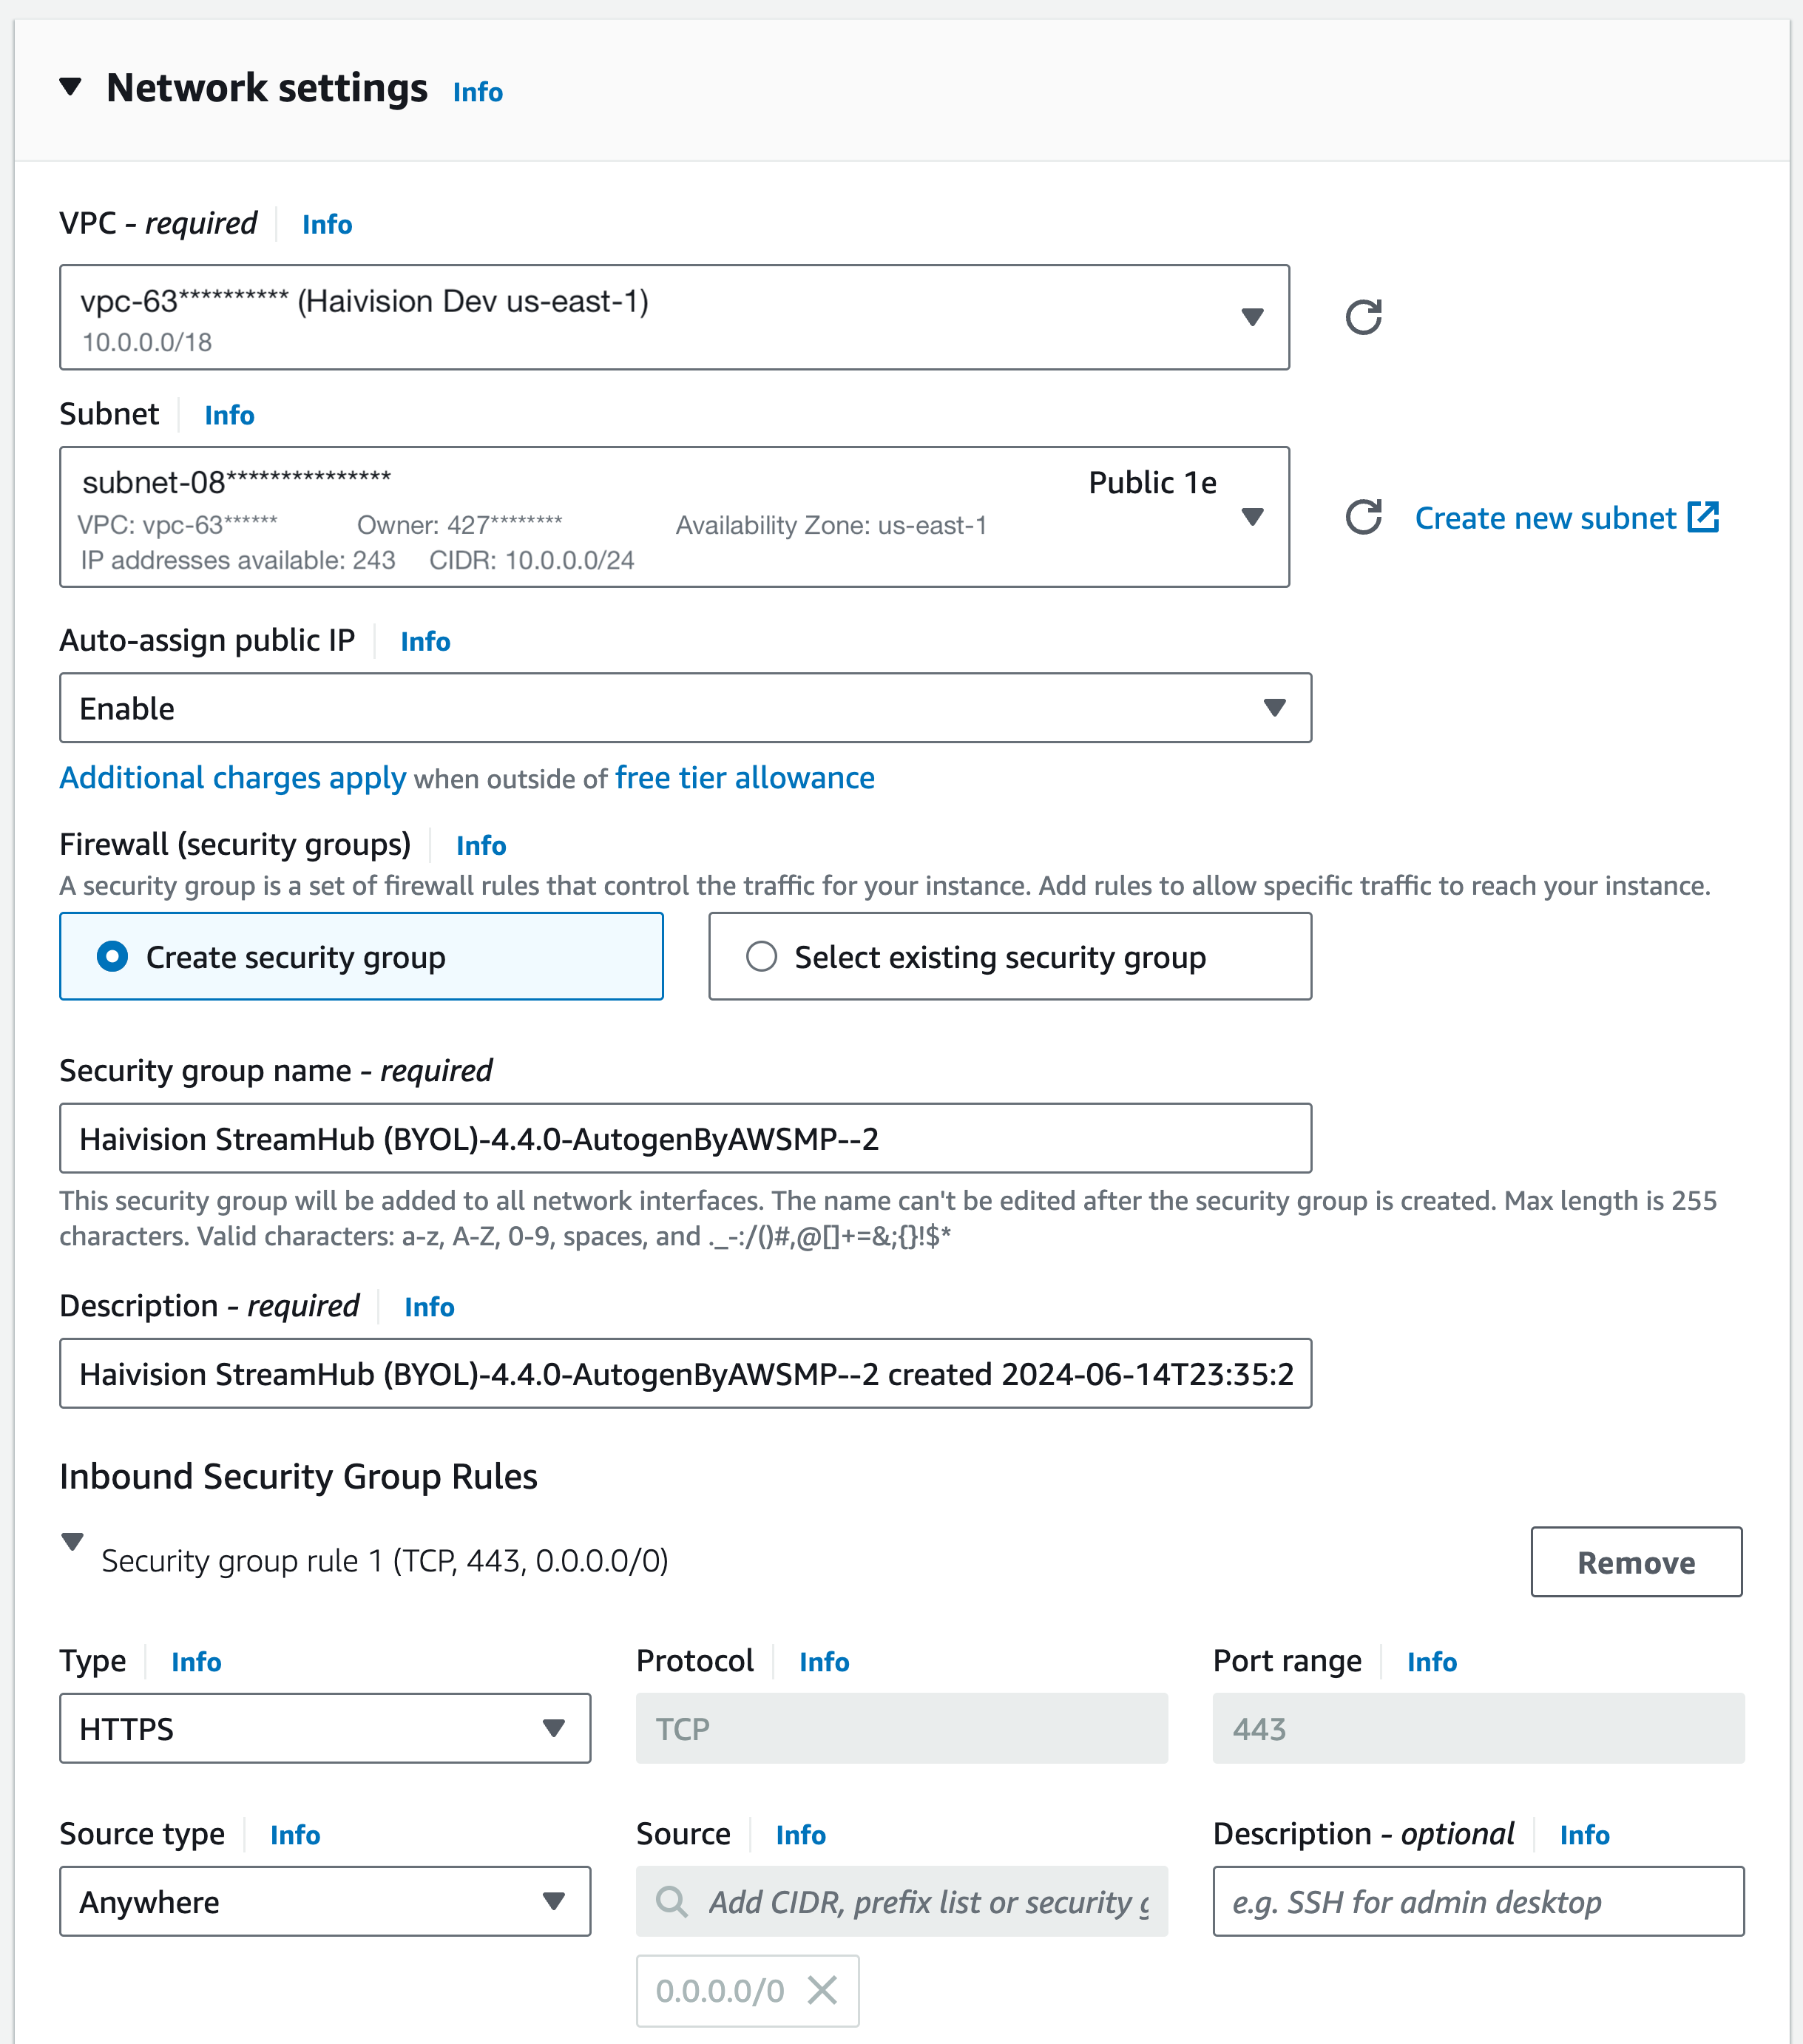
Important
You may wish to enable Auto-assign Public IP to give your server an IP address reachable from any location.
Set Inbound Security Group Rules according to the Network Port Requirements indications:
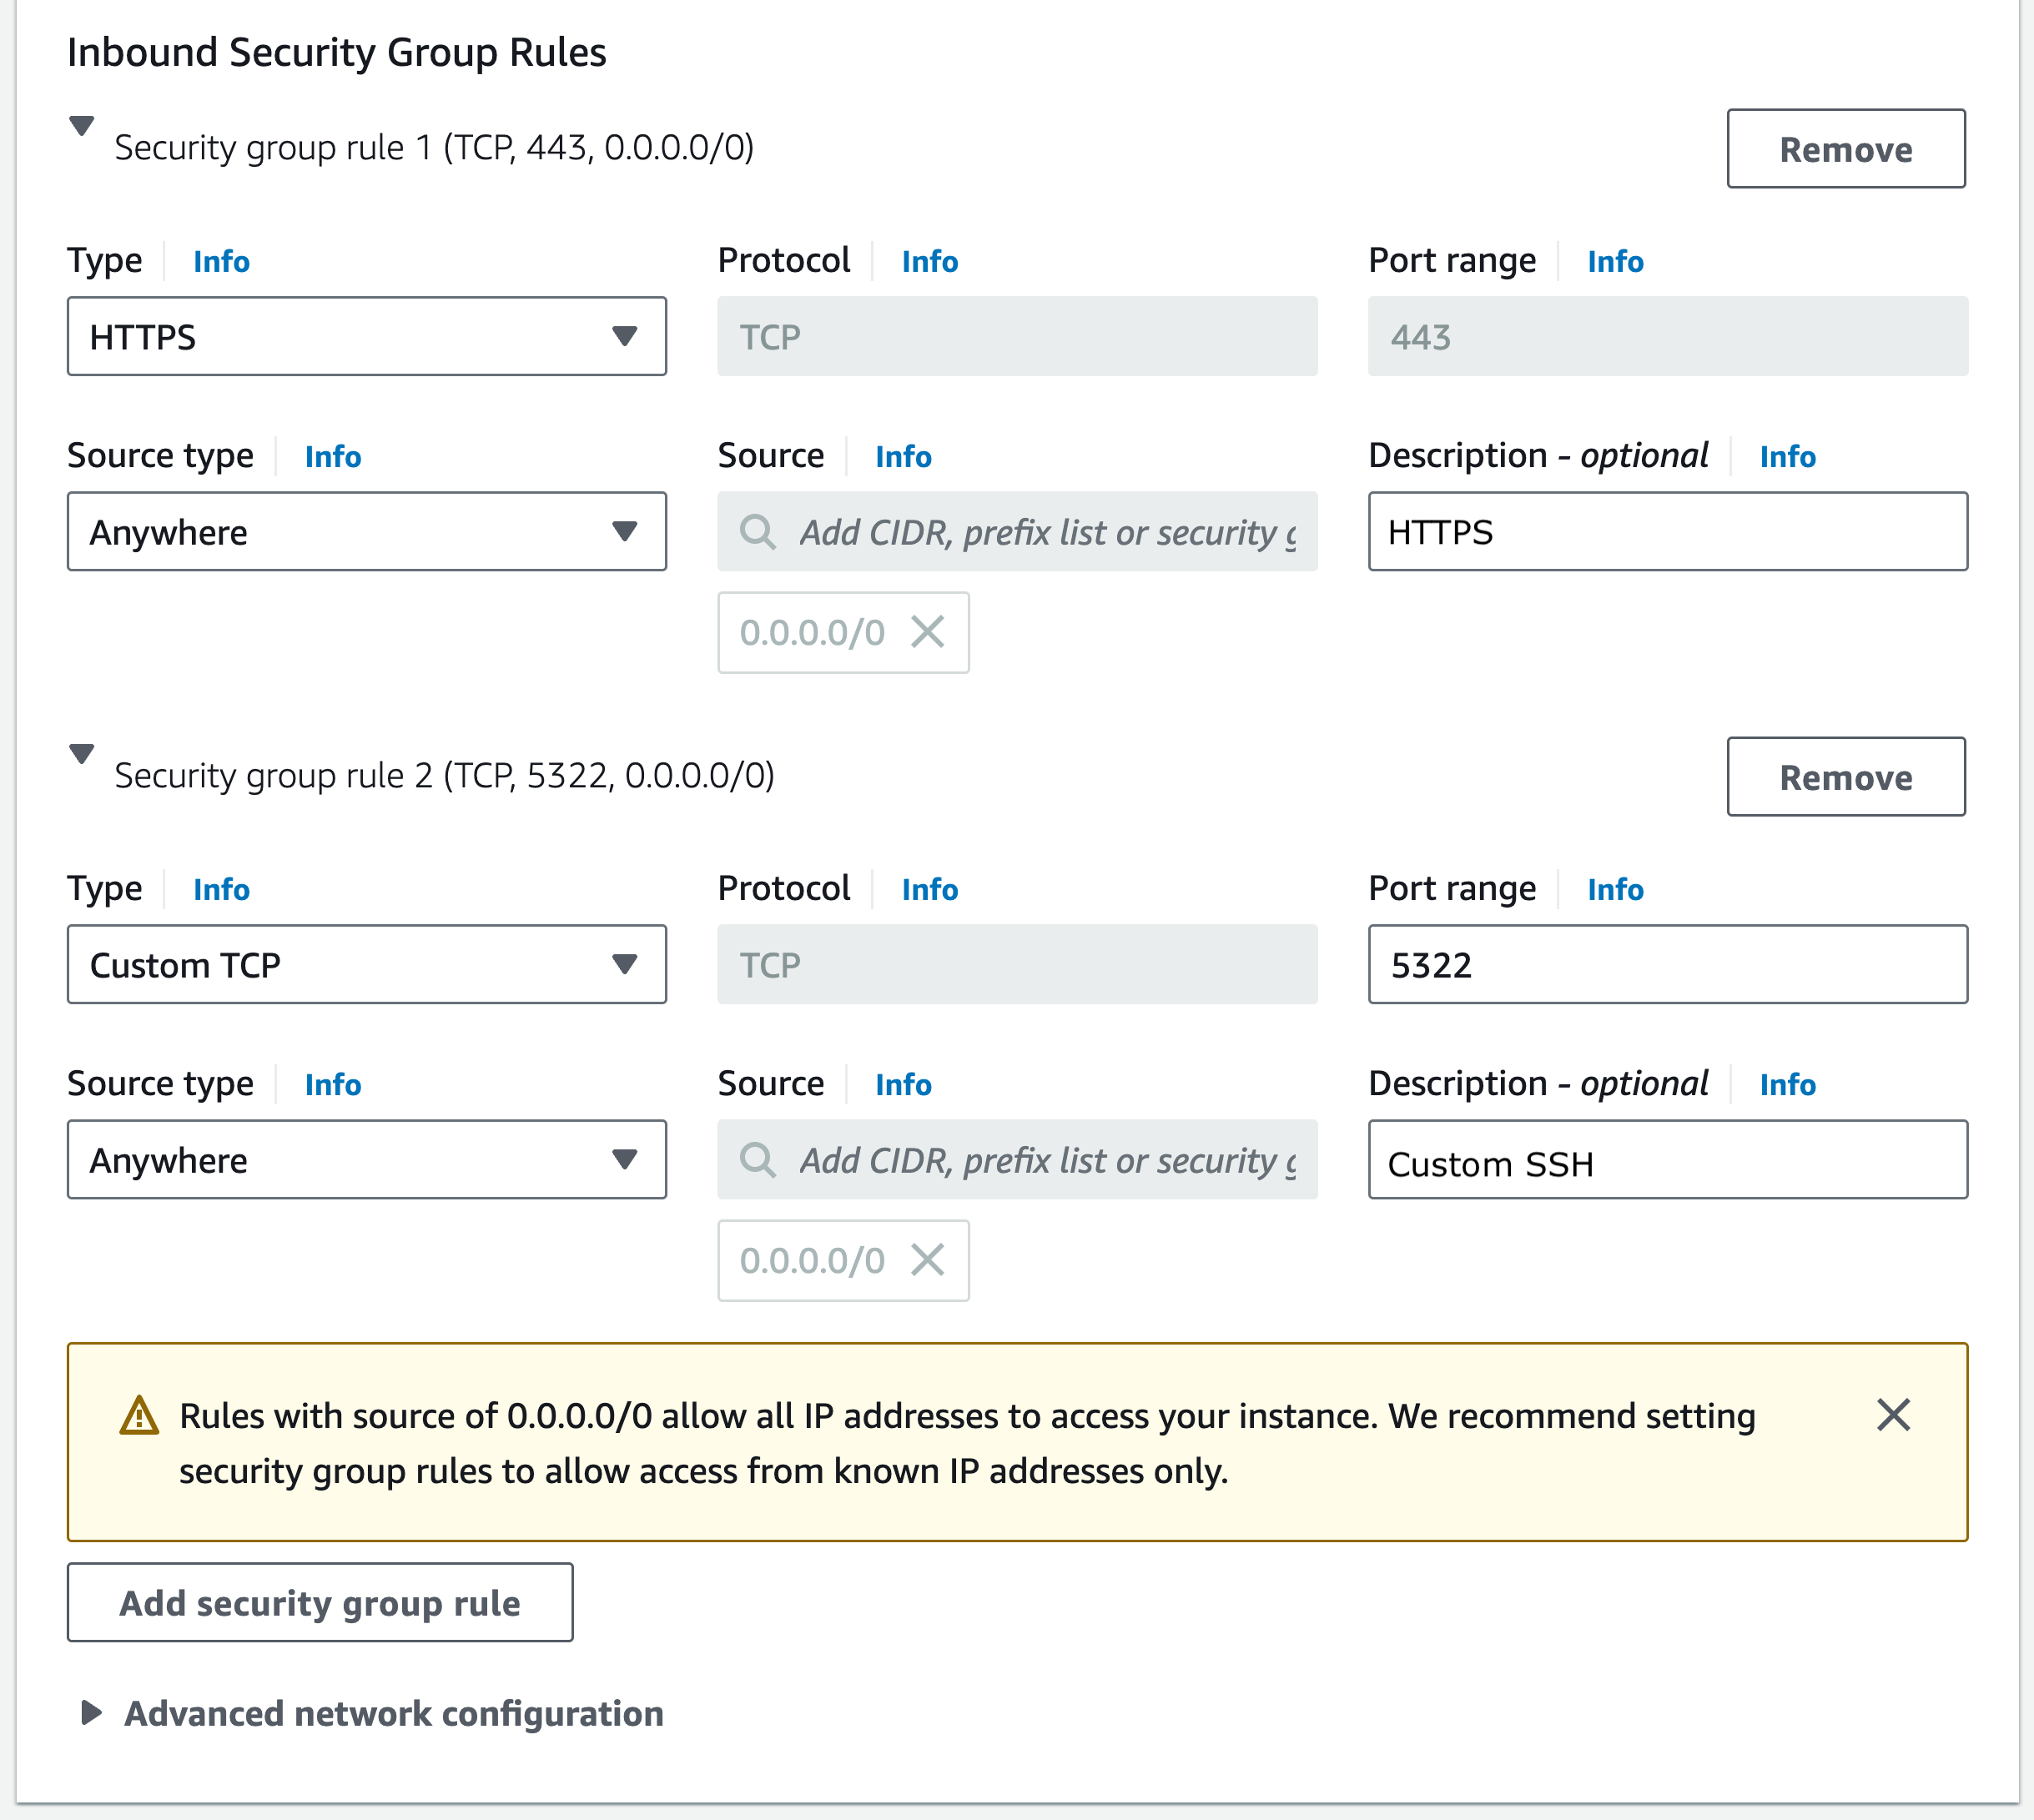
Note
Only ports 443 (HTTPS) and 5322 (SSH) are open by default.
Under Configure storage, adjust the Root volume size according to your requirements:
.png?inst-v=8e30cdcd-b48c-42b5-b410-ee0383c6beb7)
Under Summary, leave the Number of instances at 1:

Review your changes. When ready, click Launch Instance. A page appears, informing you that your instance is in the process of launching.
Once the instance has been successfully launched, click on the instance ID to view its properties:
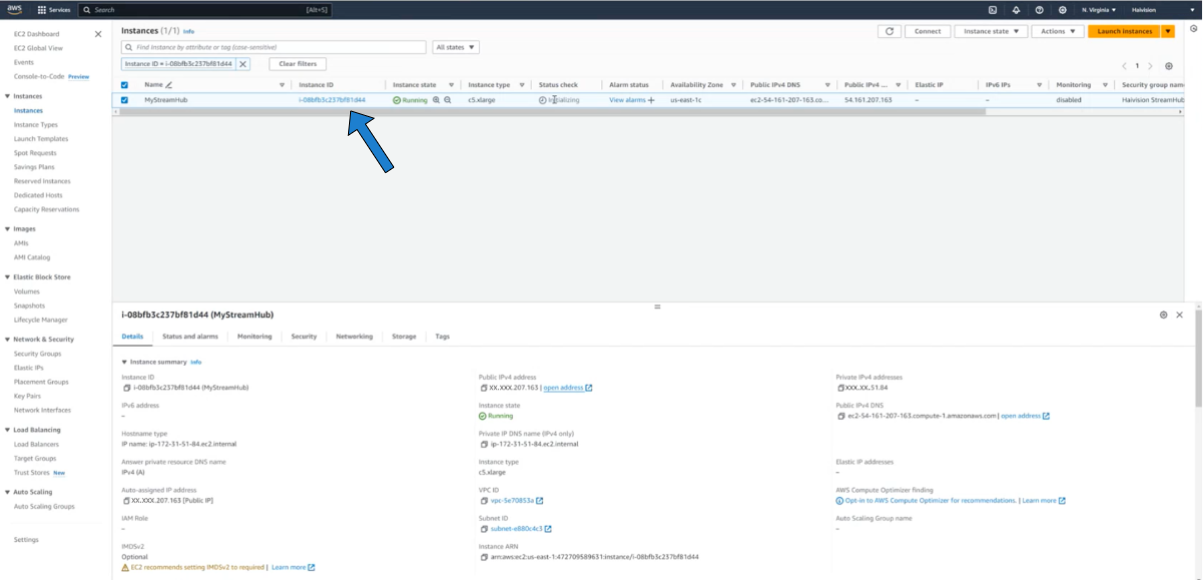
After a few moments, click on the Public IPv4 address link to open a new browser tab to the login screen of your new StreamHub virtual machine. Be sure to prefix the address with HTTPS. An invalid certificate warning may appear, which you can safely ignore (consult your IT admin to arrange for a valid certificate).

Log in as admin. The default password is the InstanceID, available on the properties page (see above).
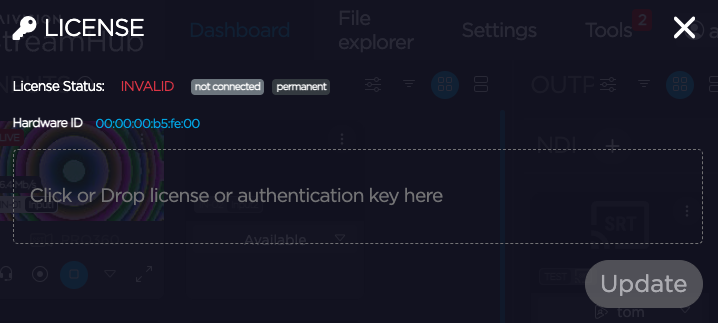
The License page appears. Before continuing to use your StreamHub server, you need to license your server. SeeLicensing Your Server.
Note
At the first start, the virtual machine runs a load test for about 10 minutes. During this time the machine has only a limited availability.
SSH access to the Console UI is only allowed via SSH public key.
Make sure you configure the security groups according to the services being used.
Signing in to Azure
Sign in to your Azure account: https://portal.azure.com.
After you have successfully logged in to the Azure portal, Under Azure services click Create a resource.

Creating a virtual server
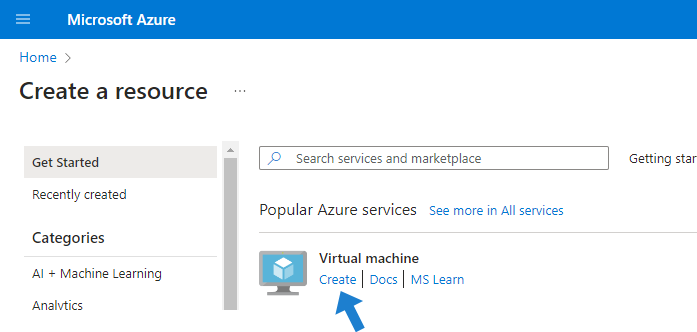
On the Create a resource page, under Virtual machine, click Create.
On the Create a virtual machine page, under Basics > Project details, enter your Azure subscription and a valid resource group:
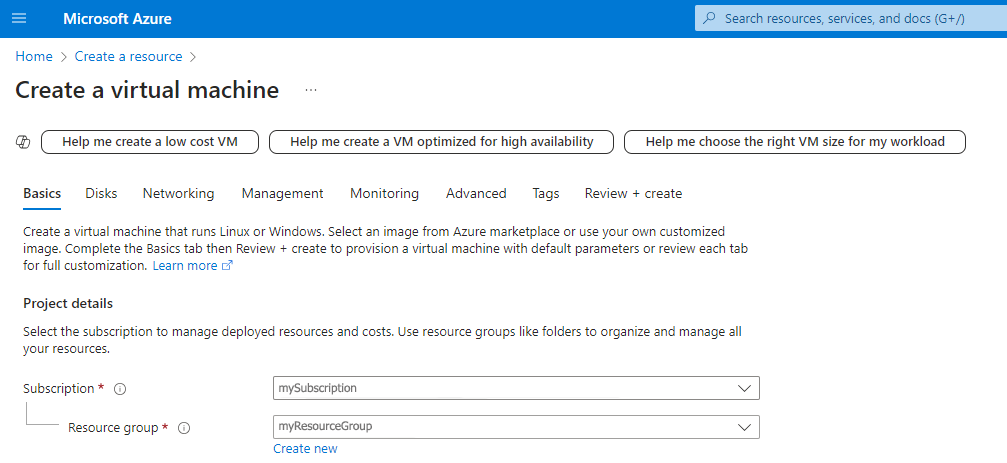
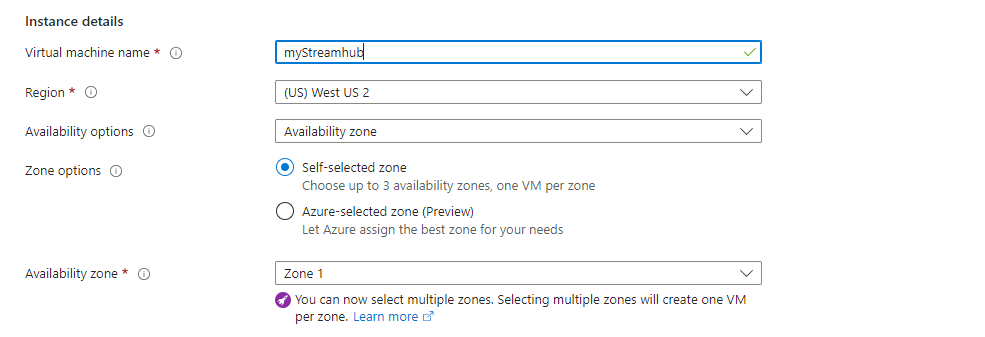
Under Instance details, enter an instance Name, and choose a Region and an Availability zone:
Under the Image field, click See all images (this opens a window where you can browse the Azure Marketplace).

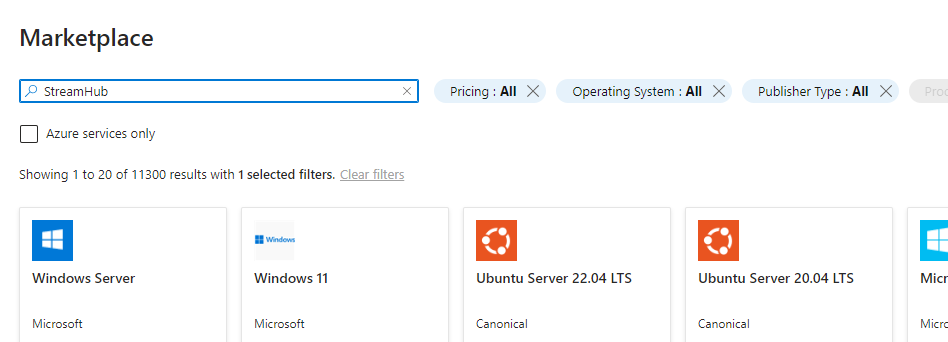
On the Marketplace page, type "StreamHub" in the search field.
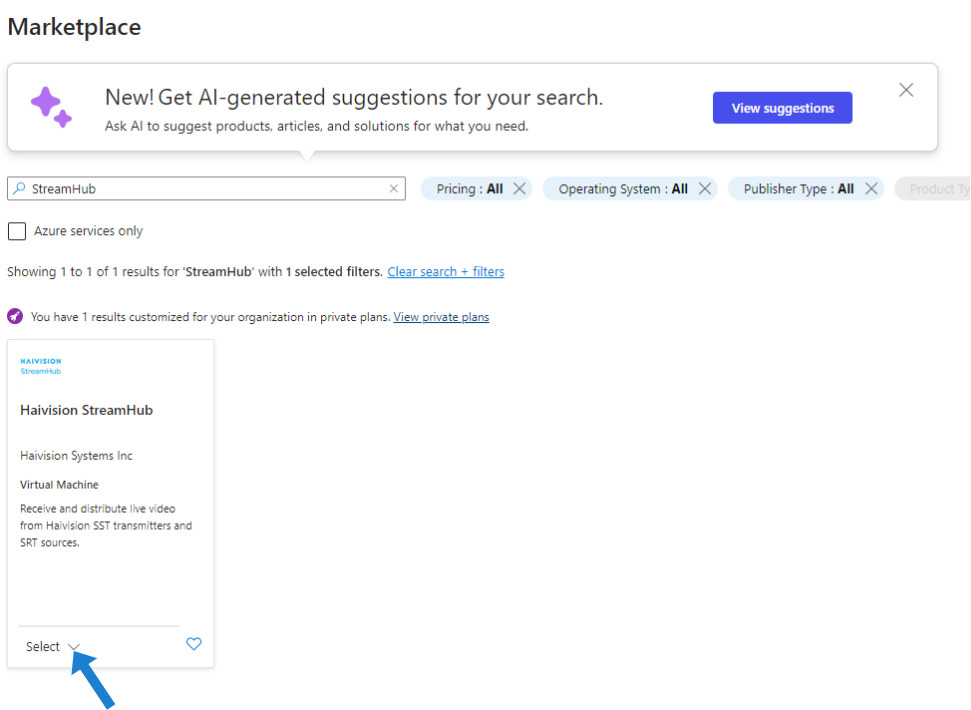
Click on the StreamHub tile to see a product overview and other details.
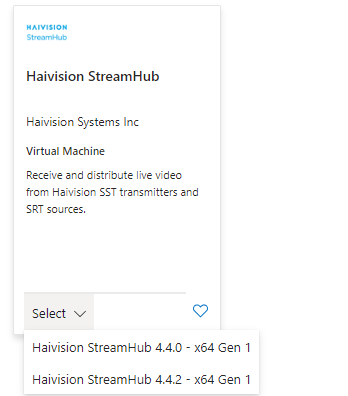
From the Select menu in the Haivision StreamHub tile, choose the StreamHub version you wish to use:
The Create a virtual machine page reappears, with your selection in the Image field:
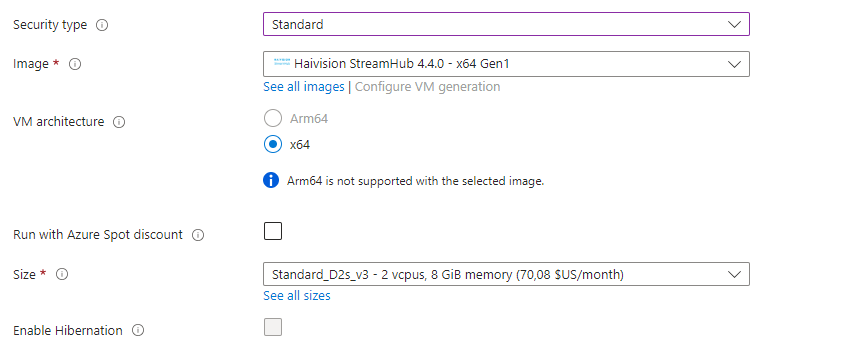
Choose an instance size in the Size field.
Under Administrator account, select SSH public key and enter awadmin in the Username field:
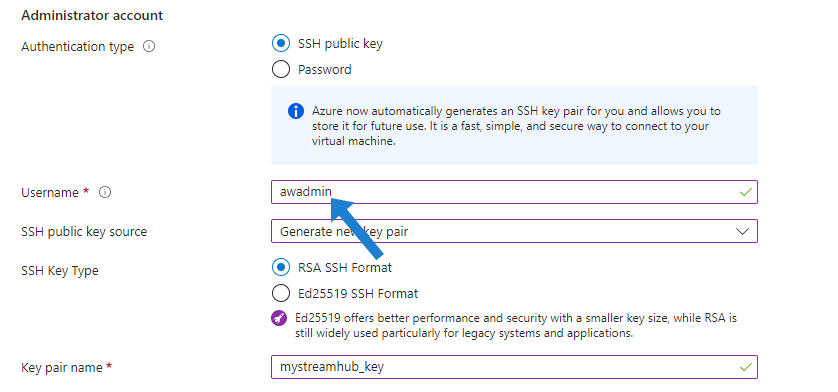
If you do not already have a public/private key pair (necessary for SSH access), select Generate new key pair.
Click Next: Disks. You may be prompted with Deployment recommendations:

Tip
It's generally a good idea to view and Adopt these recommendations.
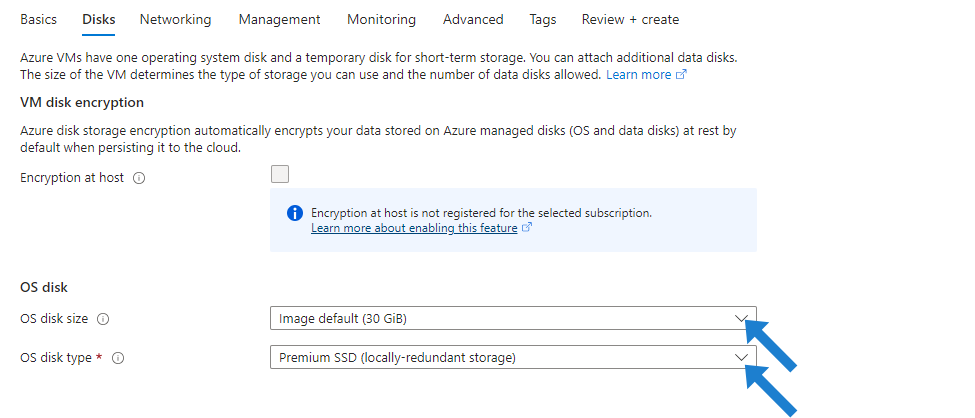
Under Disks, choose the OS disk size and OS disk type suited to your operational needs. Set Encryption if desired:
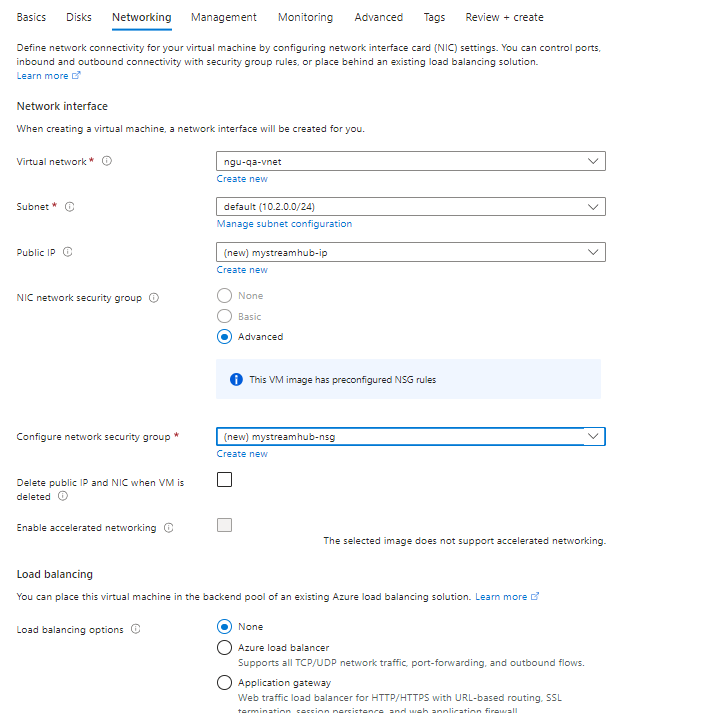
Click Next: Networking. Under Networking interface, specify a virtual network and subnet. Under the Public IP field, click Create new.
Important
Enabling a Public IP will give your server an IP address reachable from any location.
Set HTTPS and SSH ports according to the Network Port Requirements indications:
Note
Only ports 443 (HTTPS) and 5322 (SSH) are open by default.
Unless you have specific requirements, you can skip the Management, Monitoring, Advanced, and Tabs panels, and just click Review + create:
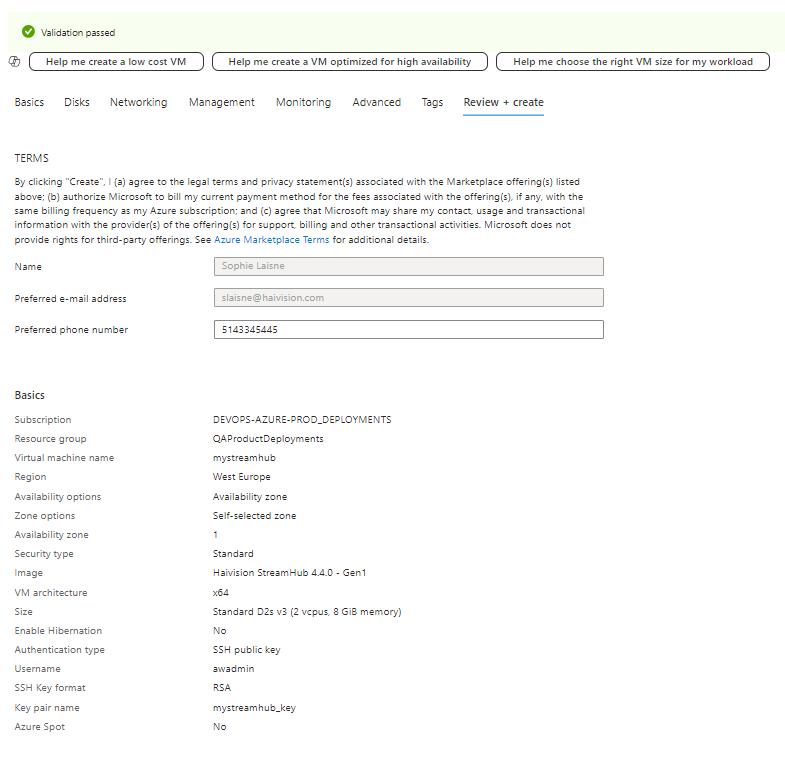
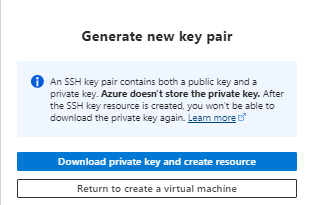
Review your settings. When ready, click Create. You will be prompted to generate a new Public/private key pair:
Click Download private key and create resource.
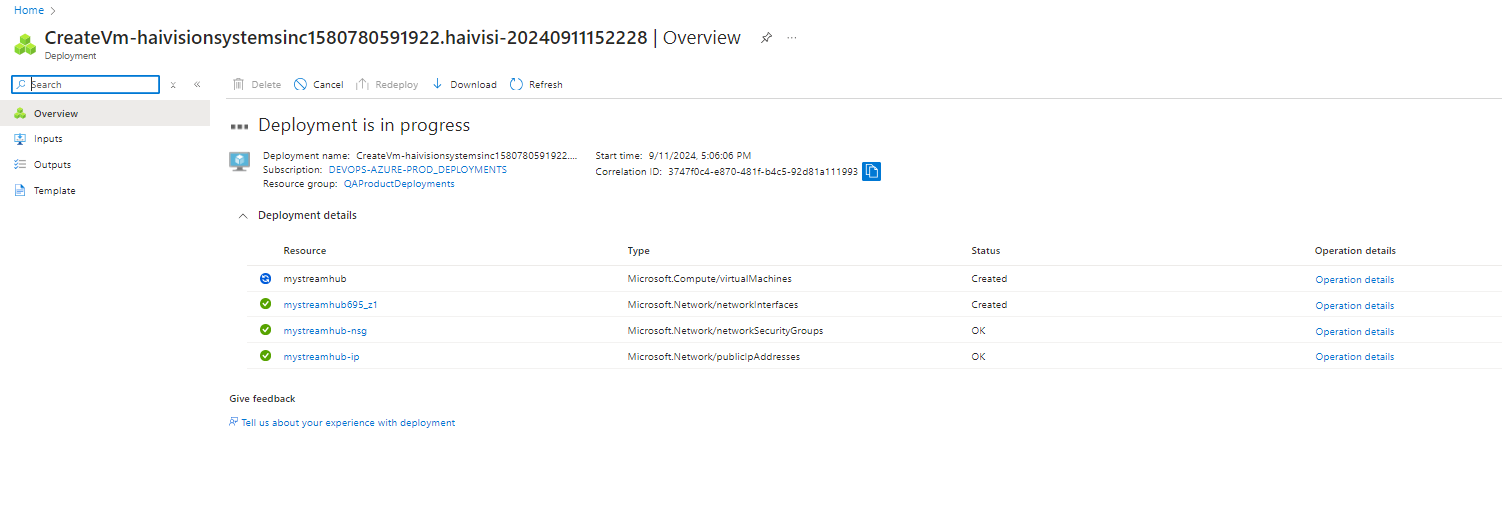
A page appears, informing you that your instance is in the process of being deployed:
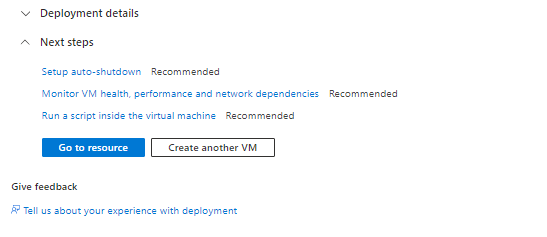
When the deployment is complete, click Go to resource to see details:
Copy the Public IP address.
.png?inst-v=8e30cdcd-b48c-42b5-b410-ee0383c6beb7)
Paste it into a new browser tab. Be sure to prefix the address with HTTPS. An invalid certificate warning may appear, which you can safely ignore (consult your IT admin to arrange for a valid certificate). The login screen of your new StreamHub virtual machine appears:

Log in as admin. The default password is the Subscription ID, available on the Resource details page (see above).
The License page appears. Before continuing to use your StreamHub server, you must obtain and apply a license. See Licensing Your Server.

Important
When it first starts the virtual machine runs a load test for about 10 minutes. During this time the machine has only a limited availability.
SSH access to the Console UI is only allowed via SSH public key.
Make sure you configure the security groups according to the services being used.
Signing in to Alibaba Cloud
Sign in to your Alibaba Cloud console: https://account.alibabacloud.com/login/login.htm
After you have successfully logged in to the Alibaba Cloud portal, click Elastic Compute Service:
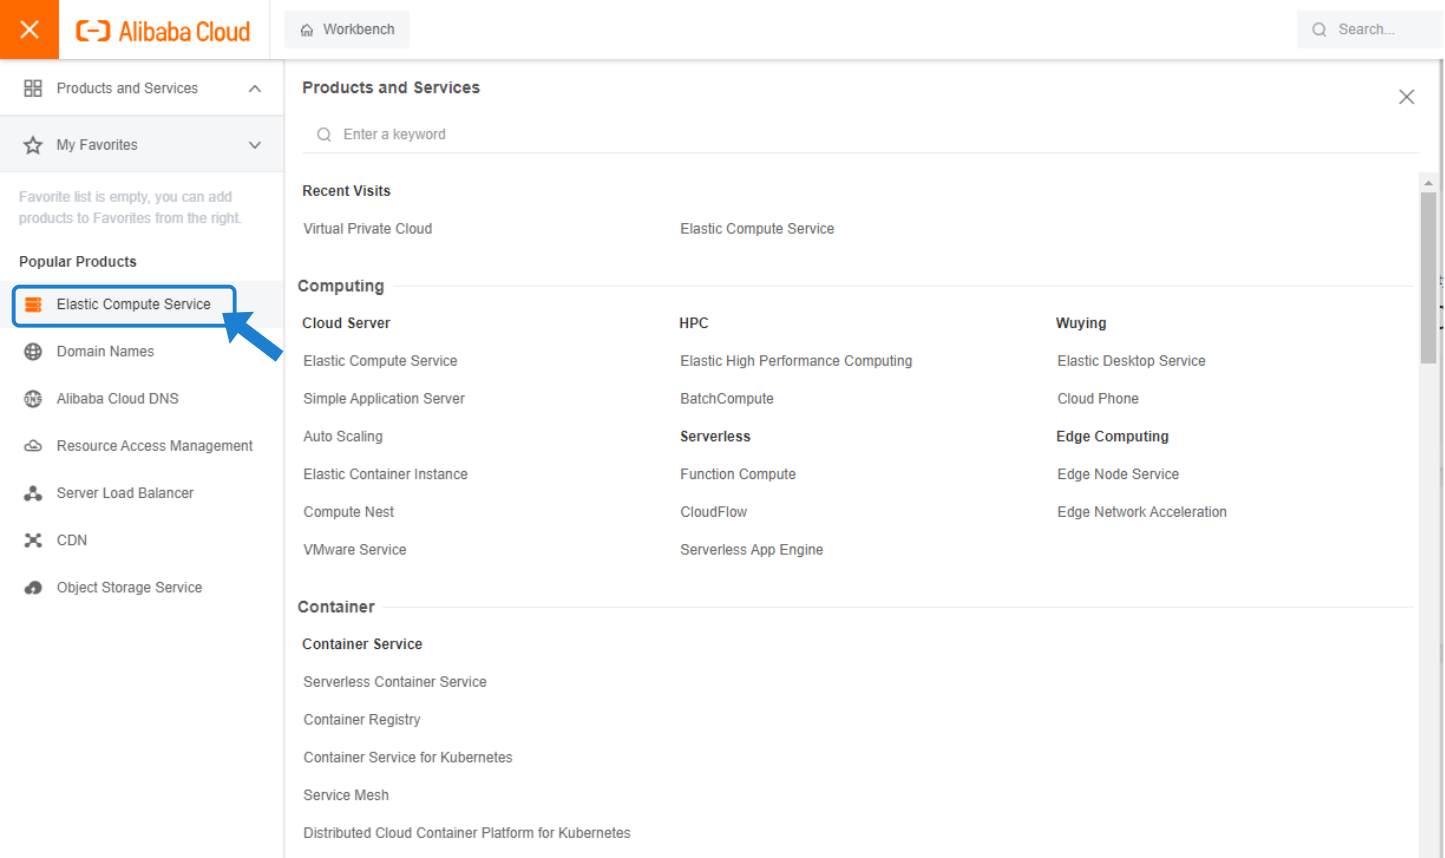
Creating a Virtual Instance
On the Elastic Compute Services (ECS) Overview page, click Create Instance:
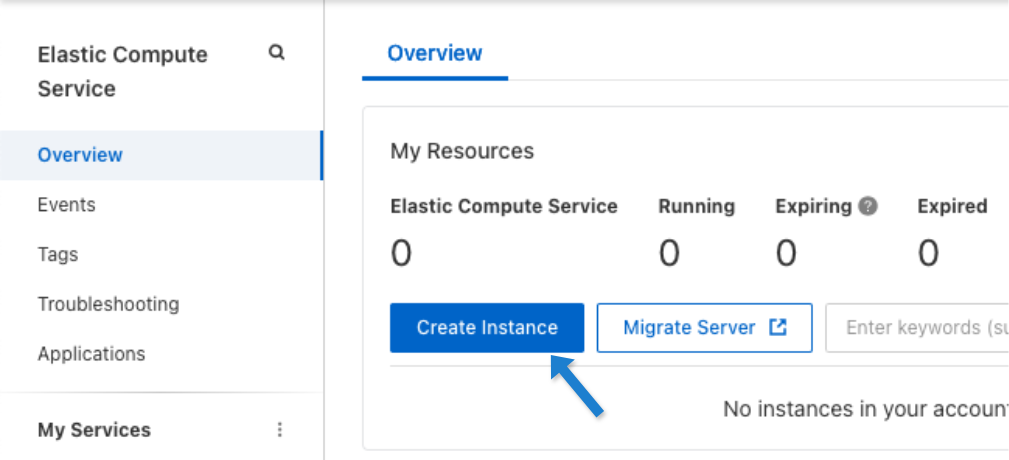
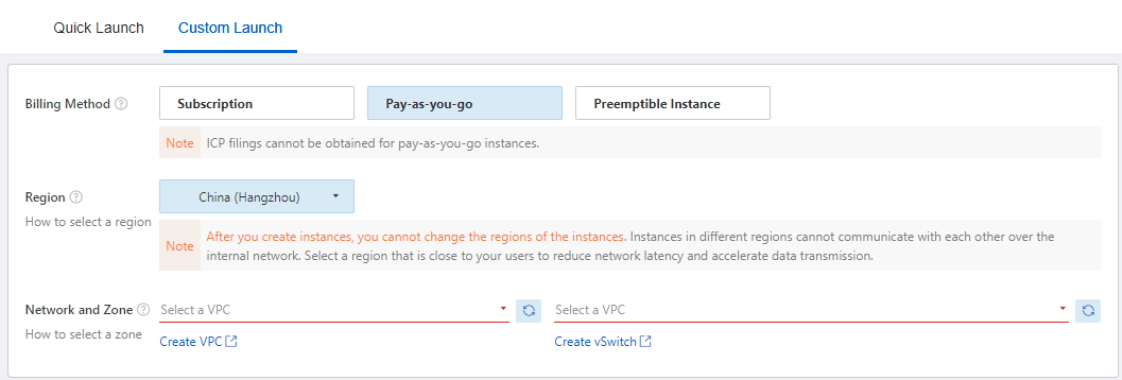
Click Custom Launch:

Choose a Billing Method, Region, and Network/Zone (Virtual Private Cloud) for your StreamHub deployment:
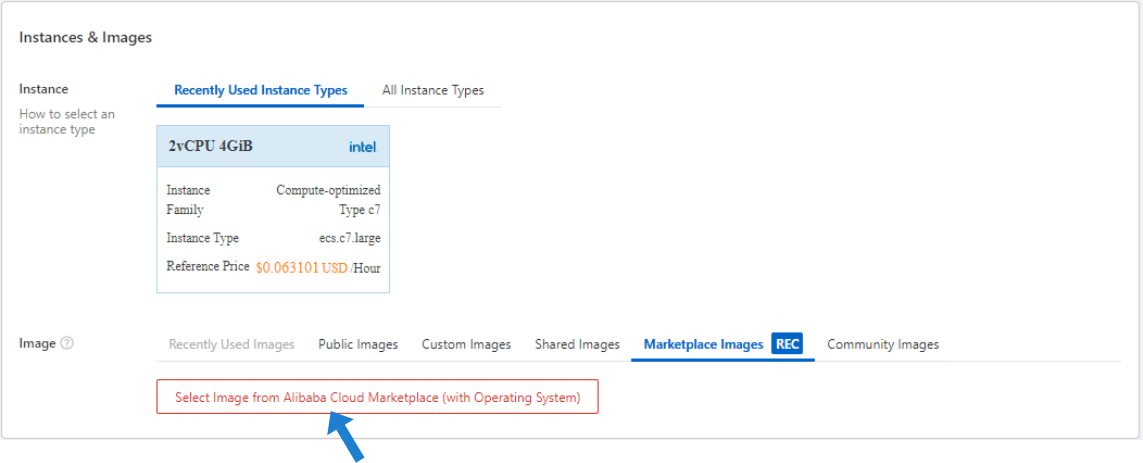
Under Instances & Images section, specify an Instance Type, and then under the Marketplace Images REC tab, click Select Image from Alibaba Cloud Marketplace (with Operating System):
Make sure none of the items in the left panel are selected, then type "StreamHub" in the search box and click Search to find the Haivision StreamHub image.
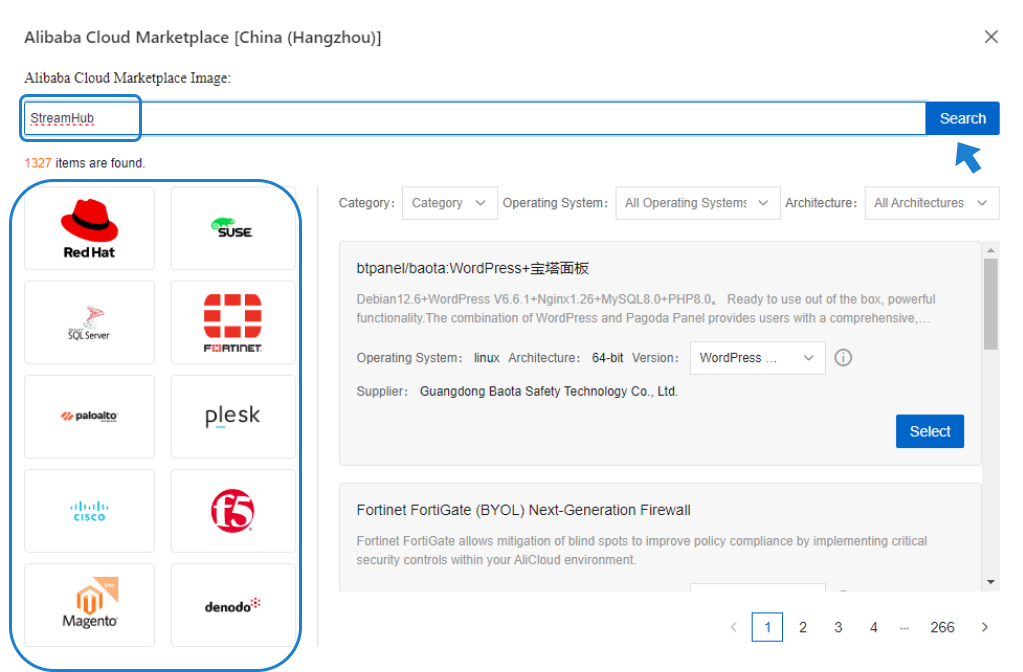
Note
You can review product and pricing details in the Alibaba Cloud Marketplace: https://marketplace.alibabacloud.com/products/56712002/sgcmjj00034225.html
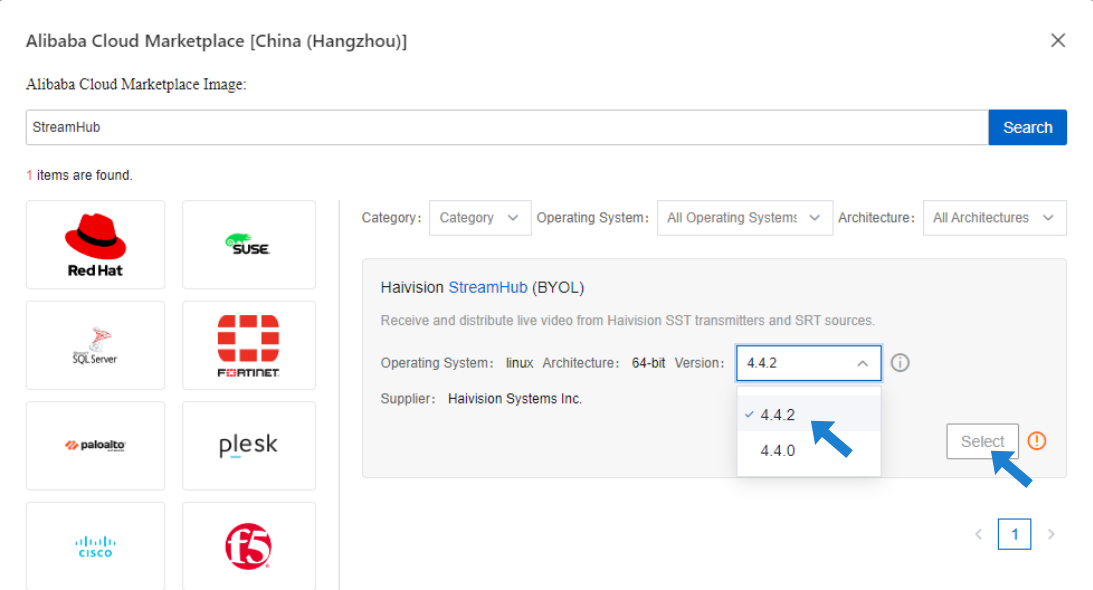
Choose the version of the StreamHub image you wish to use, and then click the Select button.
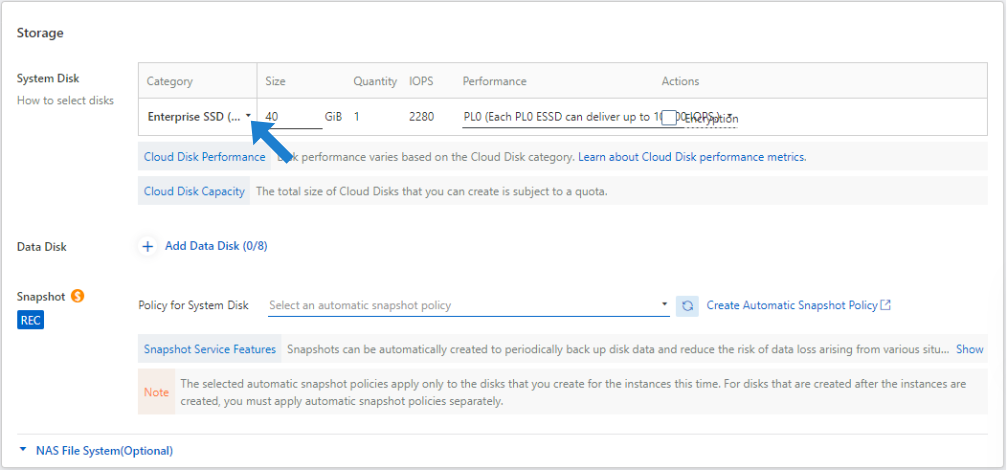
Under Storage, specify the type and size of System Disk you wish to use, and other settings according to your requirements:
In the Bandwidths & Security Groups section, click Assign Public IPv4 Address.
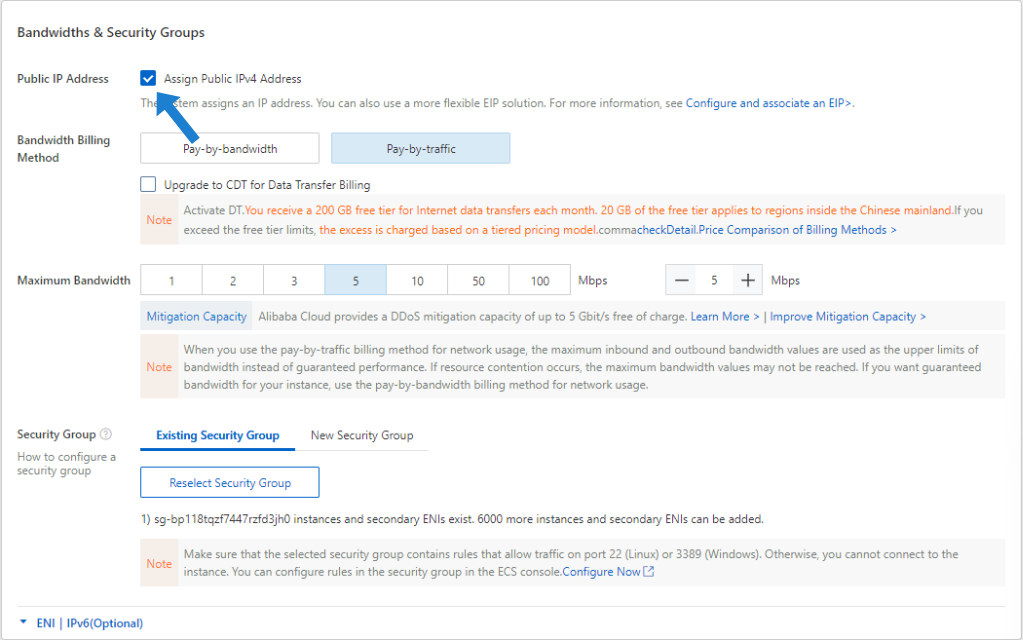
Click New Security Group and specify other settings according to your requirements.
Under Open IPv4 Ports/Protocols, enable at least HTTPS (TCP 443):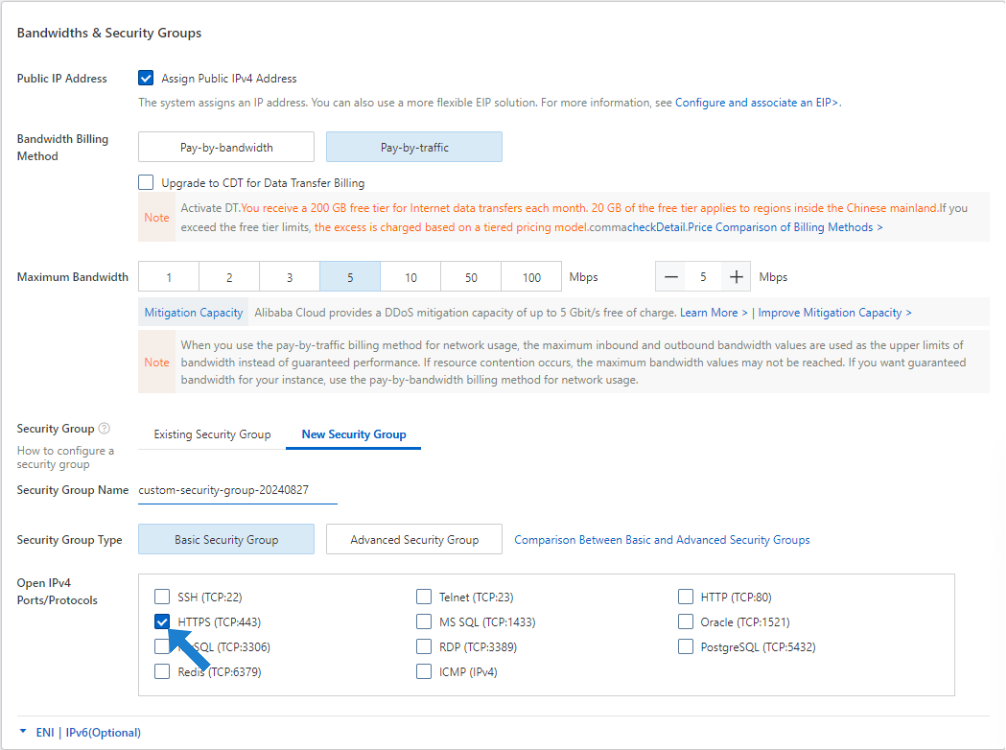
Important
Enabling Assign Public IP gives your server an IP address reachable from any location.
In the Management section, select an existing key pair or create a new one (required for SSH access to the virtual machine), by clicking Create Key Pair:

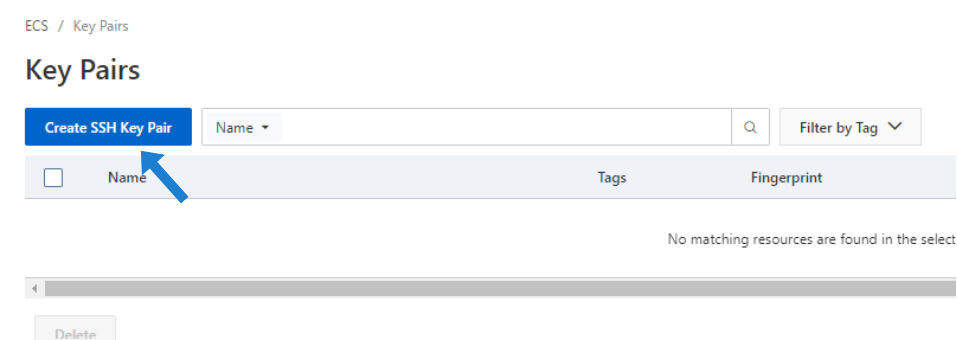
On the ECS Key Pairs page, click Create SSH Key Pair:
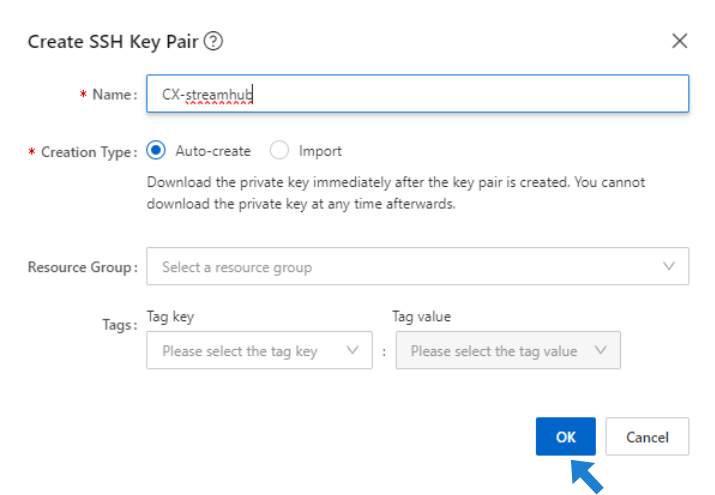
Enter a name for your key pair, and then click OK:
In the Management section, choose the newly created Key Pair:

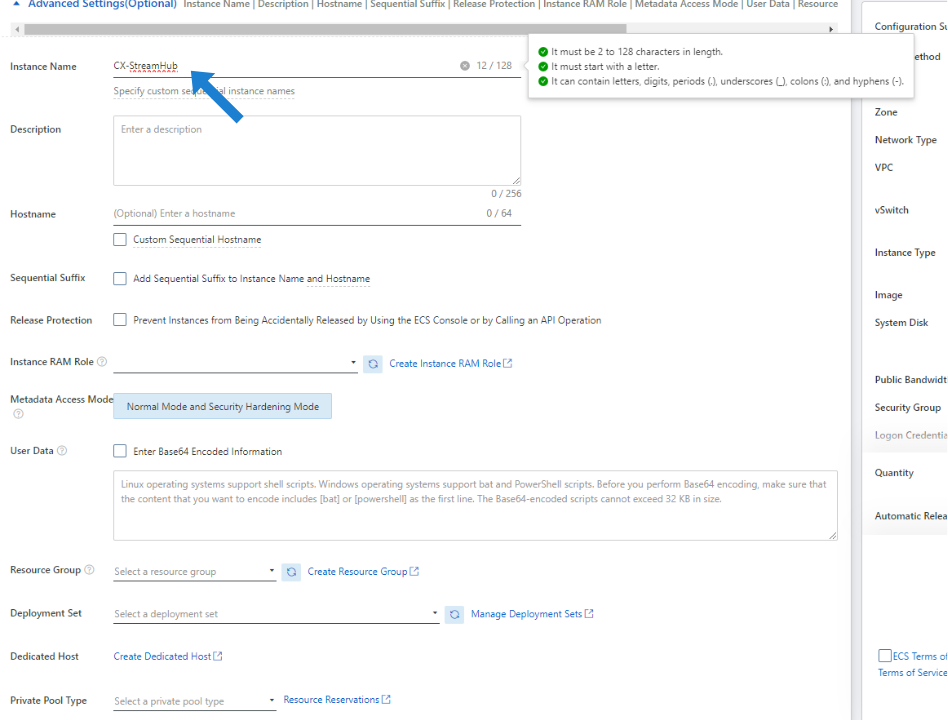
In the Advanced Settings section, enter an Instance Name:
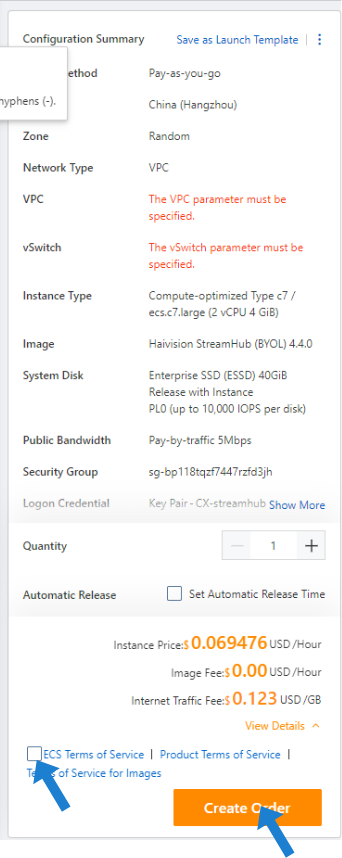
Review your changes. When ready, accept the service terms and then click Create Order:
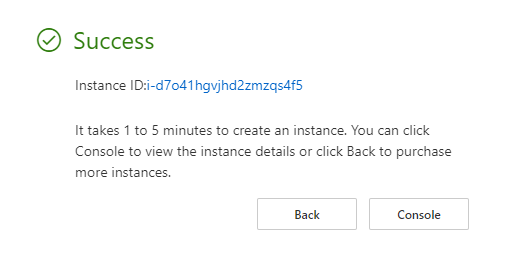
Once the instance has been successfully launched.
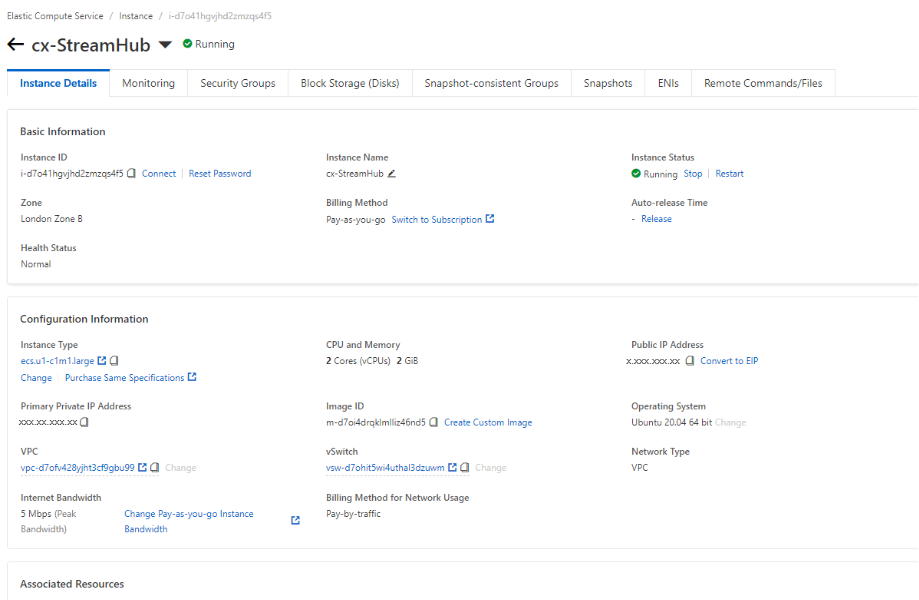
Click on Console , then Instance ID to see an overview, including the public IP address:

Click on the Instance ID to view its details:
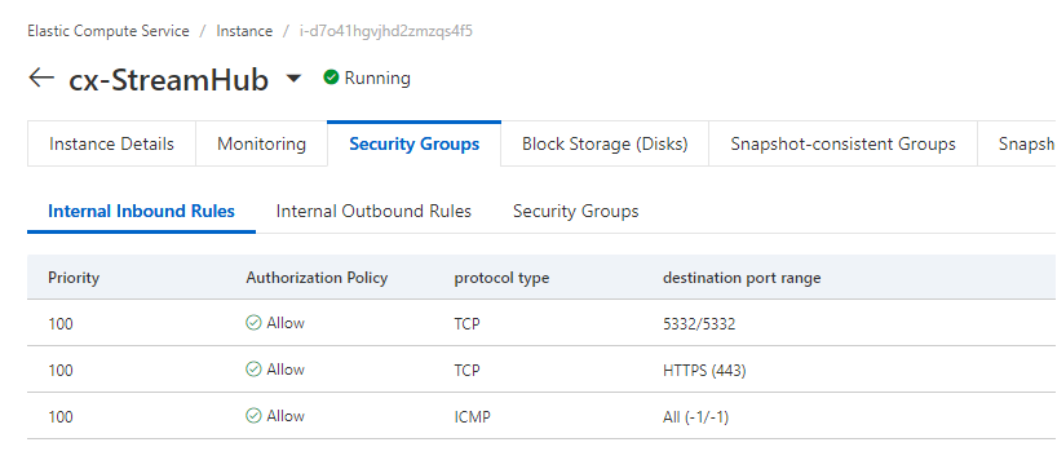
Under Associated Resources, click on the Security Group link:

Click on the Security Group ID/Name:

Delete the rules for 3389 and 22 TCP ranges:

Click Add Rule and add new rule for SSH port 5322 (refer to theNetwork Port Requirements indications):
Priority: 100
Protocol Type: Custom TCP
Port Range: Destination 5332
Source: 0.0.0.0/0
Description: Custom SSH port
Note
Only ports 443 (HTTPS) and 5322 (SSH) are open by default.
Click Save.
Return to the Instance Details page and review the Inbound Rules.
After a few moments, go onto the Instance Details page, and copy the Public IP address.
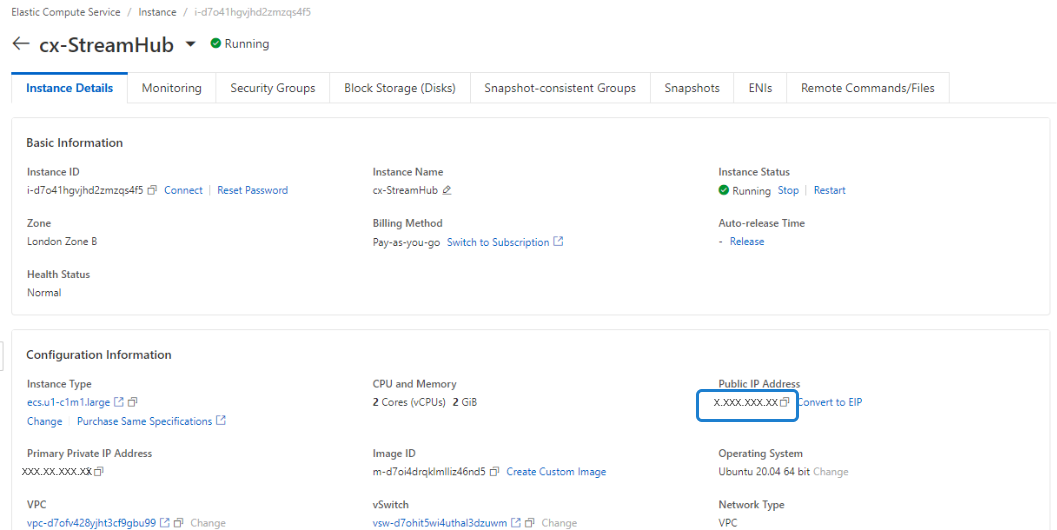
Paste the public IP address into a new browser tab. Be sure to prefix the address with HTTPS. An invalid certificate warning may appear, which you can safely ignore (consult your IT admin to arrange for a valid certificate). The login screen of your new StreamHub virtual machine appears:

Log in as admin. The default password is the InstanceID, available on the properties page (see above).
The License page appears. Before continuing to use your StreamHub server, you need to license your server. SeeLicensing Your Server.

Important
At the first start, the virtual machine runs a load test for about 10 minutes. During this time the machine has only a limited availability.
SSH access to the Console UI is only allowed via SSH public key.
Make sure you configure the security groups according to the services being used.
Obtaining the .iso installation file
The .ISO installation file can be downloaded from Haivision support portal.
Log in to the support portal (https://support.haivision.com/).
Under the Resources tab, select Download center and StreamHub & Manager ISO.
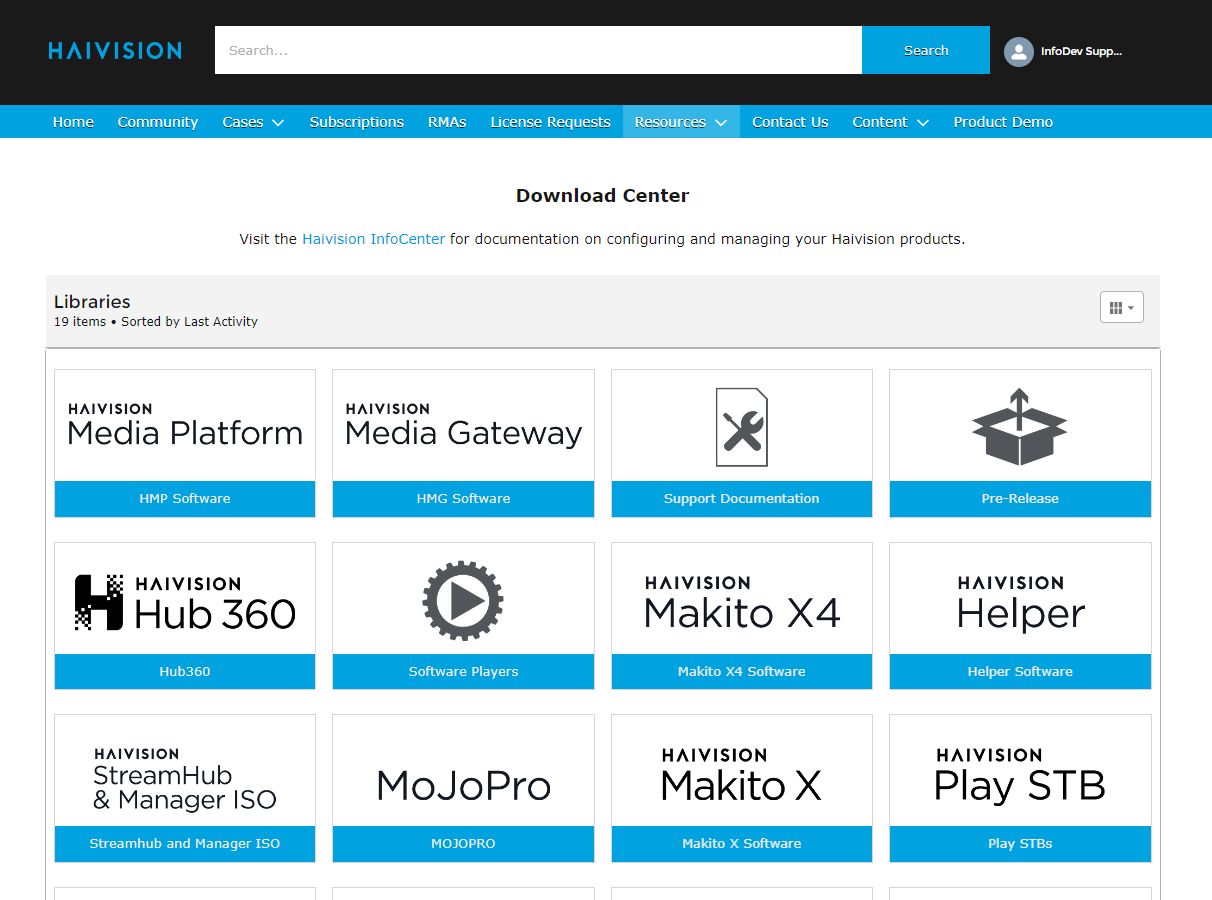
Click the ISO file to download.
Creating a virtual machine
The following steps explain how to configure a virtualized StreamHub over VMware ESXI from an ISO file.
From the VMware interface, click Create a new virtual machine and click Next.
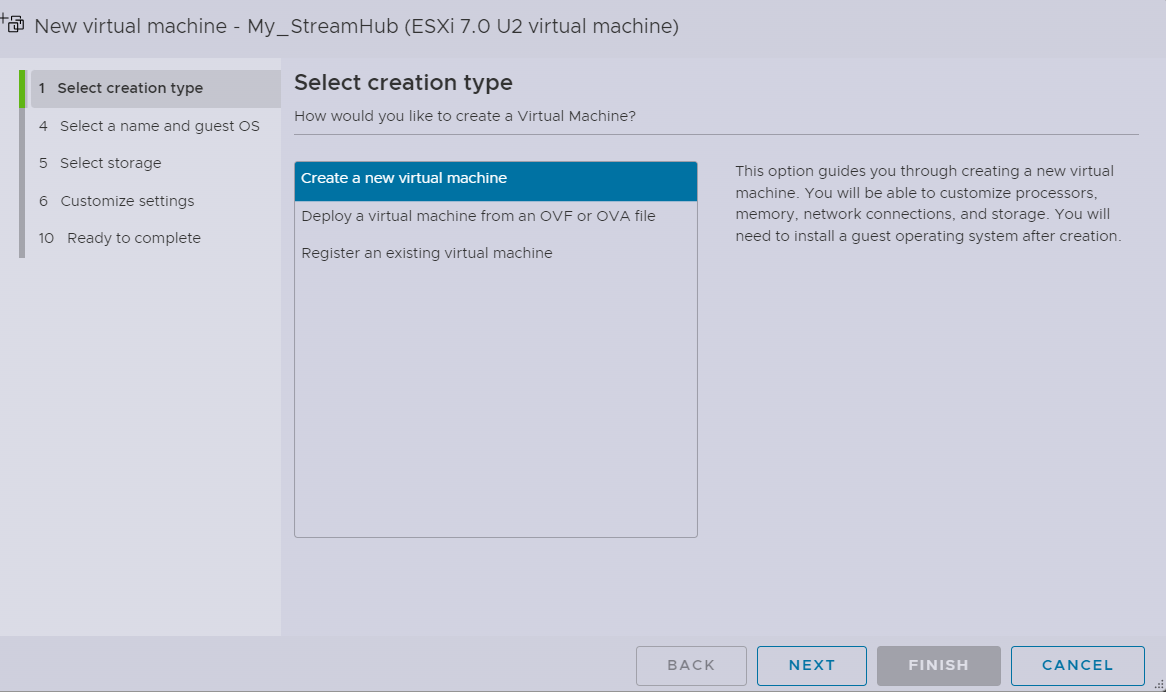
In the Name field, enter a name for your virtual server. Then click Next.
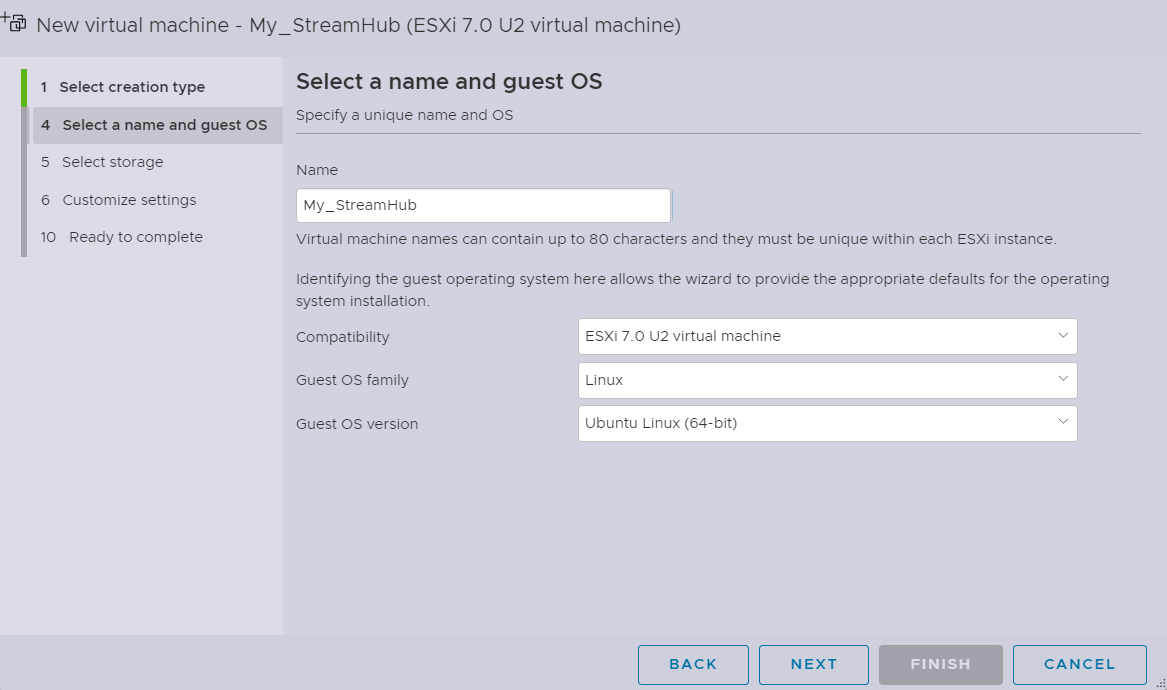
Select Standard and click Next.
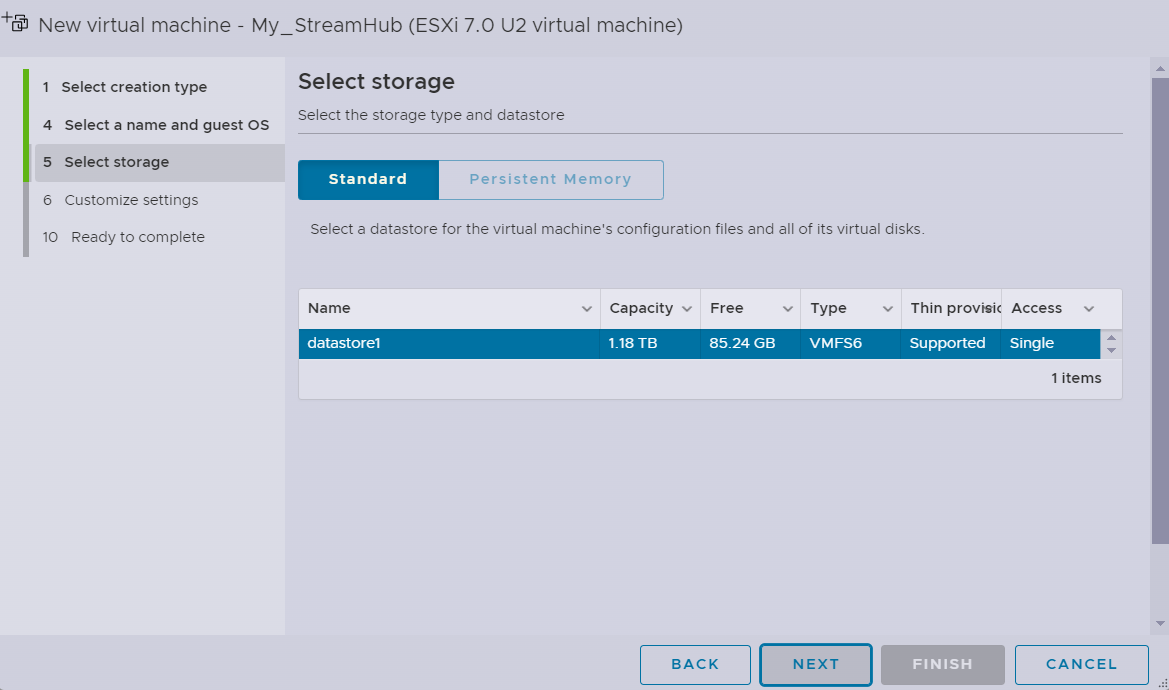
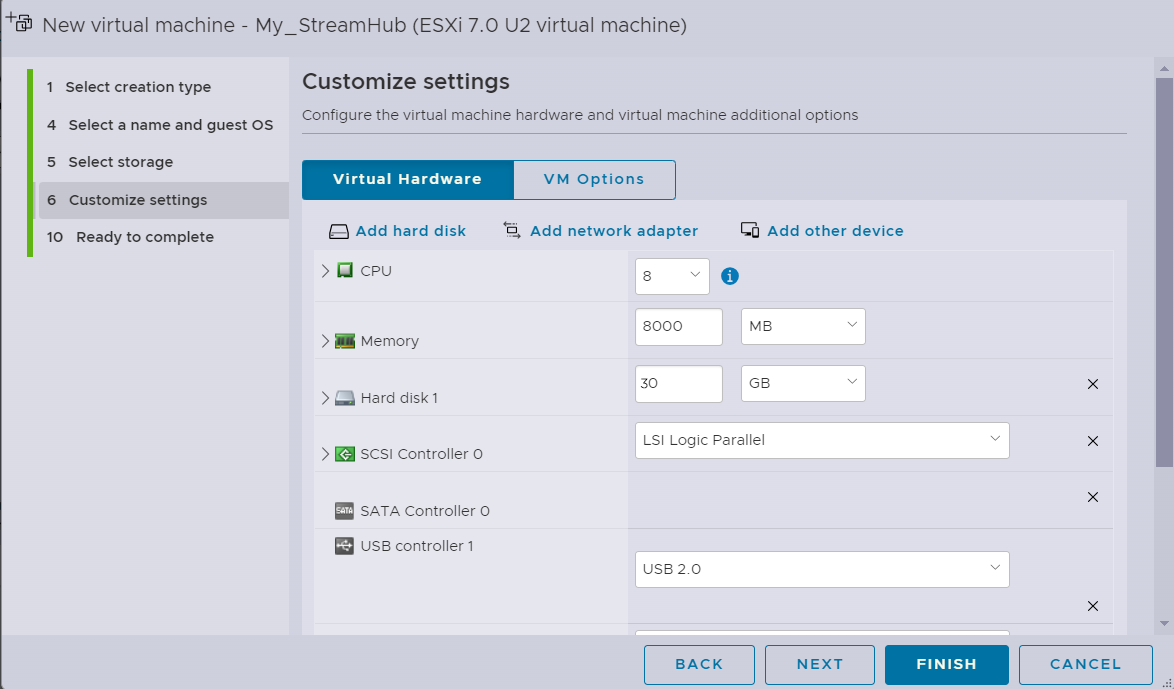
Configure a 8GB CPU and a 8000MB memory with a 30 GB Hard disk. And click Next.
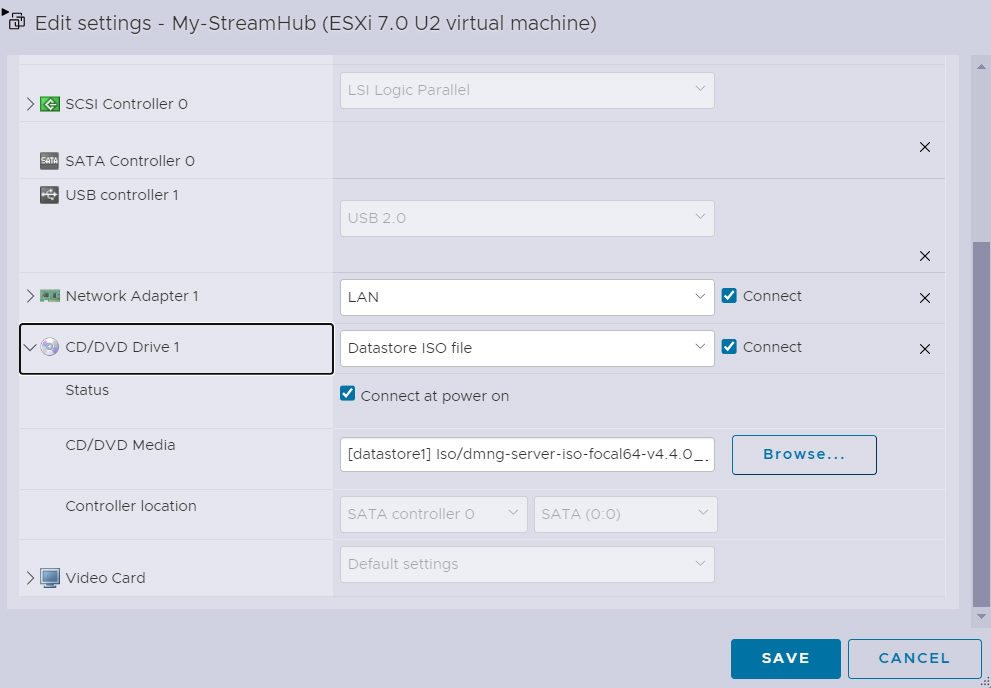
Scroll down and under CD/DVD drive1 section, select Database ISO file.
Tick the Connect at power on option and click Browse to get the .ISO file that you downloaded from the Support portal.
Click NEXT.
Your virtual machine's settings are summarized. Click FINISH to confirm.
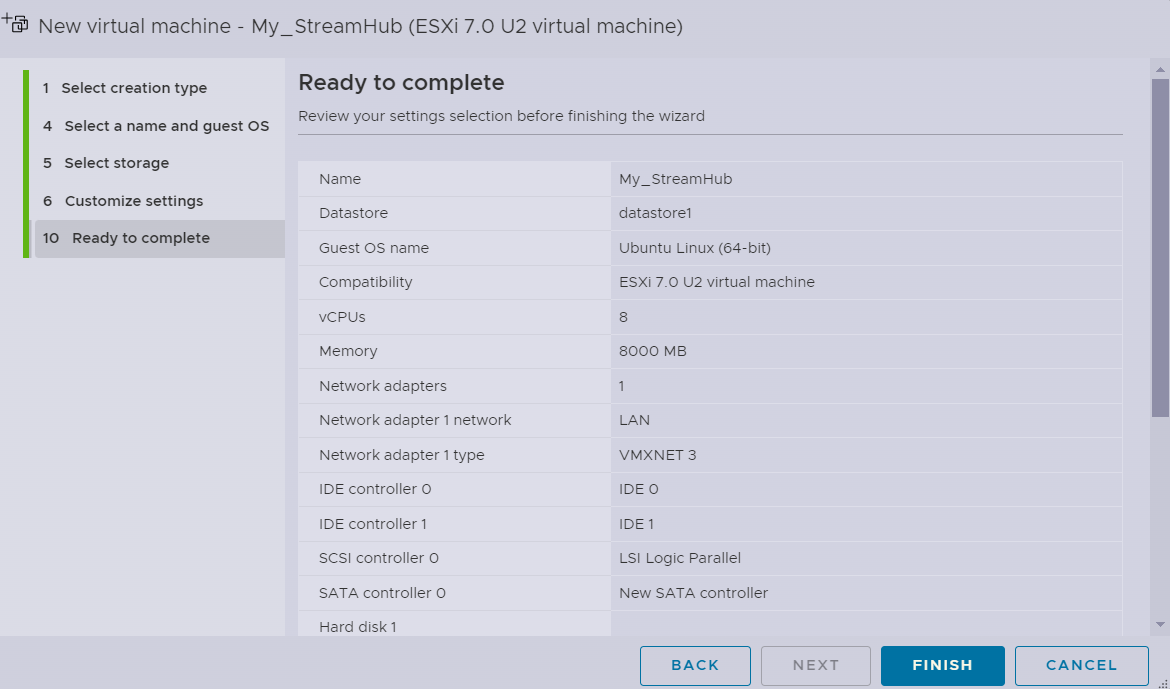
Your virtual SteamHub is now ready to be used. Click Power on.
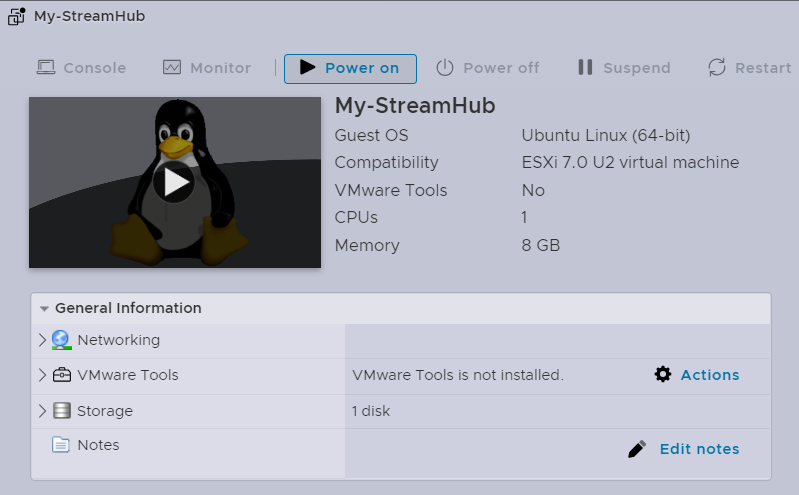
The following screen is displayed:

Click on the screen.
Place the mouse cursor somewhere on the screen and click.
Press ENTER to follow theInstalling from the ISO.
