
Recording Video

The

 Record screen is where you can record a video, save it to your device, and forward it to a connected receiver.

Record Camera Interface

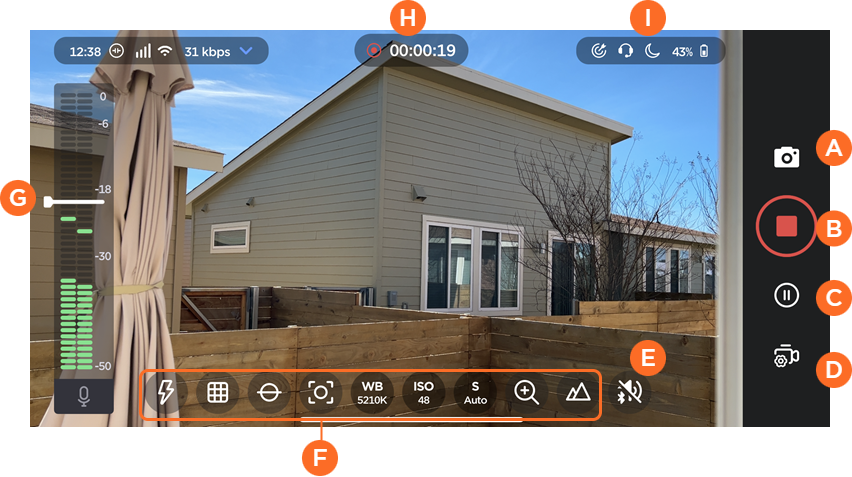
Clockwise starting from the right, the camera interface elements are:

Take a snapshot of the current camera view.

Start/stop recording.

Pause/resume recording. You can pause and resume the recording as many times as needed and after tapping the
icon, only one recording file is generated.

Select camera and audio inputs. See Video Inputs and Audio Inputs.

(Available when external audio output is connected) Enable audio capture monitoring. See Audio Monitoring.

(Varies based on settings and device) Camera settings. See Camera Settings

VU meter. Tap the scrub handle to lock the audio gain. When audio gain is locked, the scrub handle is gray and has a lock symbol.

Time elapsed since recording start.

Status icons. See Live Streaming for a list of possible icons and links to relevant topics.

Capturing Recordings

If Auto Save After Record is disabled on the Settings screen, the capture prompt opens after tapping the

icon to stop recording.

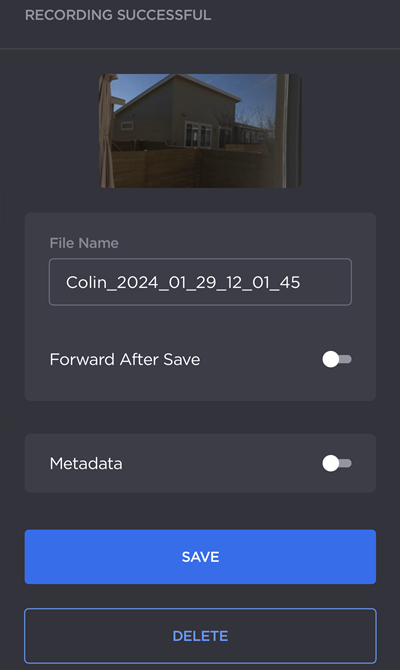
Recording Capture Prompt

From here, you can:

  • Tap the thumbnail image to preview the recording.
  • Edit the File Name of the recording.
  • Enable Forward After Save to automatically forward the recording to the connected receiver after tapping Save.
  • Enable the Metadata toggle to add Keywords and a Description. This metadata can be viewed in the saved .MOV file.
  • Tap Save to download the recording to your device.
  • Tap Delete to cancel and return to the camera interface.

JavaScript errors detected

Please note, these errors can depend on your browser setup.

If this problem persists, please contact our support.