Archive Locations
Recording in Kraken allows users to save Kraken outputs to a file on local or NFS storage. All Kraken instance types support recording including servers, small form factor appliances, virtual machines, and cloud instances.
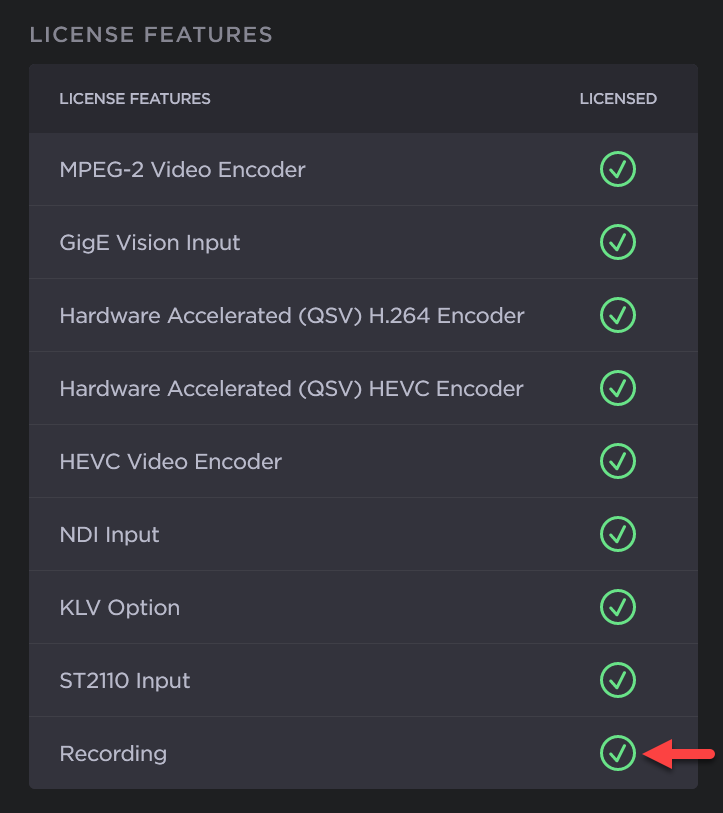
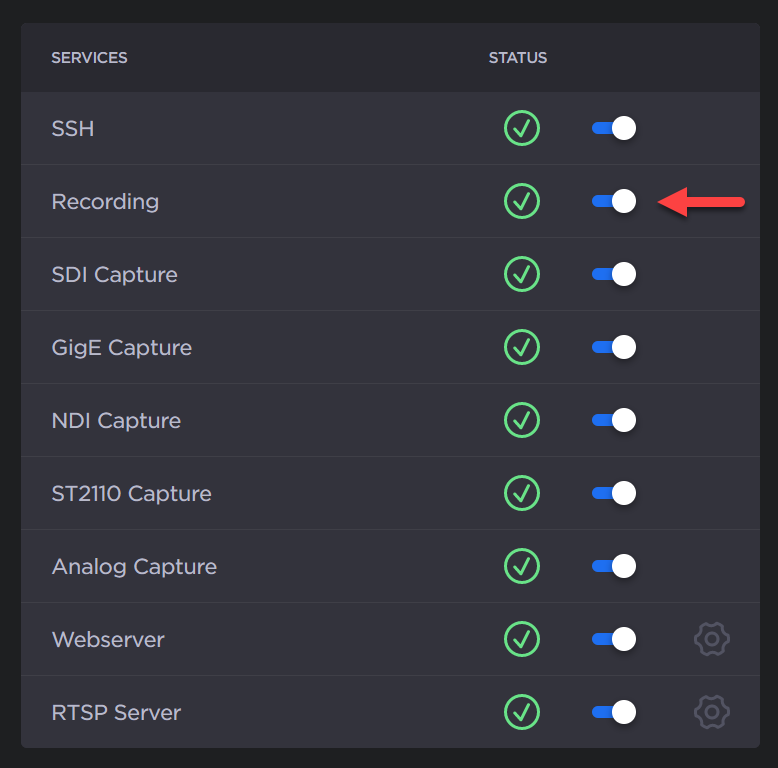
A license is required to enable the Kraken recording functionality (for more information, please contact your Haivision account representative). With a valid Kraken license including Recording, the Recording feature is shown as enabled on the Licensing page. The license enables control of the Recording Service on the Services page:
 |  |
With the Recording service active and running, Kraken streams can leverage a new output type for recording media.
Note
Recording outputs are available for Kraken Bypass streams ONLY at this time.
The new Kraken output type provides configuration parameters to define how media is written to storage. Storage is configured as an Archive Location in Kraken and is a required configuration parameter when creating a new Kraken output for recording media.
To use the Recording feature in Kraken, it is recommended to first configure an Archive Locations so that Kraken knows where it can write data.
Archive Locations
Kraken employs the concept of archive locations to isolate the management and lifecycle of storage from the act of processing and recording media. This separation of "write" operations from "storage" management provides flexibility in adapting to local or remote storage locations which impose requirements for authentication, active connection, throughput limits, etc. as Kraken evolves.
This allows users to separate recordings into distinct Archive Locations to keep recordings logically and physically separate from each other, as well as from other data.
To use the recording feature in Kraken, one or more Archive Locations must be configured.
Archive Location Types
Kraken supports storage of media both locally within a Kraken instance, or remotely by access on an IP network.
Kraken (Local) Recording
Local storage size in a Kraken instance varies by instance type and is configured as a "Local" Archive Location. This local location is in the /assets directory on the Kraken instance.
Kraken Instance Type | Storage |
|---|---|
Kraken SFF | ~180GB |
Kraken Premium | ~930GB |
Kraken Ultra | ~930GB |
Kraken Virtual Machines | ~10GB* |
*Note: By default, Kraken Virtual machines have a 10GB disk created and mounted to the /assets path. This virtual disk can be right-sized by the Kraken administrator and re mounted to the /assets as the use-case demands.
Network (NFS) Recording
Use of Network storage as an Archive Location requires the network devices or capability to be accessible by the Kraken instance. The types of Network storage that Kraken can configure as an Archive Location include:
Network File Share (NFS)
Additional Network storage locations are expected to be included in time.
Configuring Archive Locations
Available Fields for Archive Locations within the Administrative section:
Field Name | Applies To | Description |
|---|---|---|
Name | All | The Name for the Kraken Archive Location. Used when configuring a Kraken Output for recording with an Archive Location. |
Location | All | The type of Archive Location. Available locations include:
|
Auto Connect | All | Selecting Auto Connect will have Kraken automatically re-establish the connection between Kraken and the Archive Location after restart or service interruption. |
Remote Host | NFS | The IP or hostname of the Network File System (NFS) host. |
Remote Path | NFS | The configured path on the remote NFS server accessible by Kraken. |
Creating a new Archive Location
From the Archive Locations tab (located in Settings), click the Add Archive Location button:
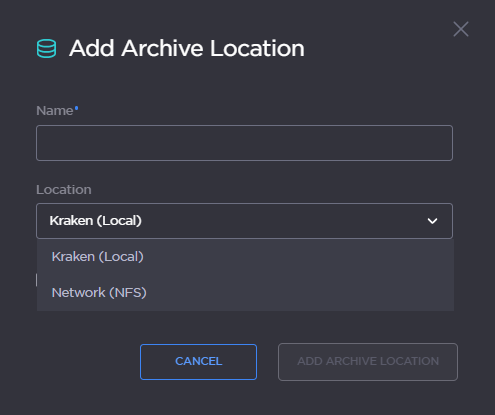
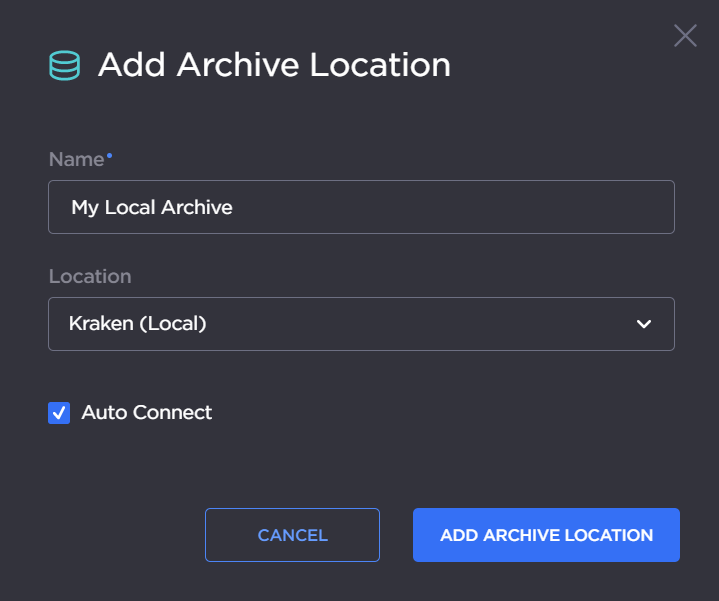
In the Add Archive Location panel, provide a Name for your new archive location.
Click the Auto Connect checkbox.
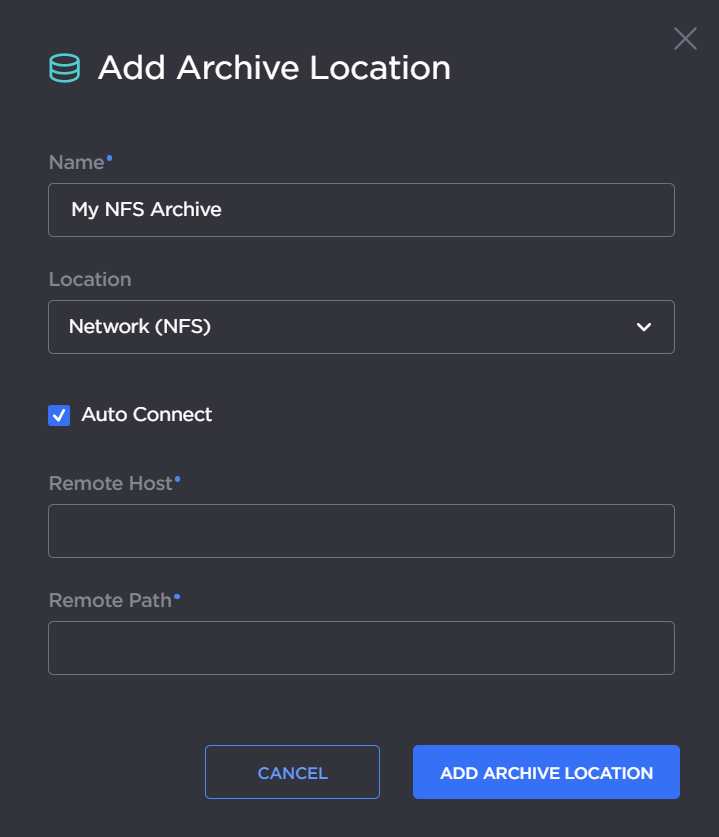
Choose the type of storage location from the Location menu.
For NFS storage, you must also specify the IP address of the Remote Host and the Remote Path to the appropriate storage directory:
Local Archive Location |
Network Archive Location |
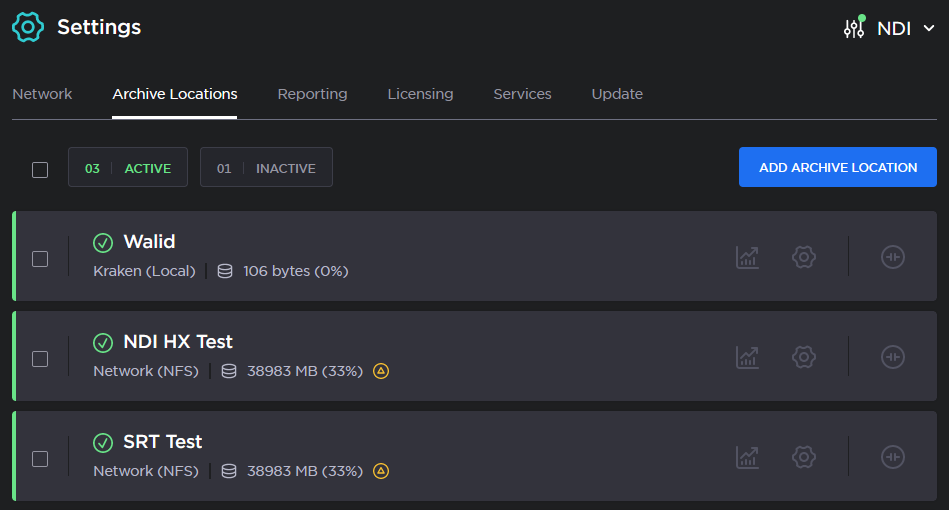
Click the Add Archive Location button. The new entry will appear in the list of available Archive Locations:

To connect the newly created Archive Location, click the Settings icon
 to display its details:
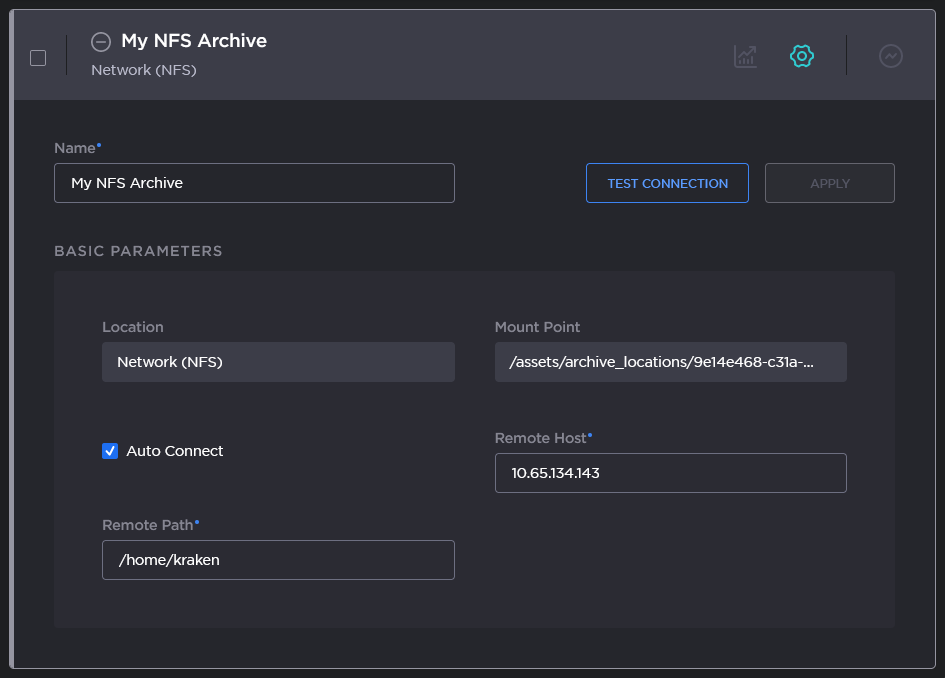
When the Archive Location is added, Kraken will create a new folder with the UUID of the Archive Location used as the name. The Mount Point field contains the UUID of this Archive Location as part of the path where recordings are stored.Click Test Connection to make sure the configured storage location is accessible.
You should receive a pop-up notification confirming that the test was successful.Click the Connect icon
 to connect the Kraken to the specified storage.|
The status icon on the archive location panel will change to Connected .
. Click the Statistics icon
 to view the State of the connection, as well as the Status information.
Kraken's State should show as Connected, and the estimates of the used/available disk space should be displayed (you may need to refresh to update the display of this information). 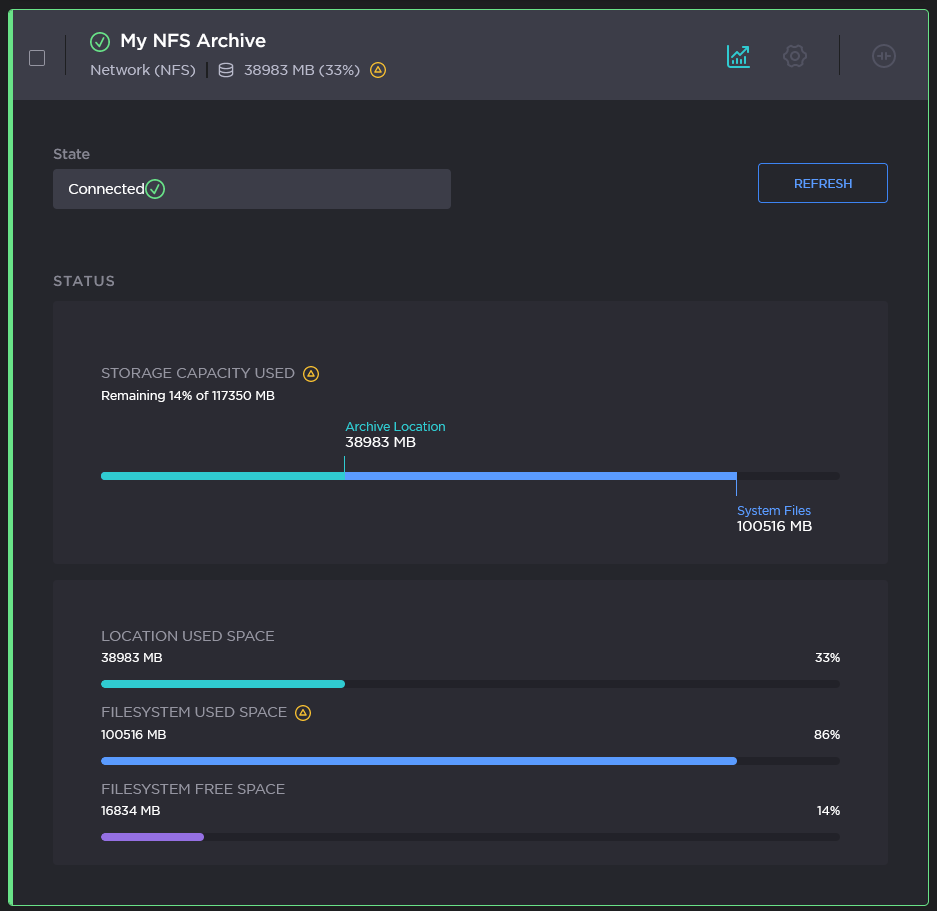
Note
The etc/exports file on your NFS storage must be configured to allow the Kraken to connect with proper permissions, and the etc/fstab file must be configured to allow remote clients (like Kraken) to auto-connect to your NFS server.
Configuring an Output for Recording
Note
An existing Archive Location is required in order to create a Kraken output capable of recording.
Click Streaming on the sidebar, and select the Outputs tab.
On the Outputs page, click Add Output.
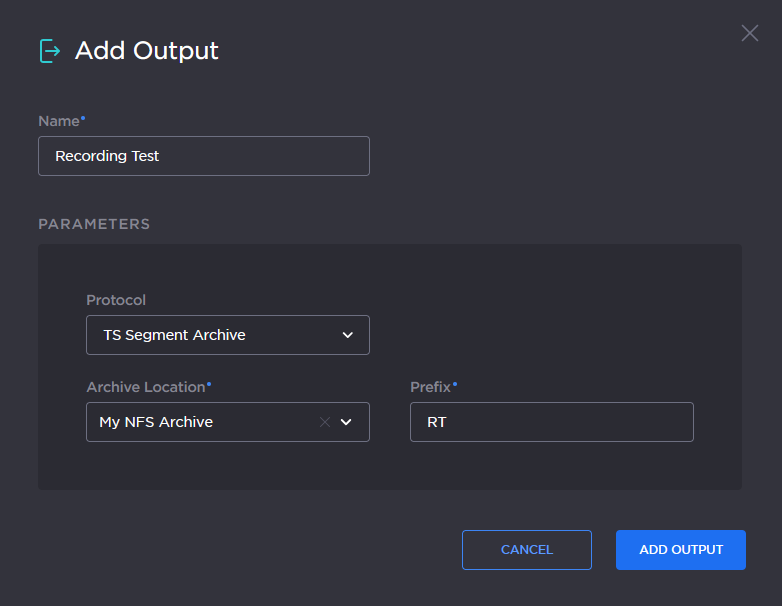
On the New Output page, provide a Name for your output (this will appear in the list on the main Outputs page).
From the Protocol menu, choose TS Segment Archive.
Specify an Archive Location.
Enter a Prefix (this will appear in the file name of any recordings produced using this output configuration).
Click Add Output. The new output configuration now appears in the list on the Outputs page.
Recording a Stream
To make a recording of an output stream, do the following:
On the Streams page, click Add Stream.
On then Add Stream page, configure a stream as follows:
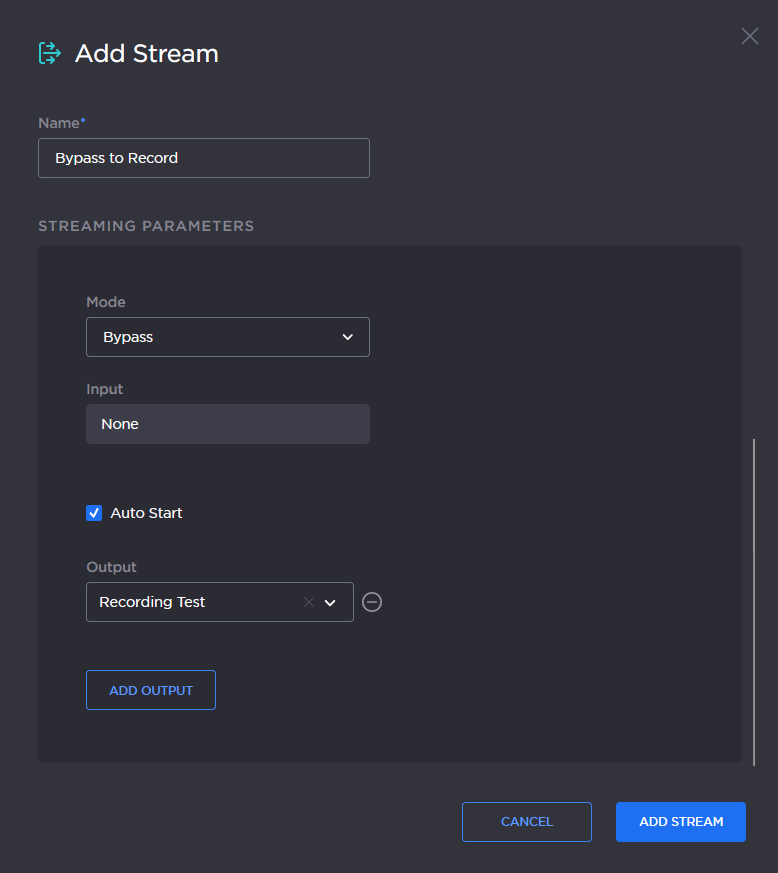
Provide a Name for the stream.
Choose Bypass from the Mode menu.
Choose a streaming source from the Input menu.
Choose an Archive Location from the Output menu. Note that you can add additional outputs, including additional recordings.
Enable Auto Start if you want the stream to resume after a restart or other service interruption.
Click Add Stream.
When ready to begin recording, click the Play icon
 . To stop a recording, you must stop the stream.
Note
The recording feature only supports the creation of a single .ts file at a time. You must start and stop the stream manually to record the desired content. Duration is limited to the available free space at the archive location. A warning will appear in the list on the Archive Locations page under Used Space when you are running out of disk space.
Viewing a Recording
When Kraken records streaming output to an archive location, it creates a folder corresponding to the UUID of the output, and then writes the stream to a .ts (transport stream) file that has a filename composed of the Output prefix, the date, and a unique sequence number. To view a recording, do the following:
Find the UUID of your Output by viewing its details from the Outputs page. The UUID is displayed in the Archive parameter:

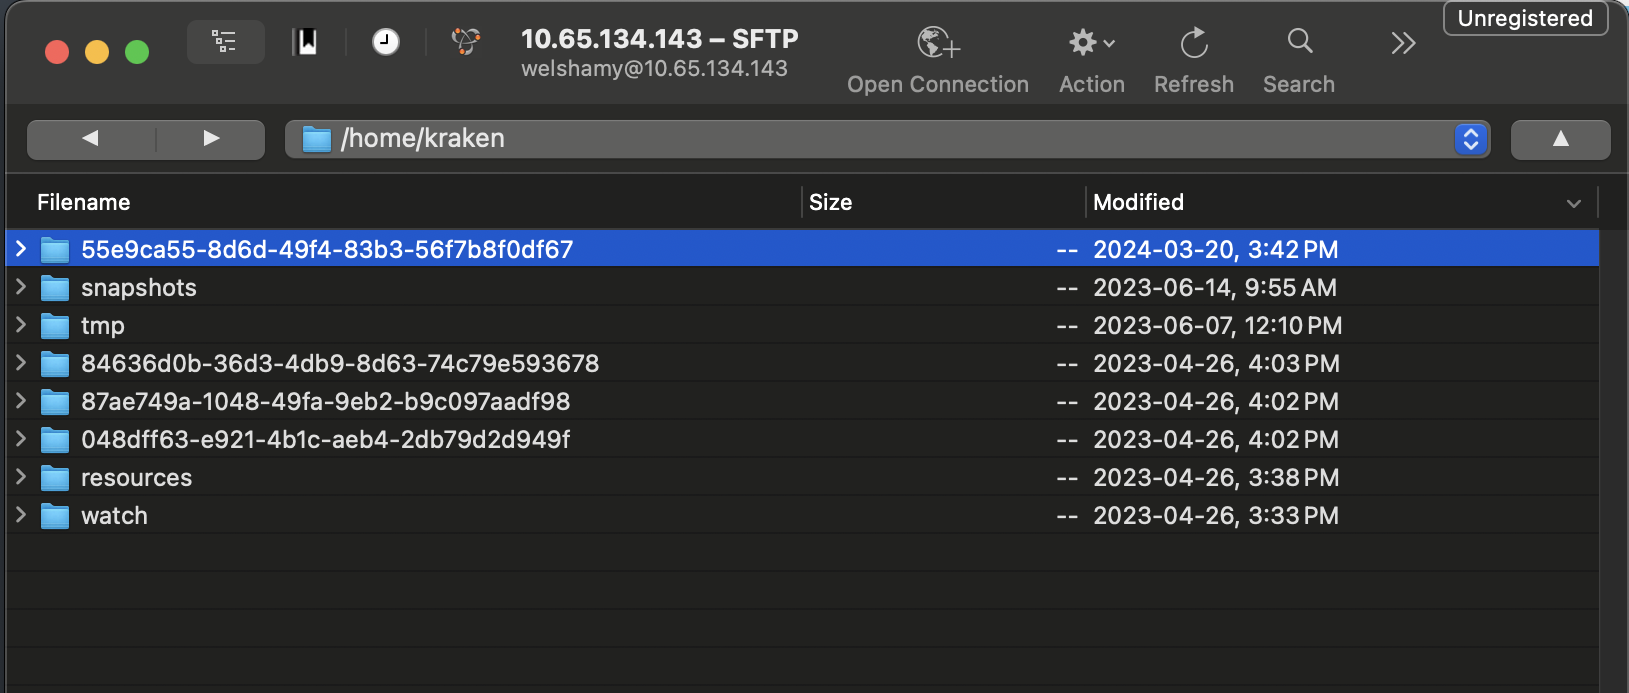
With an SFTP client, log into the Kraken using root credentials, or go to the
/home/krakendirectory on your NFS server.Locate the folder corresponding to the Output UUID:
Open the folder, then download the
.tsfile corresponding to your recording: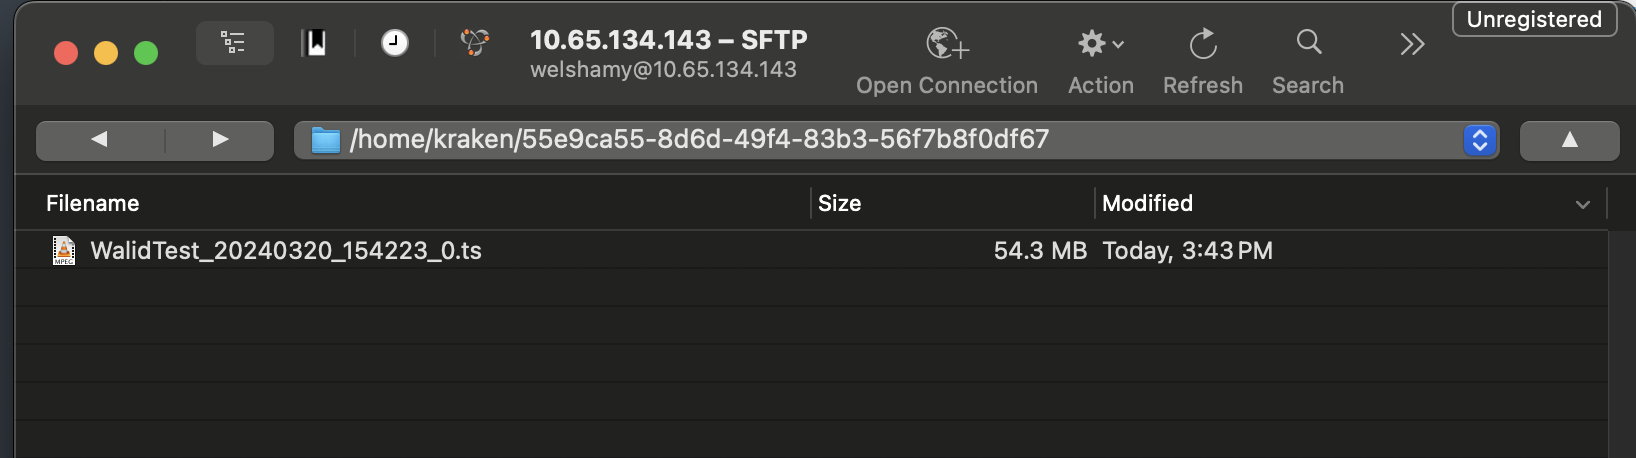
Use VLC or another media player to view the recording.
Related Topics: