Backing Up and Restoring HMP
From the Backup/Restore pane, you can back up your Haivision Media Platform system configuration and permission information, either to a network storage location or your local server. The backup includes the local configuration, such as sources and sessions (but not LDAP user information).
From the Backup/Restore pane, you can schedule backups, configure the backup rotation, password-protect backups, view a list of backups, and restore backups. You can also download backup files and upload previously downloaded files.
Important
Backups are only supported within the same version of HMP. For example, backups created within HMP 3.6 are not supported after upgrading to HMP 3.7.
Changes to the number of backups to keep or the password, apply to immediate backups (Backup Now), but are not saved until you click Save Settings. When you refresh the page, restore a backup, or navigate away from the page, these changes are lost.
Tip
To back up files onto a Network File System (NFS) storage server, ensure NFS is set to On and configured. See Managing Network Storage. Otherwise, backups are written to the local server.
To configure and schedule backups:
Click the
 icon and select Administration from the navigation drop-down menu.
Click System Settings on the toolbar and then click Backup/Restore on the sidebar.
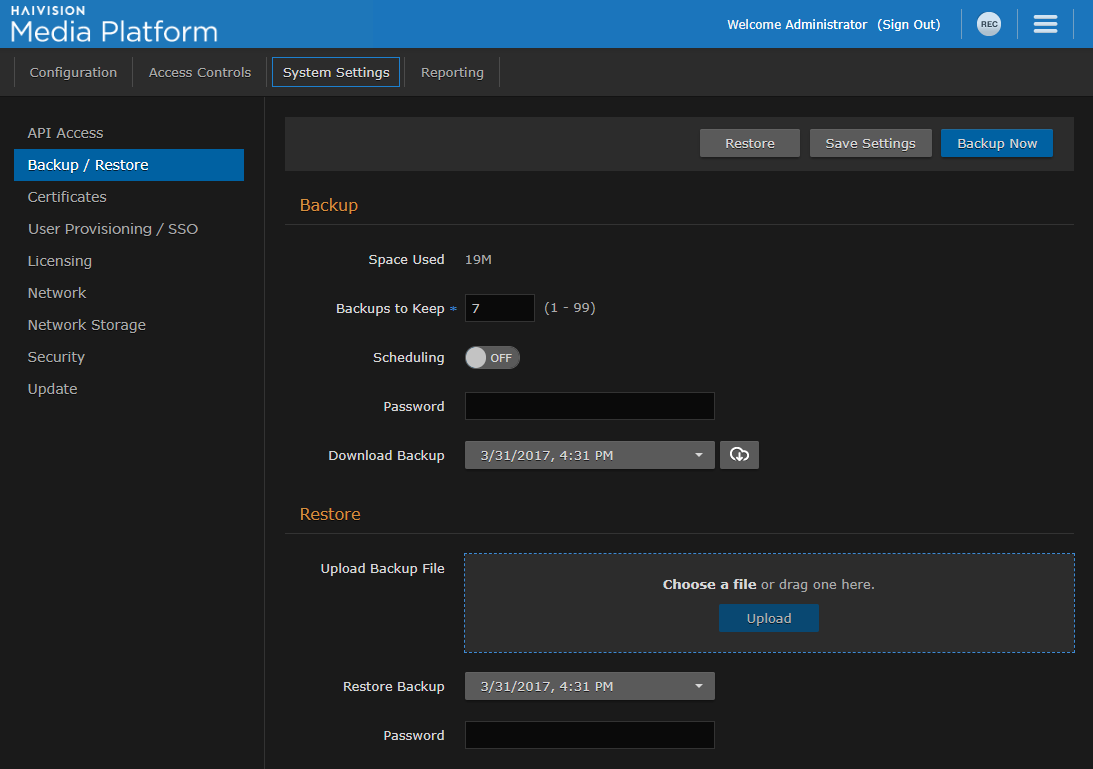
The Backup/Restore pane opens, as shown in the following example.
Backup and Restore Pane
To configure the backup rotation (and manage your backup storage media), enter the number of backups to keep, from 1 to 99 (default is 7).
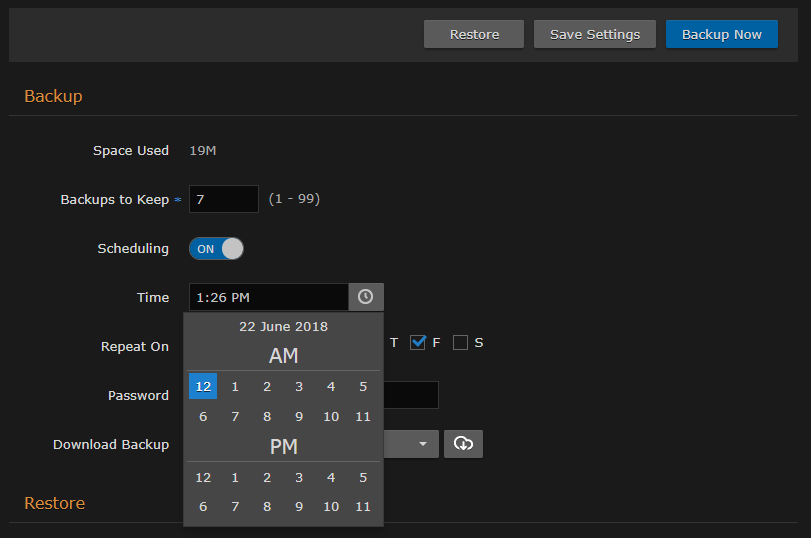
To schedule a backup, toggle the Scheduling button to On and select the start time.

Backup Scheduling Button
To schedule recurring backups, check the checkbox next to the days on which to repeat the backup.

Recurring Backup Options
To password-protect the generated backup .zip file, enter a passphrase in the Password field. This password is required to restore the backup.
Important
If you lose your backup password, that backup file cannot be restored.
Click Save Settings.
