Operating Your Set-Top Box
After the Haivision Play Set-Top Box is configured, you can begin browsing and viewing available content.
Note
The set-top box must be part of an HMP domain to receive guide data (as described in Connecting the Set-Top Box to your HMP Server).
Powering On the STB
To turn on the set-top box:
If necessary, turn on the connected TV or monitor.
Press the Power button on the STB remote control.
If connected to an HMP server and the default channel is configured, the set-top box tunes to the default channel and begins playing audio and video; Otherwise, it shows the VOD Library.
If configured for Stand Alone mode, the Stream URL screen appears. See Using the STB in Stand Alone Mode for more details.
Note
If provisioning fails, contact your local service provider or help desk.
LED Status Indicators
The front of your STB includes three LEDs:
Pwr — Power. Lights solidly when the STB is powered on. Flashes while the firmware is updating.
Err — Error. When an error occurs, flashes to indicate which error.
Note
If the Error LED flashes, please contact Haivision Technical Support and report the number of times the LED flashes.
Bsy — Busy. Flashes when there is file system activity
Using the Program Guide
When connected to an HMP server, to view the program guide, press the EPG button on the remote control. A sample program guide is shown below:
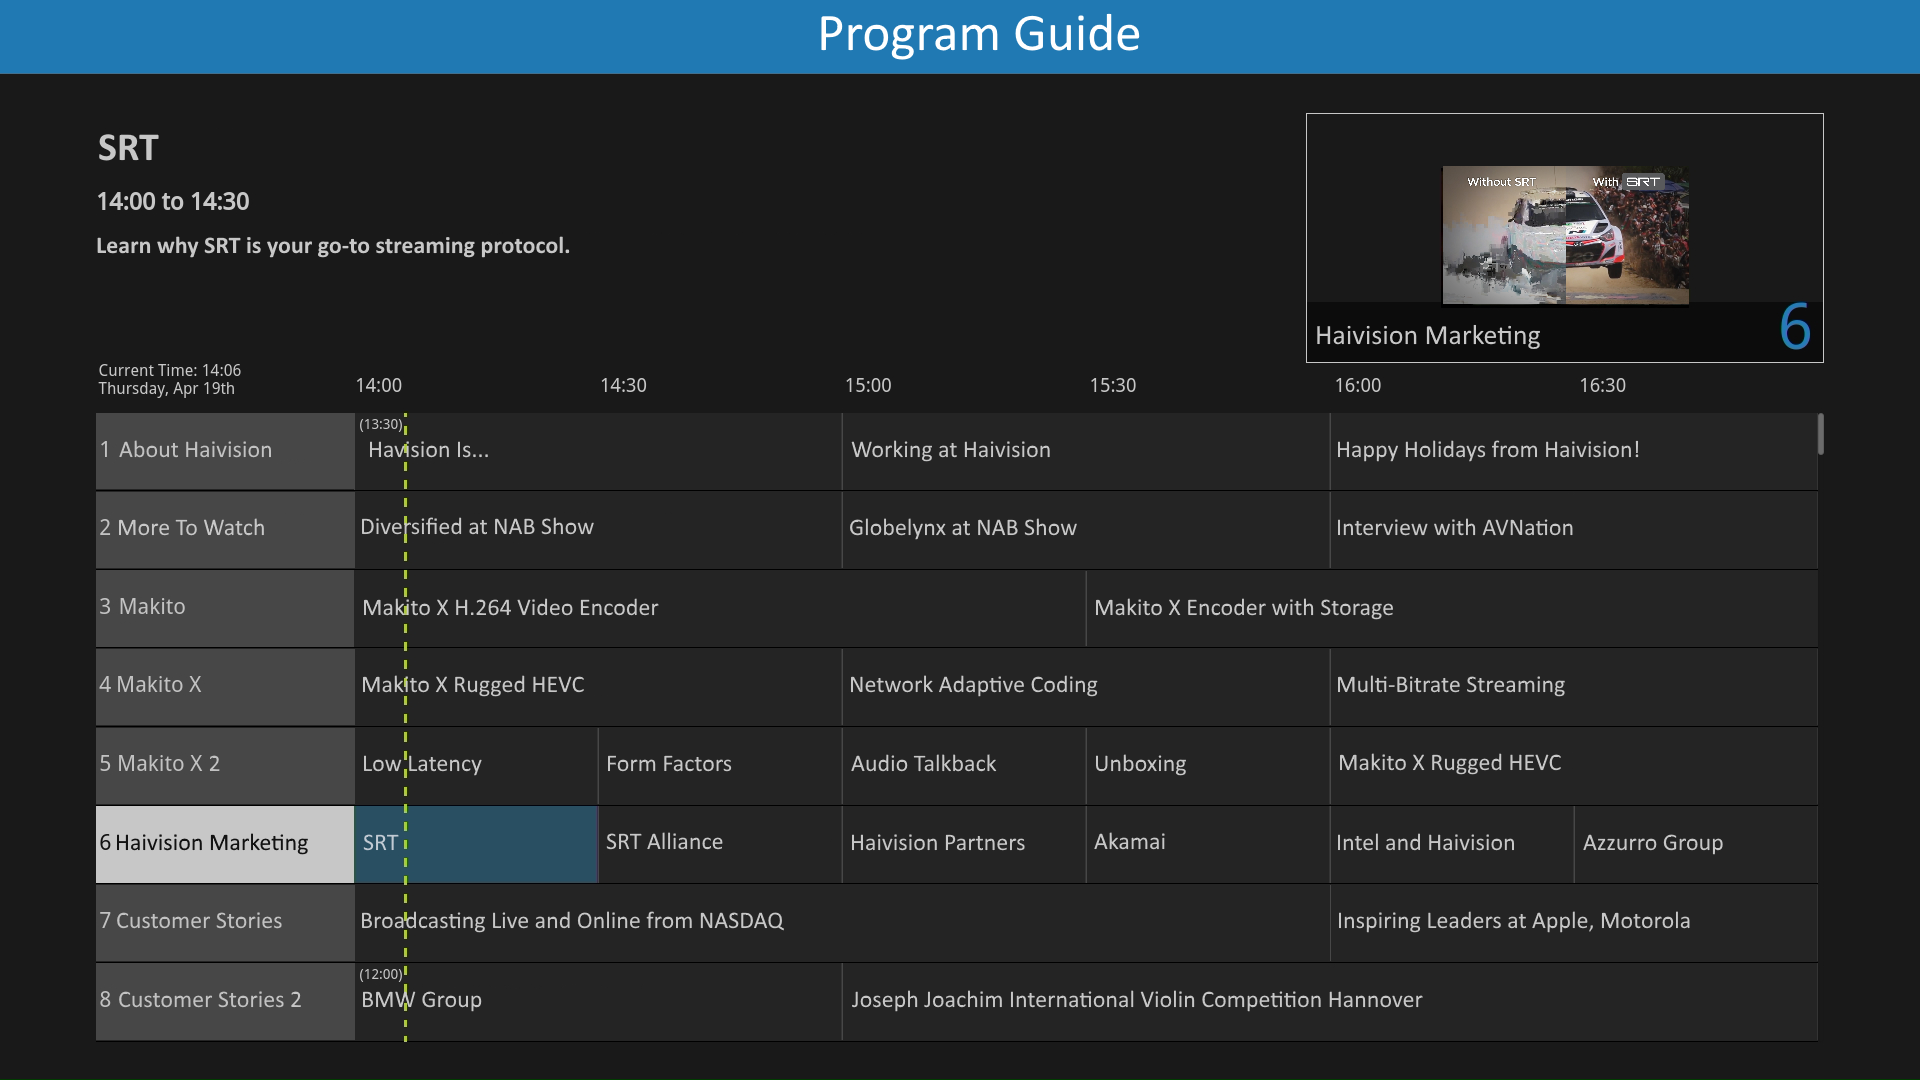
The EPG shows program information in the top left of the screen, as well as a preview video thumbnail in the top right.
The current time is indicated by a dashed line through the program guide.
Navigate programs and channels in the program guide using the arrow buttons or channel up/down buttons.
To change channels from the program guide:
Press the arrow buttons or channel up/down buttons to page up/down the EPG to highlight the desired channel/program to tune to.
Press the OK button.
Changing Channels
To change channels:
Press the channel up/down buttons.
Type in a channel number using the remote control keypad and press the OK button.
When viewing the EPG, navigate to the desired channel using the arrow buttons and press the OK button.
As you change channels, the channel number appears briefly on the screen.
Adjusting the Volume Level
When you press any of the volume controls (![]() , +, or –) on the remote control, a volume indicator appears at the side of the screen as shown below.
, +, or –) on the remote control, a volume indicator appears at the side of the screen as shown below.

Displaying Closed Captions
Press the CC button on the remote control to show/hide closed captioned text. For multi-track closed captioning, press the Up or Down arrows to select the desired track on the CC menu that appears.
Viewing Program Information
You can display program information (i.e., text entered in the video's metadata description field) when viewing video by pressing the i button on the remote control. The information band appears along the bottom of the display.
Viewing the Library
The content of the Library is based on the HMP Feeds, which may include videos, sources, or sessions. (Content not added to HMP Feeds is not viewable from the STB.) When connected to an HMP server, to view the Library:
Press the VOD button on the remote control.
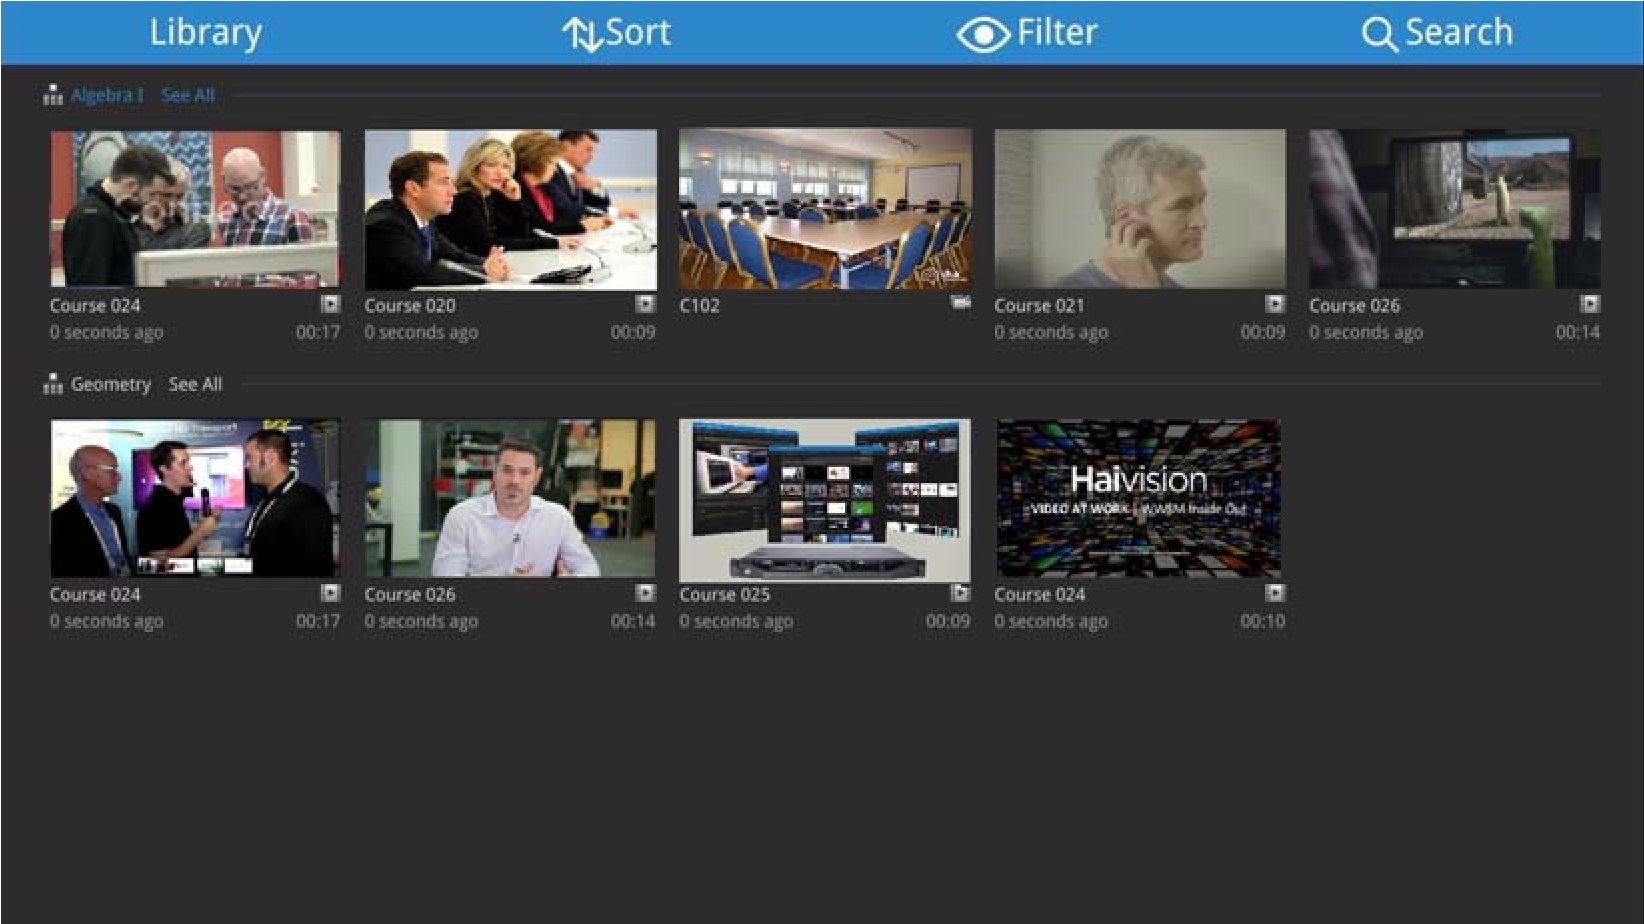
Video On Demand Library
Use the arrow buttons on the remote control to navigate through the videos.
Press OK to tune to the currently selected video.
To exit the Library, press the EPG button.
Switching Video Tracks
To access additional video tracks:
While viewing a video with multiple video tracks, press the Up or Down arrows on the remote control. Thumbnails of additional tracks appear on the lower half of the screen.
Navigate to the video track you wish to change to by pressing the Left or Right arrows on the remote control.
Press the OK button.
Switching Audio Tracks
To access additional audio tracks:
While viewing a video with multiple audio tracks, press the Audio button. A list of available audio tracks are shown.
Navigate to the audio track you wish to change to by pressing the Up or Down arrows on the remote control.
Press the OK button.