Powering Up the Encoder
Once all the cables are in place, the encoder is ready to be powered up.
Caution
To prevent damage to the Makito X and/or power supply, be sure to connect the power supply to the chassis first and then to the AC source.
Always use the AC power cord and power supply provided with the unit. The single and dual-height chassis have different power supply units and chassis connectors.
Important
There is no power switch on the Makito X appliance. The power is automatically on when the unit is plugged in. When using the AC/DC power adapter, the power supply cord is used as the main disconnect device. Ensure that the AC socket outlet is located near the equipment and is easily accessible.
To power up the Single-Height or Double-Height Chassis:
Insert the 3-pin connector on the 12V power supply into the Power input jack at the rear of the Makito X.
Connect the power cord to the power supply and plug the cord into a grounded AC power source.
The status LED will start blinking green, indicating that the encoder is booting up.Wait until the Status LED stays solid green, indicating that the encoder is ready for operation.
Single-Height Chassis
Rear View (Makito X SDI, #S/B-292E-HDSDI2) showing Conxall 3-pin Locking Connector
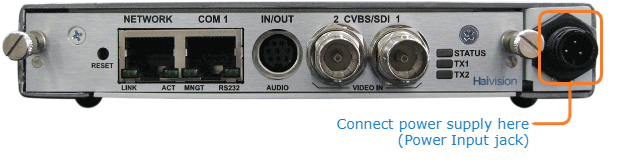
SDI Power Input
Power Adapter 12VDC with Conxall 3-pin Connector

Dual-Height Chassis
Rear View (Makito X HEVC Encoder #S-292E-SDI2-HEVC)
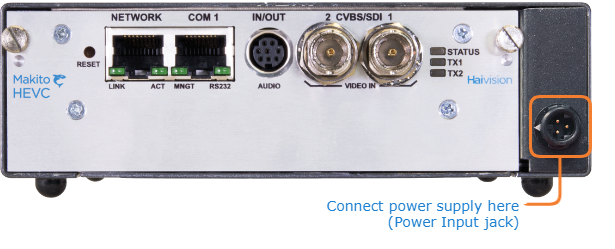
Dual-height Power Input
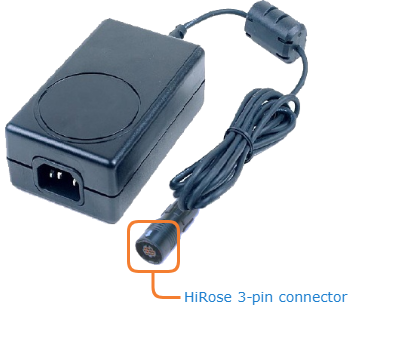
Power Adapter 12VDC with HiRose 3-pin Connector
Related Topics