
Recording Video

The

 Record screen is where you can record a video, save it to your device, and forward it to a connected receiver.

Record Camera Interface

Clockwise starting from the start/stop icon, the camera interface elements are:

Start/stop recording.

Pause/resume recording. You can pause and resume the recording as many times as needed and after tapping the 
icon, only one recording file is generated.

Change the camera input. See Video Inputs.

(Varies based on settings and device) Camera settings. See Camera Settings.

Change the audio input. See Audio Inputs.

VU meter. If Configurable Audio Gain is enabled from the Settings screen, the scrub handle can be dragged to increase or decrease the level of audio gain. Tap the scrub handle to lock it in place.

Time elapsed since recording start.

Status icons. See Status Icons for possible icons and links to relevant topics.

Additional camera settings. Includes Lock Screen, Video Return, Tilt & Grid Overlays, and Flash.

Take a snapshot of the current camera view.

Capturing Recordings

If Auto Save After Record is disabled on the Settings screen, the capture prompt opens after tapping the

icon to stop recording.

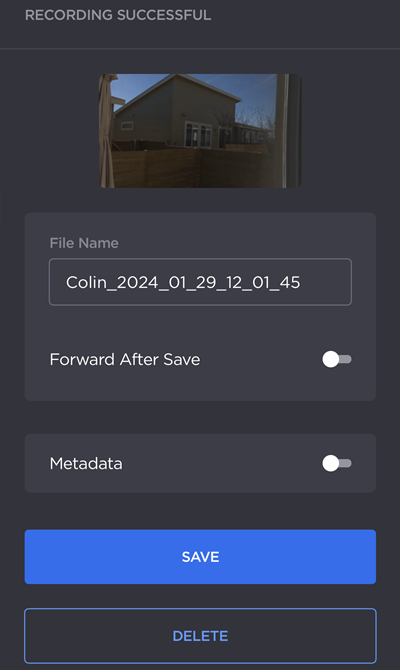
Recording Capture Prompt

From here, you can:

  • Tap the thumbnail image to preview the recording.
  • Edit the File Name of the recording.

    Note

    The file name must contain only valid characters. Letters (a-z and A-Z), numbers (0-9), and the following special characters are allowed: . _ -

  • Enable Forward After Save to automatically forward the recording to the connected receiver after tapping Save.
  • Enable the Metadata toggle to add Keywords and a Description. This metadata can be viewed in the saved .MOV file.
  • Tap Save to download the recording to your device.
  • Tap Delete to cancel and return to the camera interface.
JavaScript errors detected

Please note, these errors can depend on your browser setup.

If this problem persists, please contact our support.