Configuring Network Settings
From the Network Configuration page, you can modify Kraken's network interface settings, including configuring the unit with a valid IP address and gateway to work in your environment. You can configure the network to use either IPv4 addressing, IPv6 addressing, or both. The default is IPv4.
Note
Network settings are not configurable through the Web Interface on sofware-only/cloud-based Kraken instances. The Network Settings page is only available for Kraken appliances.
From the Network Configuration page, you can modify the Kraken network interface settings. This includes general settings, such as specifying the server hostname and DNS servers, as well as advanced settings, such as setting up multiple network interfaces, link negotiation settings, and static routes.
The Network Configuration page shows the number of the available Network Interface Cards (NICs) depending on whether you have the High Density or Standard Density Kraken appliance. If available, you can configure additional NICs. Kraken can be configured to input streams from and/or send streams out on any of the available NICs.
Caution
When you make changes to the Network Settings, be sure to write down the new IP Address or label the chassis. After you save your changes and reboot, you will have to redirect the browser to the new IP address and log in again in order to access the appliance.
If you are connecting to the encoder through an IPv4 connection, disabling the IPv4 interface will drop your connection after a reboot. You will need to reconnect using IPv6 or the serial interface (if available).
To view and configure the Network Settings:
Click Settings on the sidebar, and select the Network tab.
The Network Configuration page opens, as shown in the following example.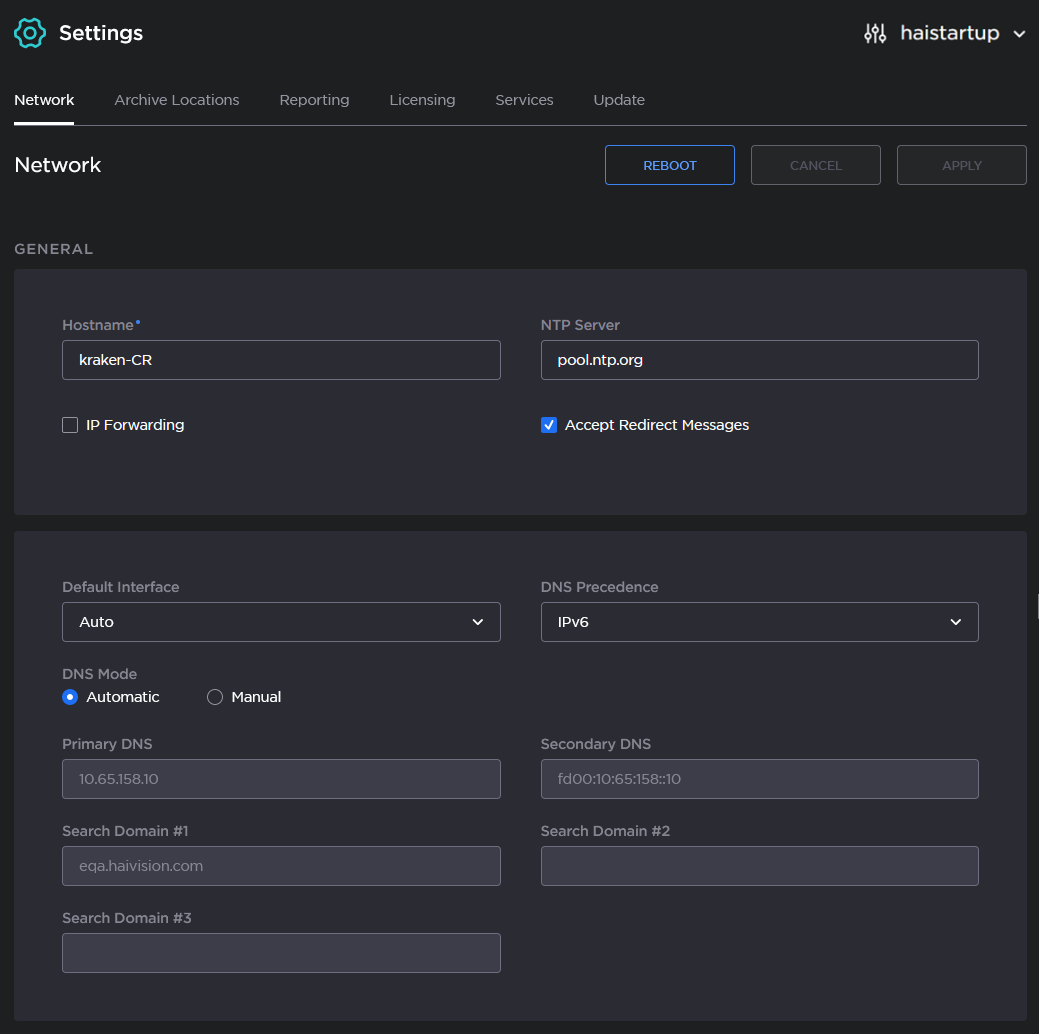
Fill in the General section. For details, see Network Settings.
Select the Default Interface, and the DNS Precedence (IPv4 or IPv6) to specify the priority DNS resolution.
Important
When upgrading to 4.0, existing Kraken systems that have multiple networks configured may induce a scenario where multiple default routes are enabled.
Multicast Streaming may be impacted for Kraken Inputs and Kraken Outputs.
It is recommended to specify a Default Interface before upgrading to ensure expected streaming behavior in these multi-network deployments.
It is recommended to confirm network configuration settings following updating to Kraken 4.0.
On new installations of Kraken, the primary NIC will be set as the default automatically.
Select the DNS Mode. If Manual was selected, fill in the additional DNS settings.
To enable SNMP alerts, toggle SNMP on and specify the read-only community string and trap server(s).
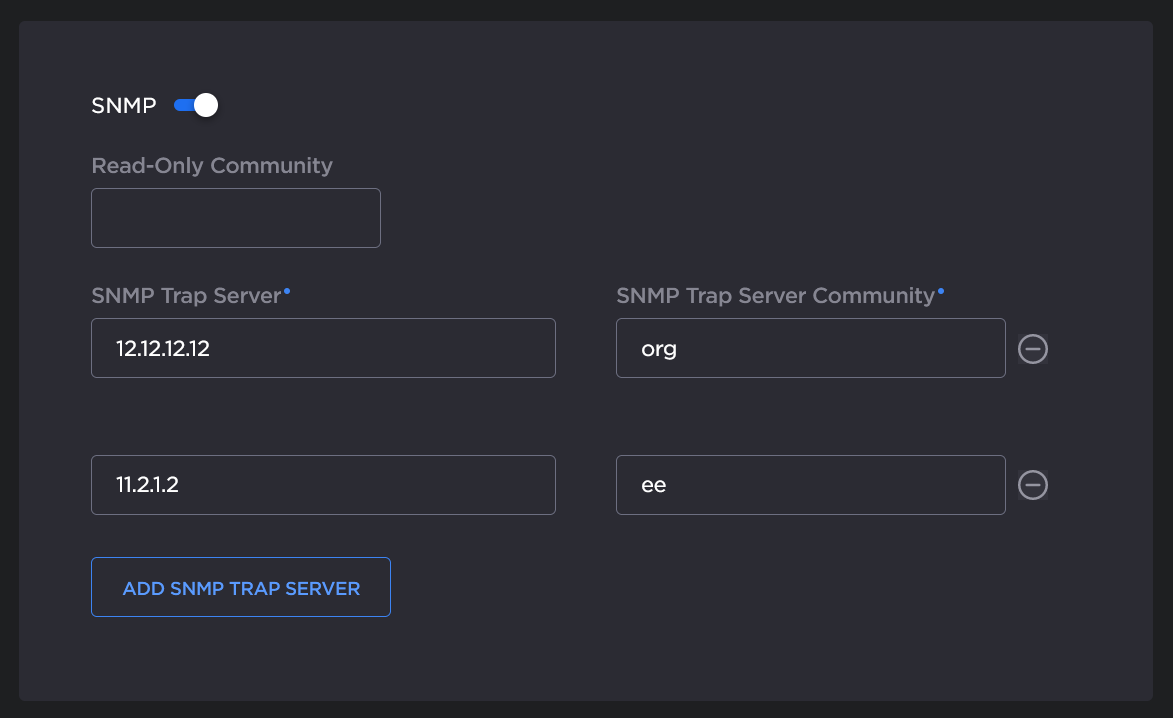
Click Add SNMP Trap Server to add additional SNMP trap servers.
Click the
 icon to remove existing SNMP trap servers.
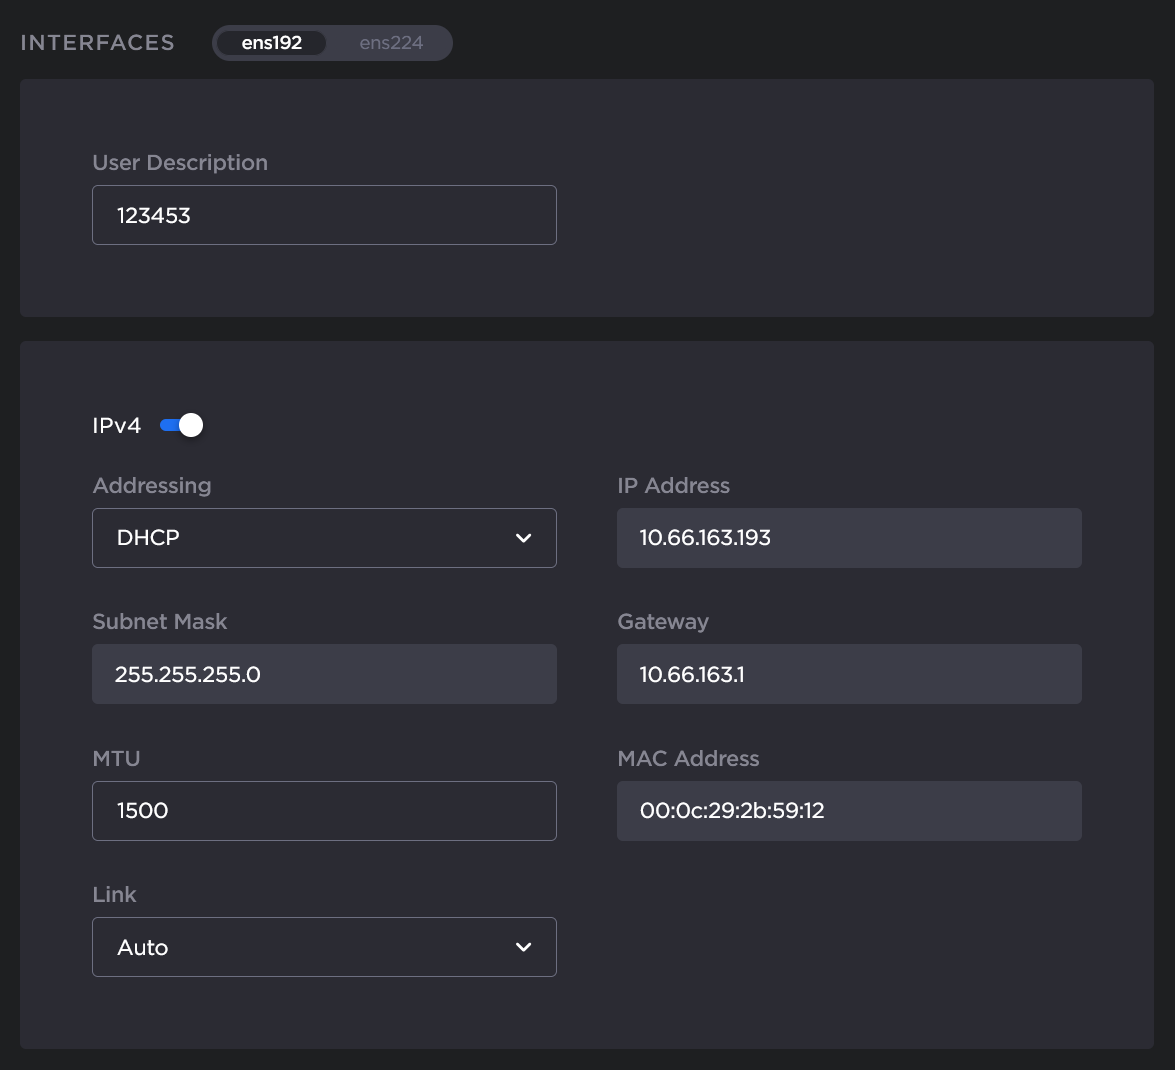
To configure additional NICs (Network Interface Cards) for the server, scroll down to the Interfaces section and click the next available interface tab (if available) and configure the required settings.
To configure IPv6 addressing, toggle IPv6 on, and select the appropriate Addressing option.
Enter the new value(s) as required. For details see 'IPv6' in Network Settings.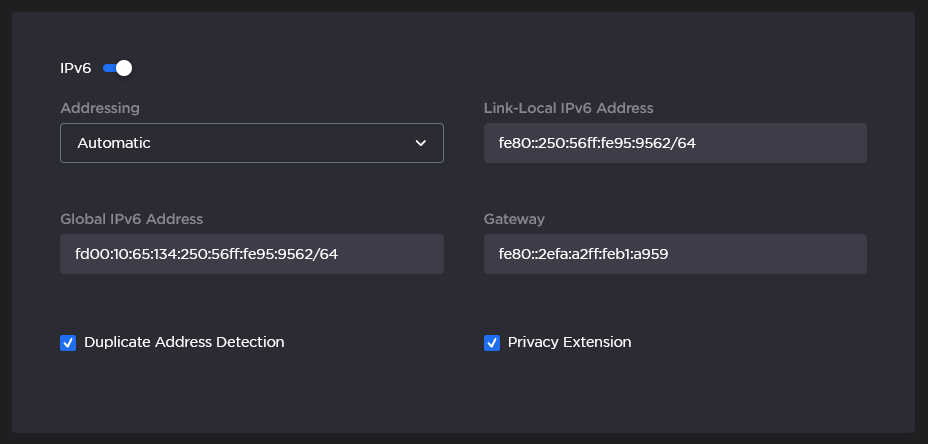
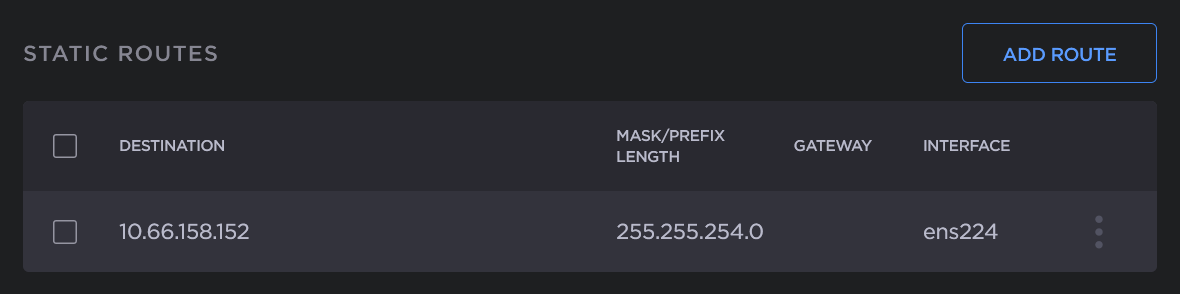
To add a static route, click the Add Route button. Fill in the Destination, Subnet Mask, Gateway, and Interface in the Add Static Route dialog.
The static route is added to the list.
Tip
All entries in the routing table must be in dotted-decimal format.
Click Apply, and then click Reboot. You must reboot the system for the changes to take effect.
Kraken will reboot and you will be returned to the Sign-In page.
Topics Discussed