Setting Up Your Server
To set up your virtual server, complete each of the sub-sections as described below.
Basics
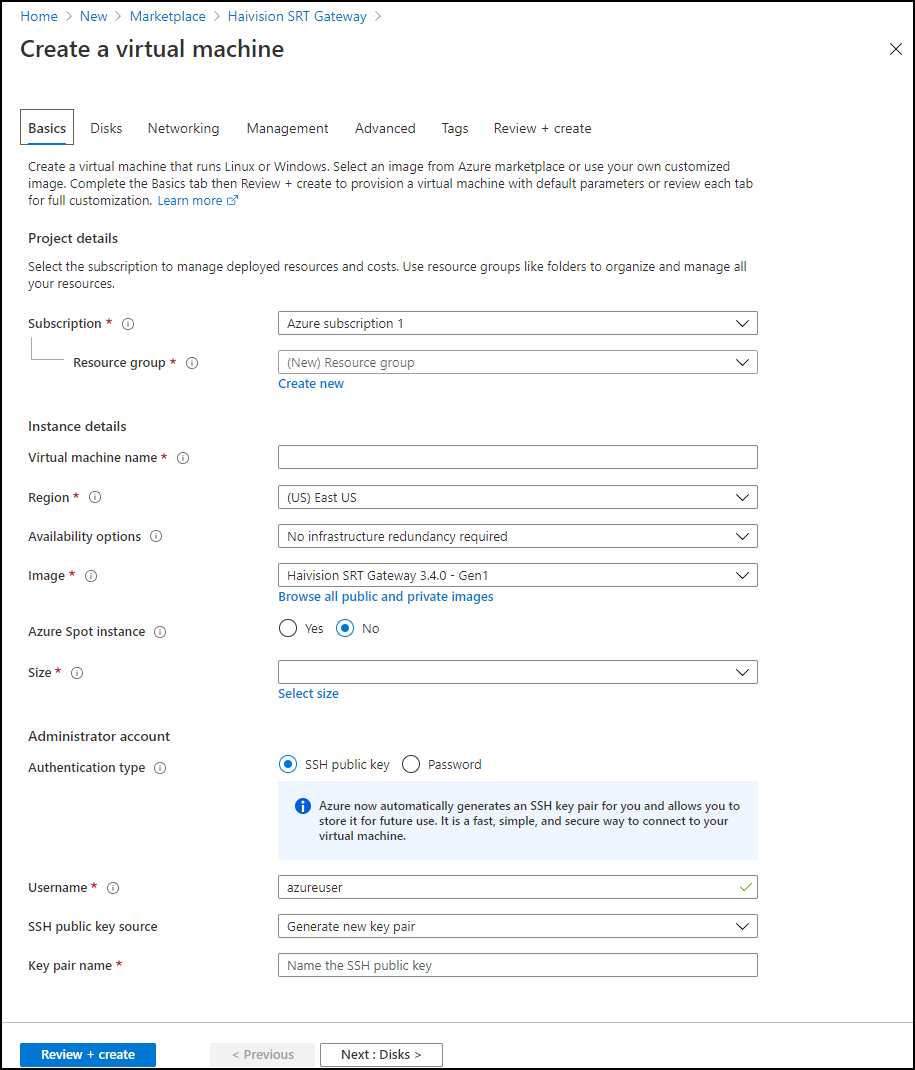
Basics section
In the Basics section, specify a subscription plan.
For Resource Group, select an existing resource group. Click Create New to create a resource group, if necessary. For more information on resources, visit: https://docs.microsoft.com/en-us/azure/azure-resource-manager/resource-group-portal
Note
The resource group must be composed of the characters A-Z, a-z, 0-9, period(.), hyphen (-), and/or underscore (_).
Enter a name for your virtual machine instance.
Note
The name must be composed of the characters a-z and/or 0-9.
Select a region, corresponding to the geographical location closest to the ingest source and/or egress source of your virtual server. This ensures the lowest latency for your Media Gateway/SRT Gateway traffic.
In Size, select from the recommended pricing tiers. For details see: http://azure.microsoft.com/en-us/pricing/details/virtual-machines/
Note
Currently, we only recommend Compute Optimized F-Series v2 (e.g. F4s_v2, F8s_v2, etc). Using tiers with lower CPU resources may result in poor performance.
Set up the administrator account by choosing SSH public key for the Authentication type and entering hvroot for the Username.
Generate a SSH public/private key pair for admin access to your virtual server. Typically, this is done on the computer that you will use to manage the server.
Note
SSH access to the Gateway’s Console UI is only allowed via SSH public key. After deploying the virtual server, you can use this console to enable access for other administrators by uploading their public keys.
You can generate an OpenSSH public key with tools like ssh-keygen on Linux and OS X, or PowerShell on Windows. For details, see https://docs.microsoft.com/en-us/azure/virtual-machines/linux/ssh-from-windows and https://docs.microsoft.com/en-us/azure/virtual-machines/linux/mac-create-ssh-keys.
Select Use existing public key, and copy/paste your public SSH key into the SSH public key field. Never share the private key.
When you are satisfied with your settings, click Next: Disks.
Disks
Select the OS disk and Encryption types. Disk size should be based on the considerations of performance, space, and pricing.
When you are satisfied with your settings, click Next: Networking.
Networking
For Public IP address, if a static IP is desired, click Create New and select the desired options.
For Configure network security group, click Create New and add inbound/outbound rules for each necessary port. See Modifying Network Security Rules for more details.
When you are satisfied with the settings, click Next: Management.
Management
Select the desired management/protection settings.
When you are satisfied with the settings, click Next: Advanced.
Advanced
Select any additional advanced configuration options.
When you are satisfied with the settings, click Next: Tags.
Tags
Create any desired tags.
When you are satisfied with the settings, click Next: Review + Create.
Review + Create
Review your settings. You can go back to previous sections to make any necessary changes or corrections.
When you are satisfied with the summary, click Create.
Creating your server instance can take several minutes. After the deployment completes, you can sign in.

Deployment Complete