To configure a broadcast Live Profile from the Unit Panel, or from the Web Interface, see the sections below.
Unit Panel
From the Home menu, tap >>.
Tap the Profile Name field and enter a new profile name.
Tap to confirm the new profile name.
Tap the Application field and and choose between Bcast (SRT) or Bcast (SST).
Tap the End-to-End Latency field to adjust the latency.
Tap and tap the BGAN profile field to select a BGAN profile if required.
Tap the Encoder Type field and choose between H.264/AVC and H.265/HEVC.
(SST Live Profiles only) Tap the Bitrate Control field and choose between VBR and CBR.
Tap the Capped Bitrate field to enter a new bitrate.
In the Audio settings, tap the Channel Layout field and choose between: 1x Mono, 1x Stereo, 2x Mono, 2x Stereo, 4x Mono, 4x Stereo, 8x Mono, and No audio.
Tap the Bitrate field to adjust bitrate.
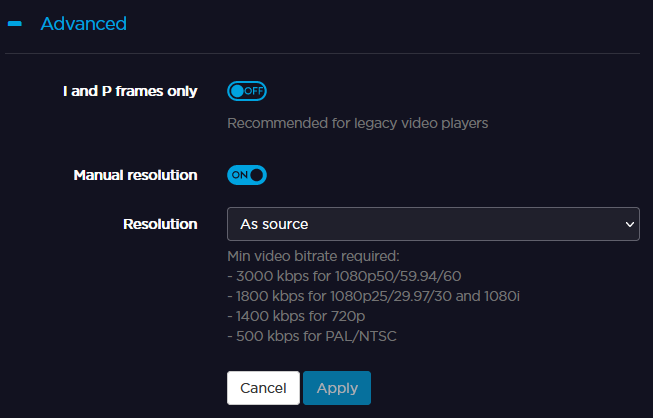
Tap and select ADVANCED +.
Tap to enable I and P frames only.
Tap to enable Manual Resolution.
Tap the Resolution field to display the resolution list.
Note
Only downscaling or same resolution are supported.
Select the resolution you want to apply.
Tap to save the new Broadcast Live Profile settings.
Web Interface
Click Settings > Live.
Click the button.
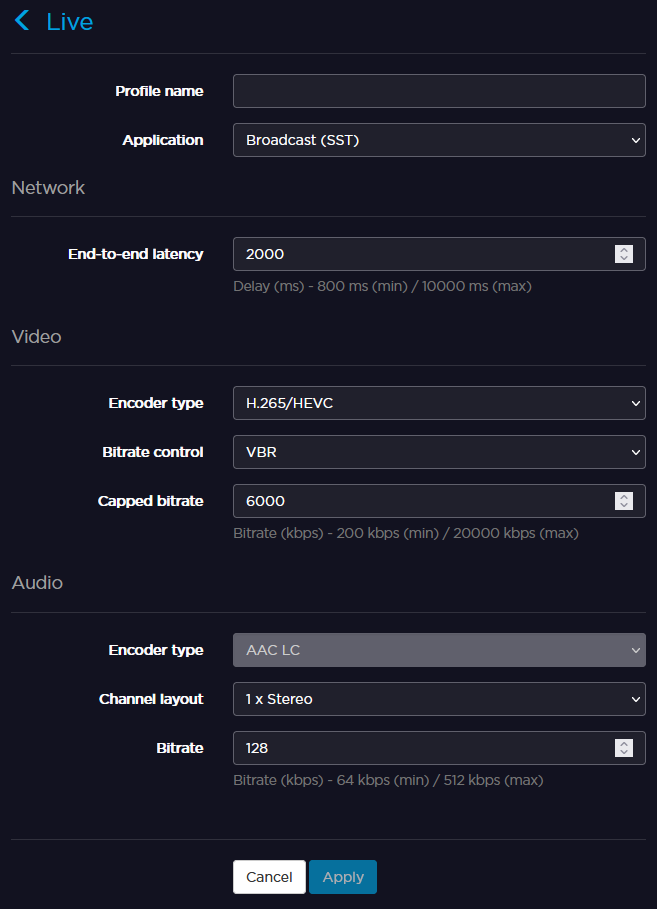
Enter a profile name in the Profile Name field.
Fill in all parameters. For details on Broadcast Live Profile parameters, see Configuring Live Profiles.
Click Apply.
JavaScript errors detected
Please note, these errors can depend on your browser setup.
If this problem persists, please contact our support.