Configuring Modem Bands
Important
If modem bands are not set in automatic mode or if they are not all selected, a star is displayed on the modem line.
You can configure modem bands using:
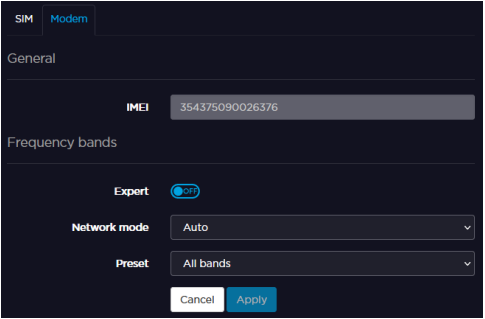
- Standard Mode – keeps it simple by limiting required fields to Network Mode and Preset.
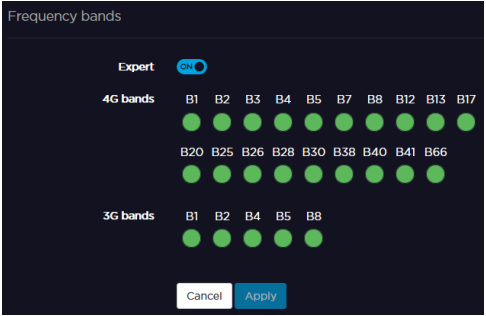
- Expert Mode – gives you access to all bands.
Depending on whether you are working locally from the unit panel, or remotely from the web interface, choose from the following tabs.
Using Standard Mode
Unit Panel
- From the Home menu, click on


- Choose one of the following for the Network Mode:
- Auto
- 4G Only
3G Only
Click on the Preset field and choose either:
- All Bands
Low Frequency
Note
Low Frequency bands are useful for indoor operations.
Web Interface
- From the main screen, click on an active modem line.
- Click on the Modem tab.
- Choose one of the following from the Network Mode menu:
- Auto
- 4G Only
- 3G Only
- Click on the Preset field and choose either:
- All Bands
Low Frequency
Note
Low Frequency bands are useful for indoor operations.
- Click Apply.

Please refer to the Notes in the Unit Panel section.
Using Expert Mode
Unit Panel
- From the Home menu, click on


- Click on

- Click on

- Click on

Web Interface
- From the main screen, click on an active modem line.
- Click on the Modem tab.
- Click

- Click


- Click Apply.

