How to use DataBridge for PTZ Camera Remote Control
Purpose
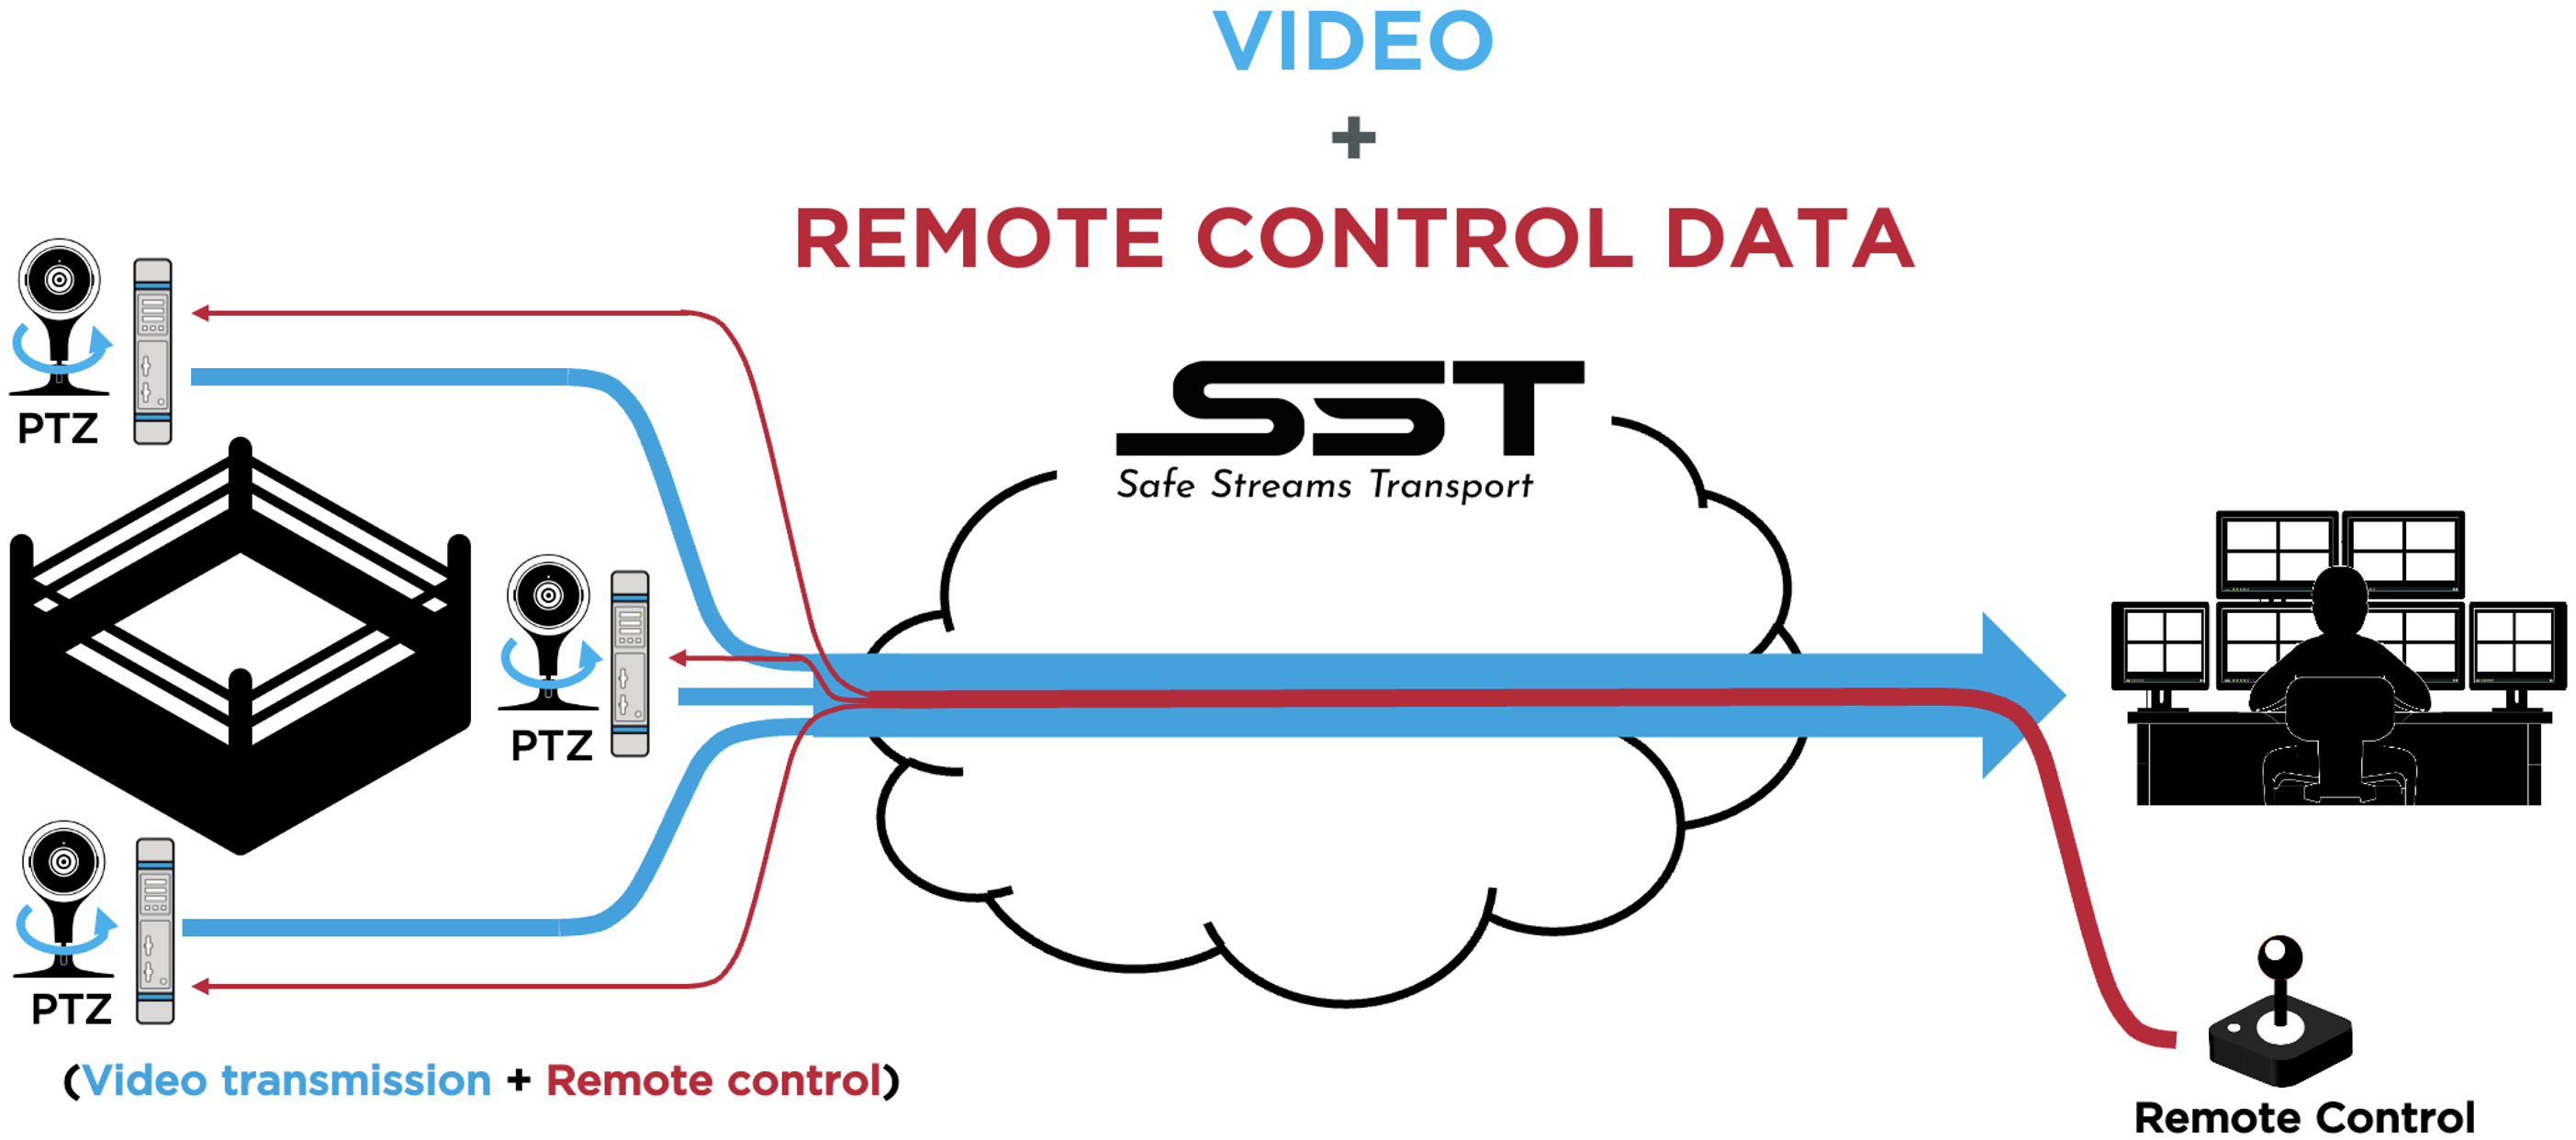
Haivision field transmitter units and StreamHub servers can be configured to enable routing access between the StreamHub LAN and the transmitter's shared LAN. The DataBridge functionality makes it possible to leverage this capability to enable the central management of remote third party devices, such as PTZ cameras, in the field.
Prerequisites
StreamHub license with DataBridge feature
One DataBridge license per transmitter
Administrator level access on the remote control PC
Note
StreamHub must be on the same network as the remote control PC.
Procedure
Enable Gateway / Access Point Mode in the field unit (transmitter).
To allow communication between the field unit (transmitter) LAN and the StreamHub LAN, it is necessary to enable gateway / access point mode in the field unit (transmitter). This allows third party PTZ cameras to then be connected to the field unit (transmitter) LAN. There are two methods to achieve this:Method 1: Wired Mode
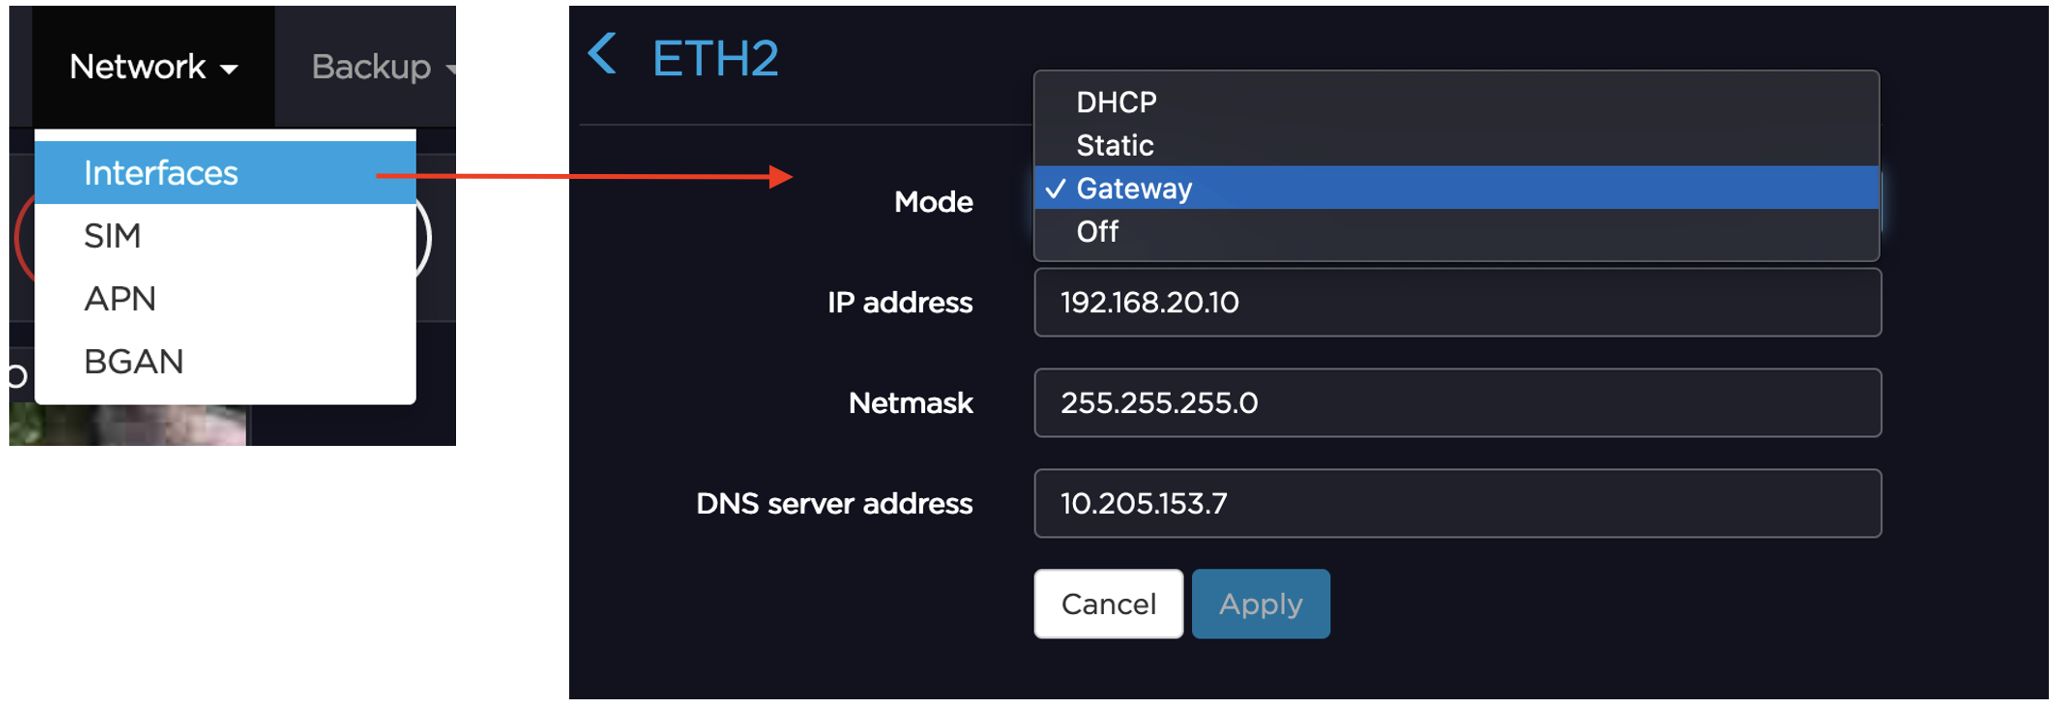
Select Network -> Interfaces and choose the ETH2 interface (ETH1 cannot be used for gateway mode).
Note
Only one Ethernet port is available for AIR series transmitters. If this interface is already used for some other connection, then it is no longer available for gateway mode. In this case, please use wireless mode instead (see Method 2) .
Change the Mode to Gateway and click Apply.
Method 2: Wireless Mode
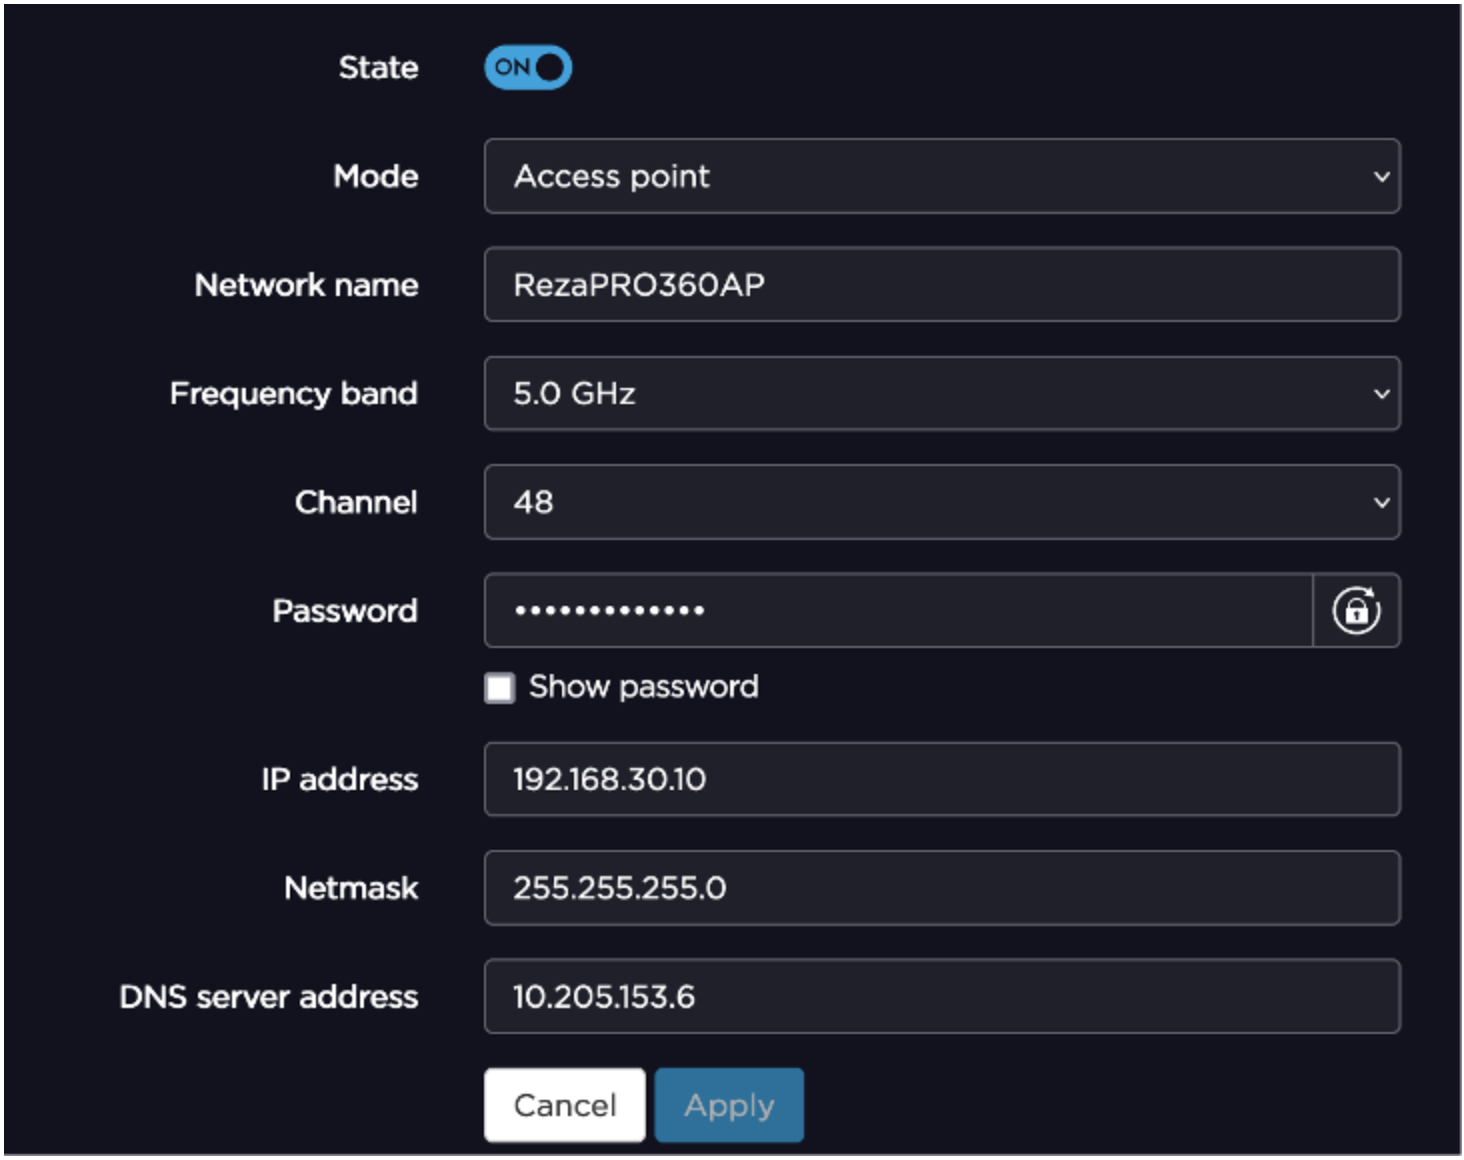
Select Network -> Interfaces and choose the WiFi interface.
Change the Mode to Access point and click Apply.
Note
Be sure to record the SSID and Password so that they can be entered in the PTZ camera configuration to allow it to connect to this WiFi access point.
Connect the PTZ camera to the transmitter.
Configure the PTZ camera in DHCP client mode (see example below) so that it will be able to automatically obtain an IP address from the transmitter via DHCP: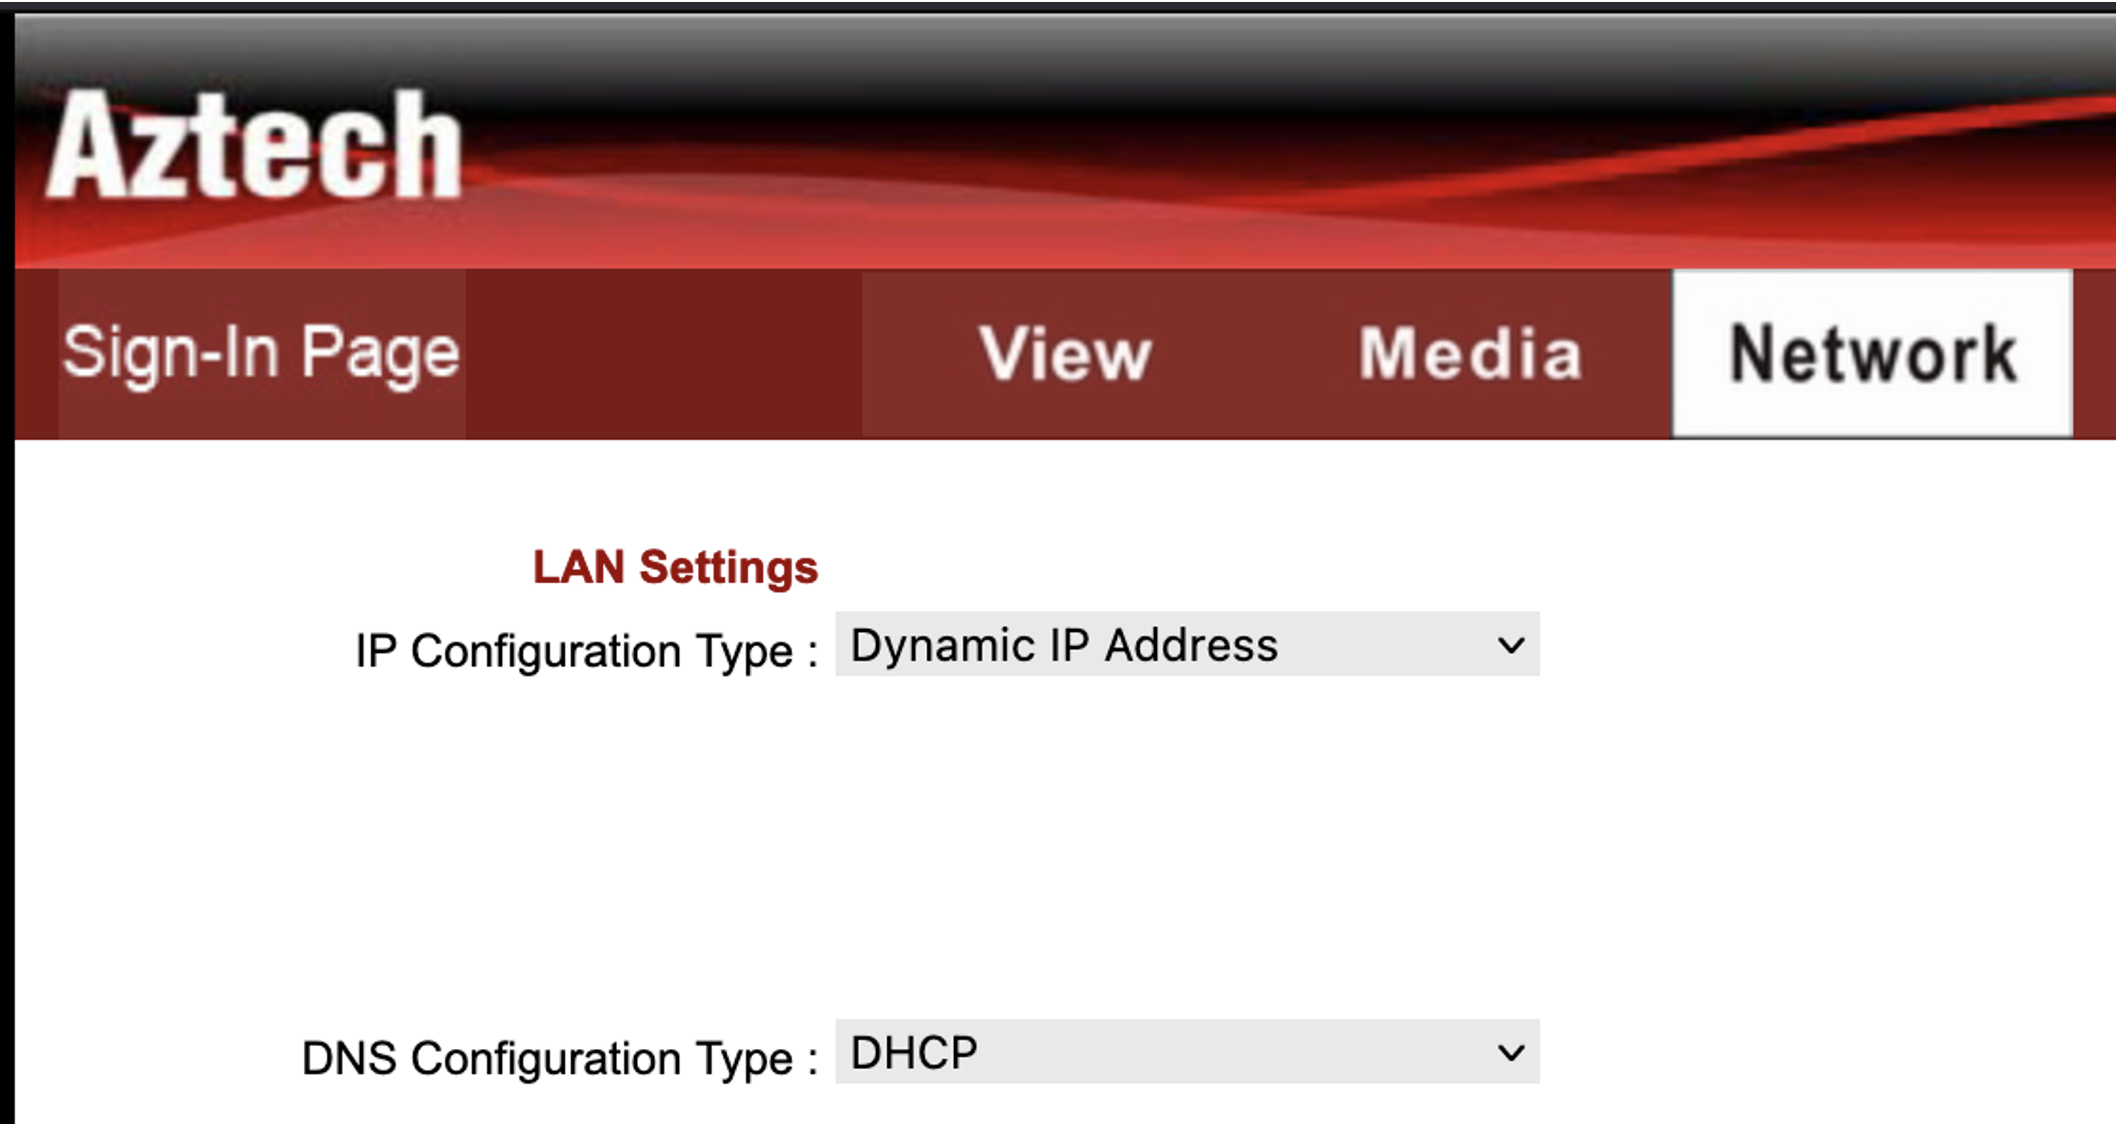
Assuming you are using the ethernet port in gateway mode on the Haivision transmitter, connect the camera to the network port configured for gateway mode. If you have more than one camera, consider connecting a Layer 2 switch between the transmitter and the cameras.
If you are using the WiFi interface, up to 10 devices can connect to the transmitter WiFi access point.
Each PTZ camera will automatically be assigned an IP address from DHCP server of the transmitter. The order of assignment depends on which devices connect first and request an IP address from the transmitter. For example, if the gateway ETH2 interface is 192.168.20.10, the first camera / device connected will be assigned the IP address 192.168.20.11. The second device will be assigned 192.168.20.12, and so on.
Tip
You can also connect other network wired devices, such as a laptop computer, to the transmitter network.
Enable the DataBridge function on the transmitter unit.
From the Web UI or the front panel, enable DataBridge mode on the transmitter, and then select the appropriate Destination profile (i.e. the StreamHub to connect with the DataBridge).
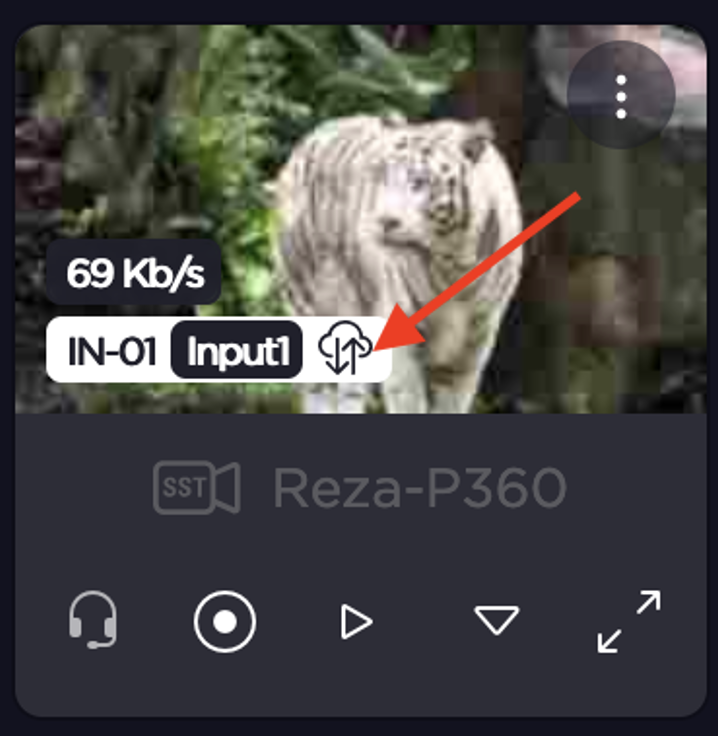
Verify that the DataBridge function is available and connected properly.
From the field unit / transmitter Web UI or front panel LCD: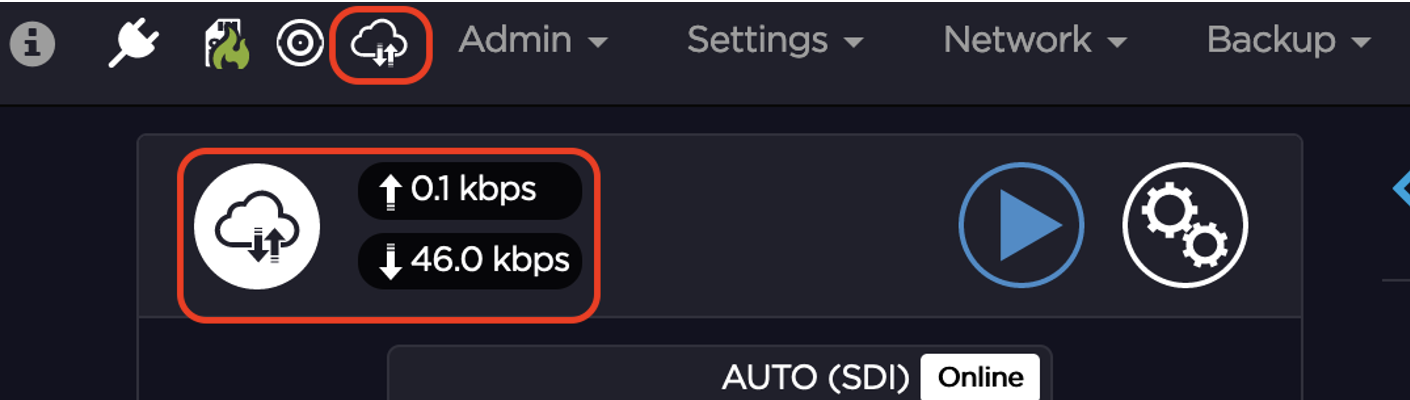
From the StreamHub server UI:
Note
When DataBridge is enabled in the field unit, it is no longer possible to perform recording or file forwarding. To continue using either of these functions, you must disable DataBridge.
Create a static route on the central command (management) PC.
This step is necessary because the field unit (transmitter) LAN is only known to StreamHub. The StreamHub LAN typically connects to a router and the default route to the corporate LAN. The corporate LAN has no knowledge of the transmitter LAN connected to StreamHub.
In the example below, the corporate LAN has an IP range of 10.5.0.0/16, and the transmitter LAN in gateway mode has a network with an IP range of 192.168.20.0/24. The transmitter LAN in gateway mode (the 192.168.20.X network) is only reachable via StreamHub, and not via the corporate LAN router / firewall.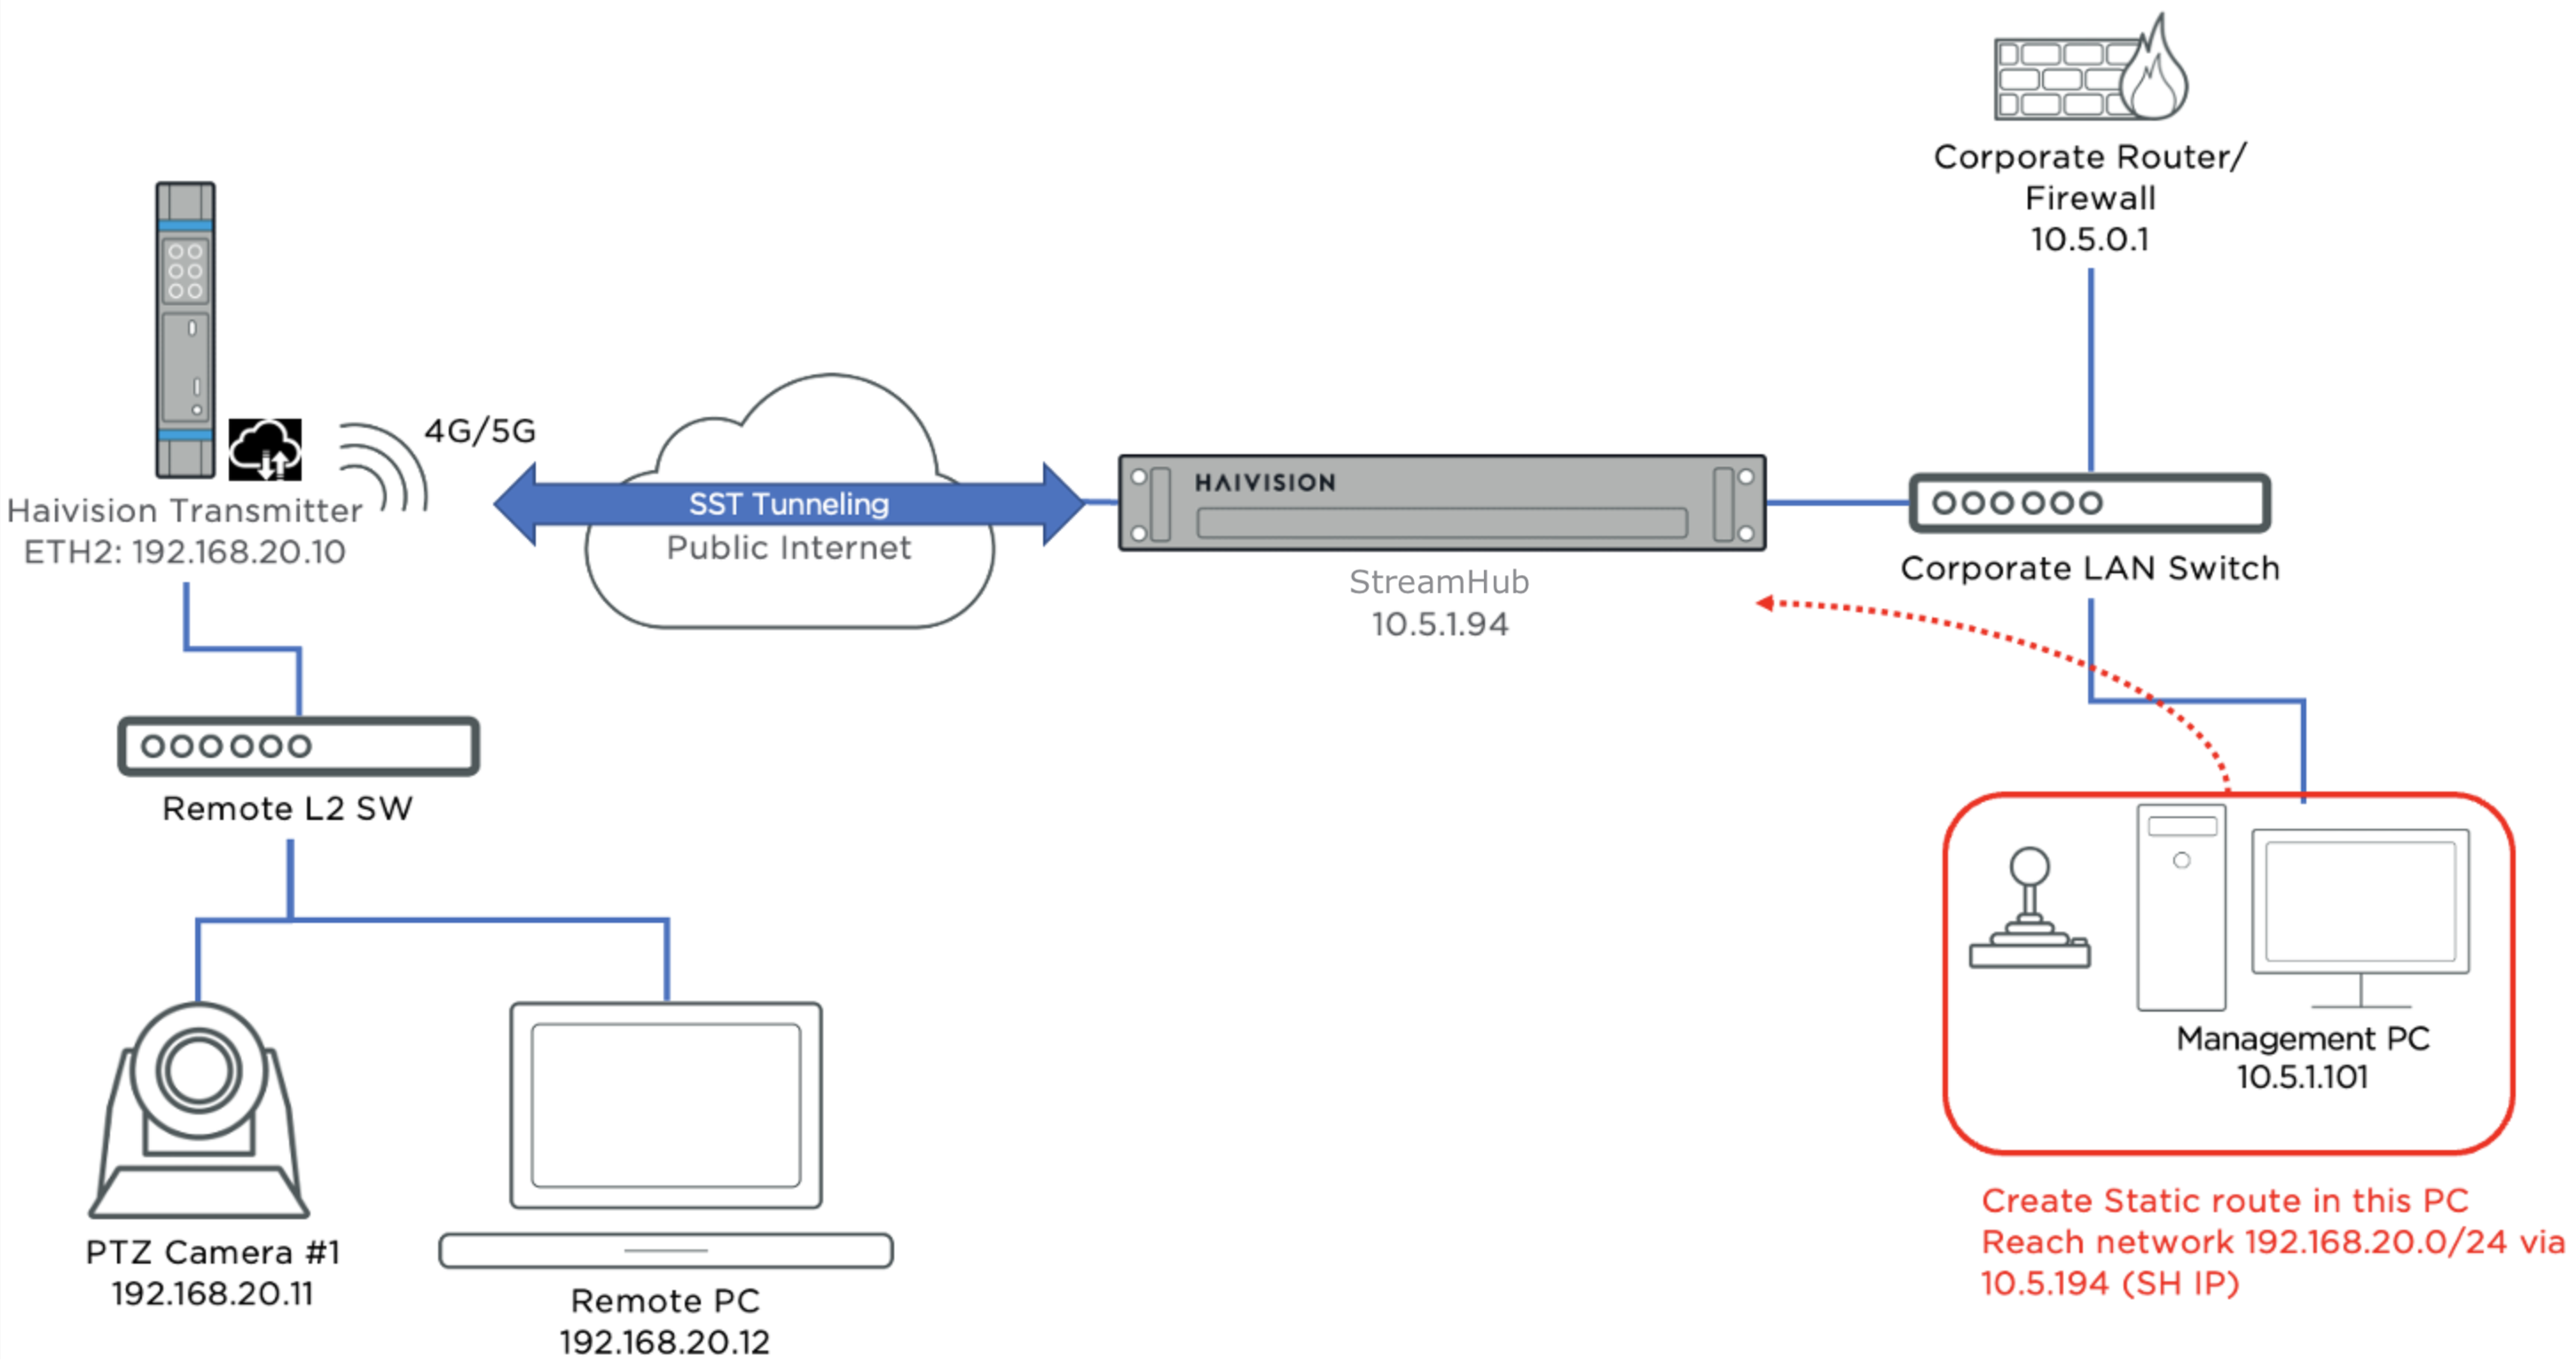
To create a static route in Microsoft Windows (Windows 10 or later) open a command prompt in Administrator mode (right click on the command prompt and choose Run as Administrator) and then enter the following command:
ROUTE ADD 192.168.20.0 MASK 255.255.255.0 10.5.1.94 METRIC 10
Tip
Set up the IP addressing according to your networking needs. In this example, the StreamHub IP address is assumed to be in the same subnet as the management PC.
Ensure that the route is configured properly on the Windows management PC:
ROUTE PRINTIPv4 Route Table===========================================================================Active Routes:Network Destination Netmask Gateway Interface Metric0.0.0.0 0.0.0.0 10.5.0.1 10.5.1.101 25192.168.20.0 255.255.255.0 10.5.1.94 10.5.1.101 10Check the access from the central management PC to the field unit PTZ camera as well as from the remote PC / laptop to ensure connectivity.
C:\Windows\System32>ping 192.168.20.11Pinging 192.168.20.11 with 32 bytes of data:Reply from 192.168.20.11: bytes=32 time=300ms TTL=62Reply from 192.168.20.11: bytes=32 time=276ms TTL=62Reply from 192.168.20.11: bytes=32 time=214ms TTL=62Reply from 192.168.20.11: bytes=32 time=282ms TTL=62Ping statistics for 192.168.20.11:Packets: Sent = 4, Received = 4, Lost = 0 (0% loss),Approximate round trip times in milli-seconds:Minimum = 214ms, Maximum = 300ms, Average = 268msCheck connectivity from the remote PC to the field unit PTZ as well to ensure that the transmitter LAN can reach the central Management PC:
C:\Windows\System32>ping 10.5.1.101Pinging 10.5.1.101 with 32 bytes of data:Reply from 10.5.1.101: bytes=32 time=300ms TTL=62Reply from 10.5.1.101: bytes=32 time=276ms TTL=62Reply from 10.5.1.101: bytes=32 time=214ms TTL=62Reply from 10.5.1.101: bytes=32 time=282ms TTL=62Ping statistics for 10.5.1.101:Packets: Sent = 4, Received = 4, Lost = 0 (0% loss),Approximate round trip times in milli-seconds:Minimum = 214ms, Maximum = 300ms, Average = 268msTo create a static route in macOS open the Terminal app and elevate to root ( sudo -i ), and then type the following command:
route add -net 192.168.20.0/24 10.5.1.94
Tip
Set up the IP addressing according to your networking needs. In this example, the StreamHub interface IP address is assumed to be in the same subnet as the management PC.
Ensure that the route is installed properly in the management Mac:
netstat -nrRouting tablesInternet:Destination Gateway Flags Netif Expiredefault 10.5.0.1 UGScg en7192.168.20.0/24 10.5.1.94 UGSc en7Perform a ping test between the remote PC / device and the central management PC to ensure connectivity.
Tip
If you reboot your management PC (or Mac) any static route that was manually created will disappear and it will be necessary to create it again by repeating the steps above.
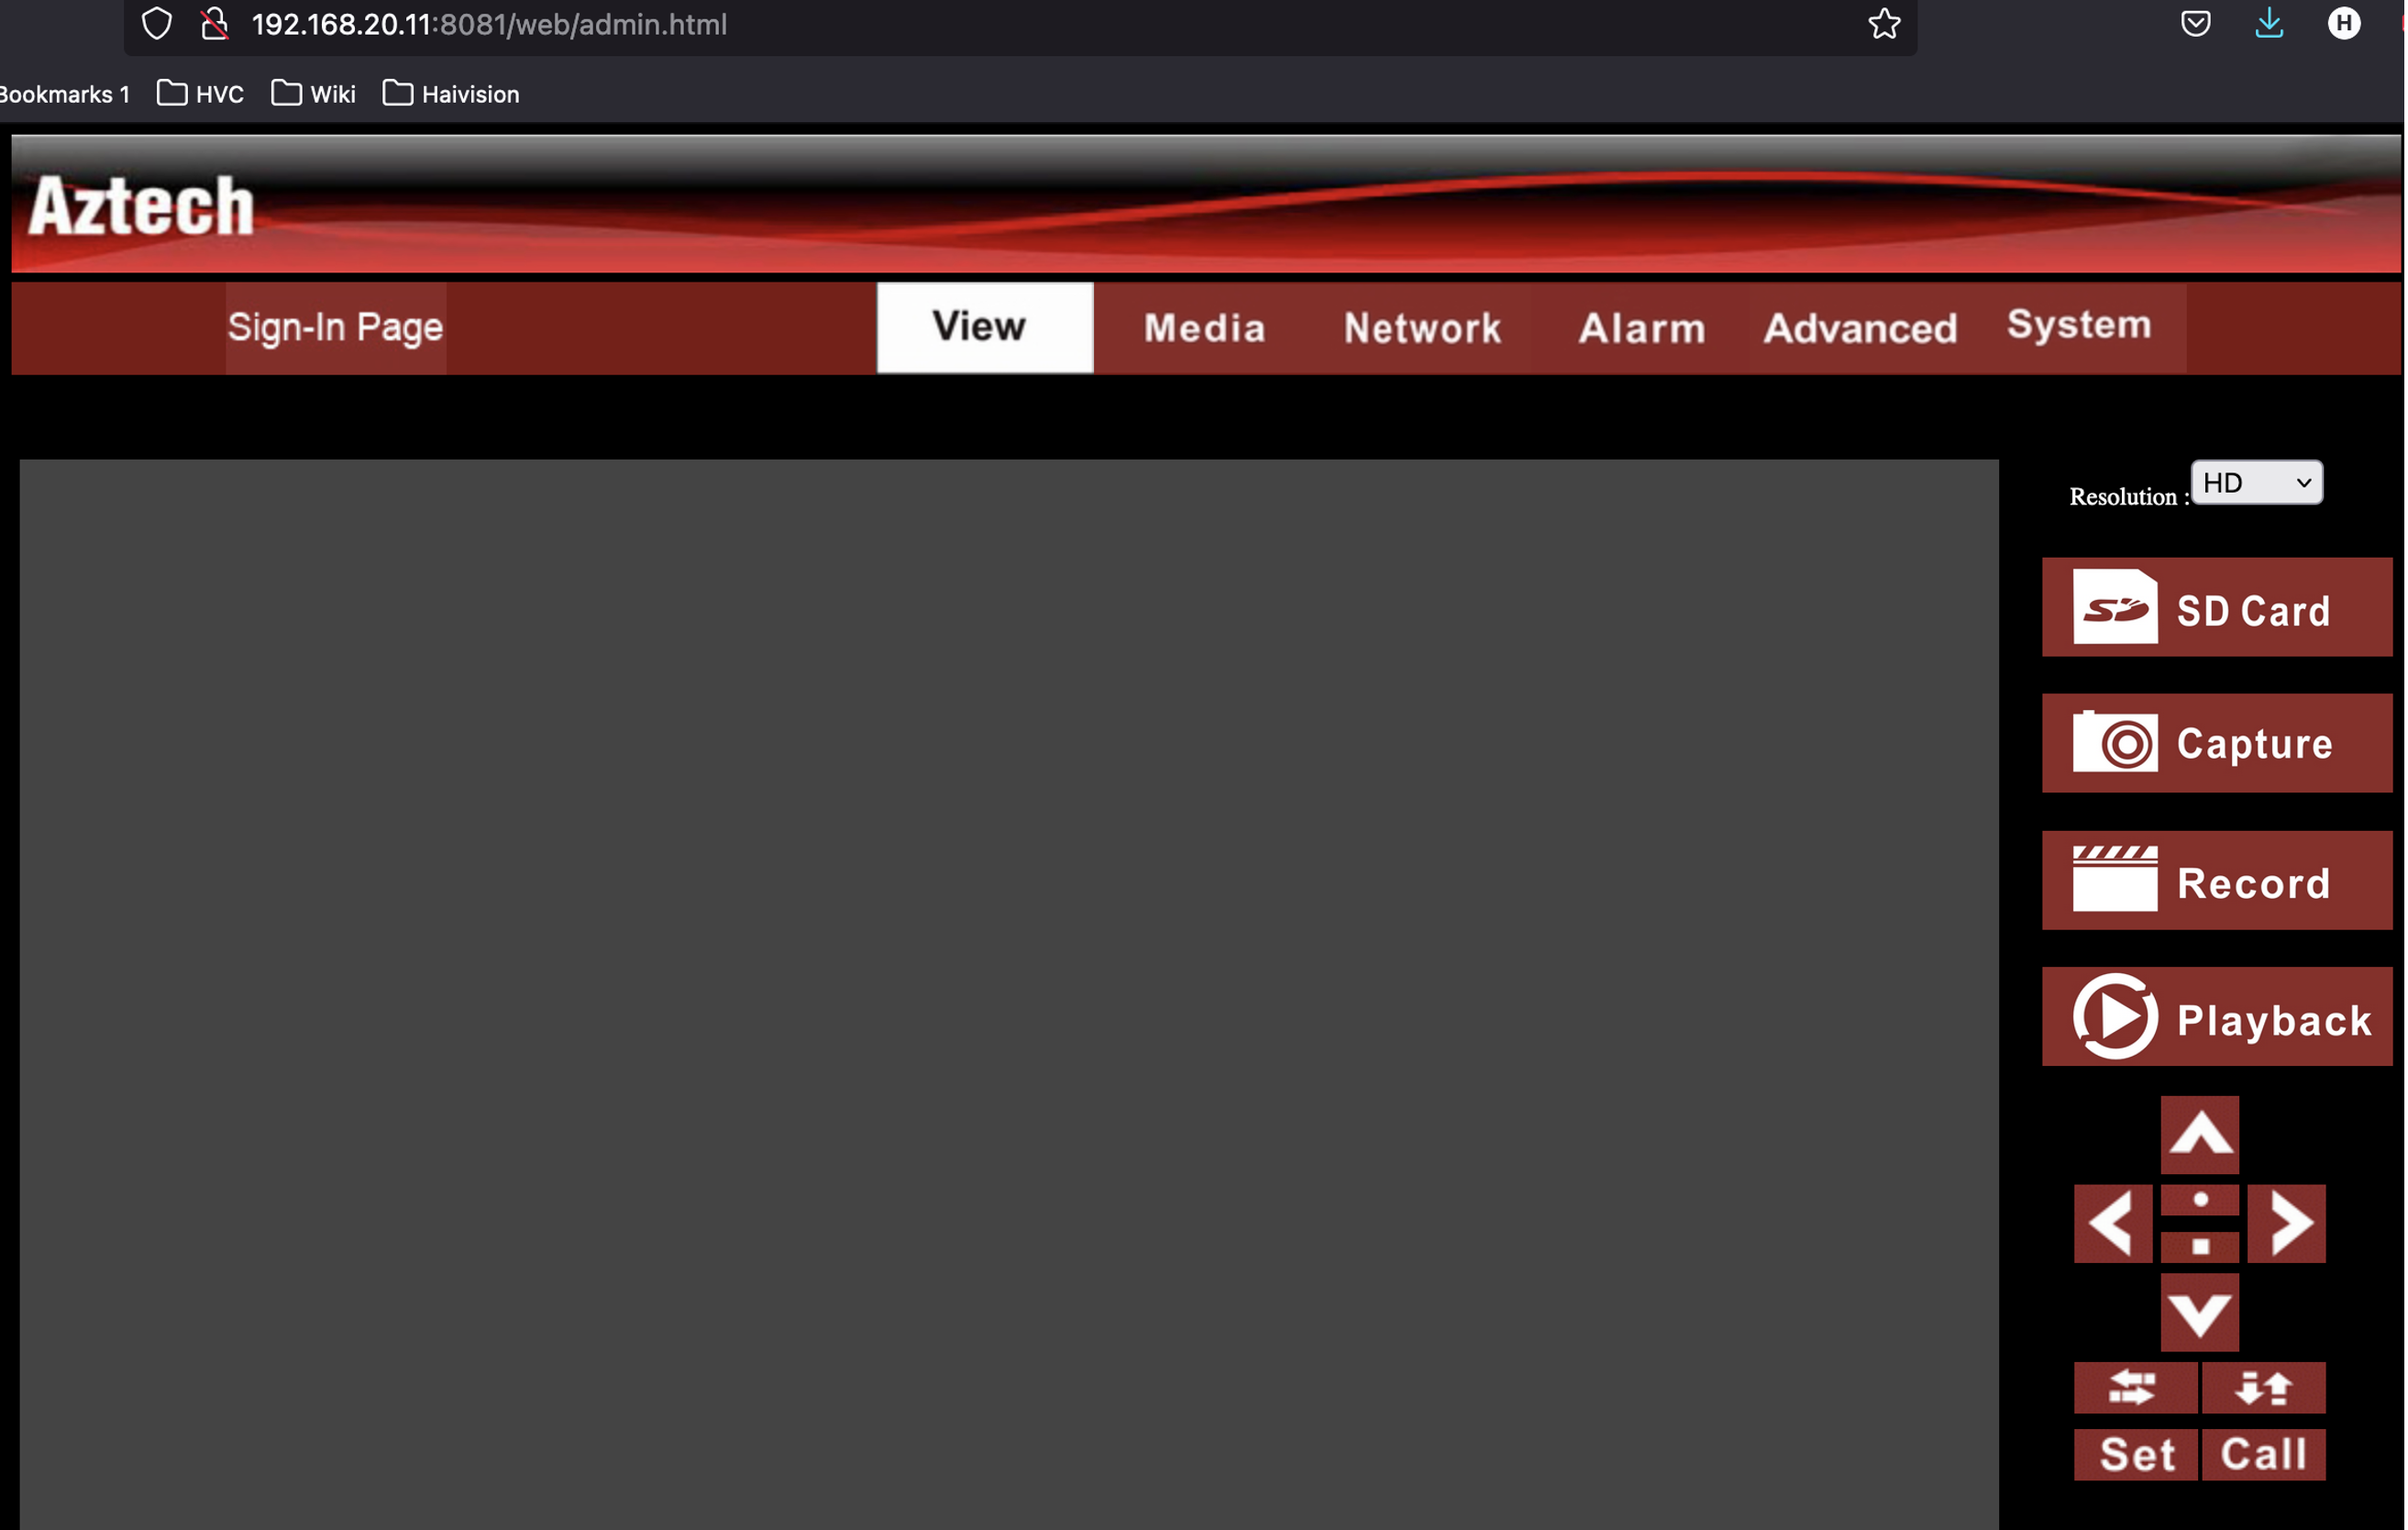
Verify that the central management PC can gain access to the PTZ control interface (varies by vendor). The following example shows the web interface of a typical PTZ camera controller on the remote site accessed via the central management PC: