Managing Certificates
The Certificates page shows the list of Identity and CA Certificates installed on Makito X Series devices.
Identity Certificates: An Identity Certificate identifies the Makito X during the authentication process when trying to establish a TLS connection in Audit or HTTPS session startup. Its Common Name or Alternate Subject Names must match the device's IP address and/or its FQDN (Fully Qualified Domain Name) if DNS is used.
CA Certificates: A CA Certificate is normally a root certificate from a certificate authority that is generally widely known and trusted. CA Certificates are stored on the Makito X so they can be used to authenticate CA-signed certificates from audit servers. You will need to import the root certificate from the CA that signed the certificate of the configured remote audit server. It is also recommended to import the root certificate of the CA that signed your Makito X identity certificate (if you have one).
From the Certificates page, you can generate, import, view, and delete Identity Certificates, as well as select the default Identity Certificate. You can also import, view, and delete CA Certificates.
To open the Certificates page:
On the Administration page, click Certificates on the sidebar.
The Certificates page opens.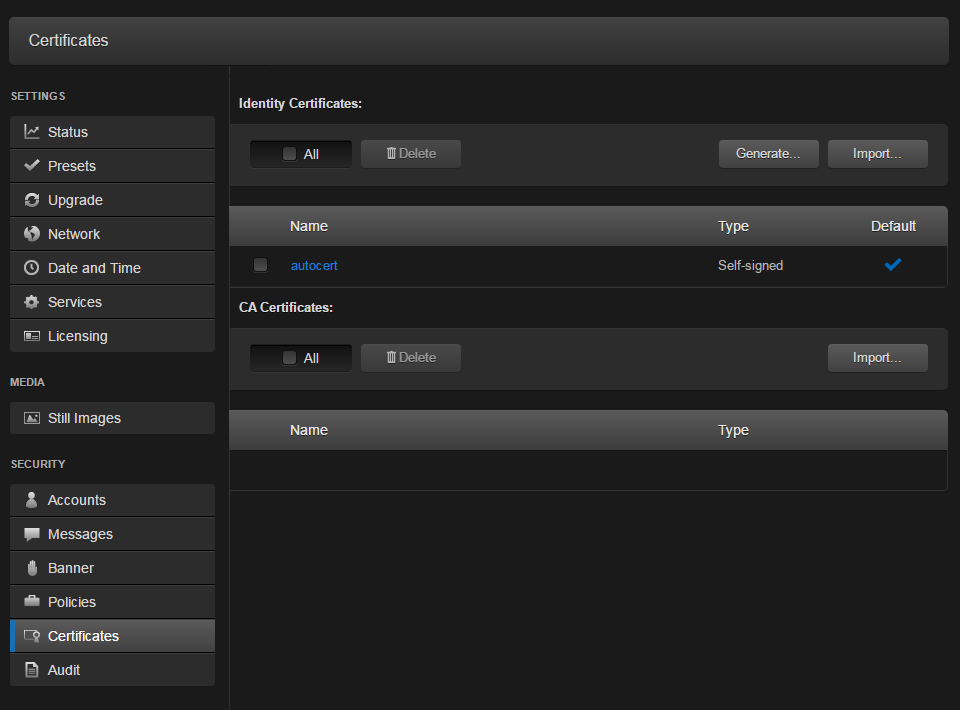
Certificates Page
The default Identity Certificate is indicated with a blue check.
To generate a Certificate Signing Request:
On the Certificates page, click Generate.
(Optional) Type a name for certificate in the Generate Certificate dialog.
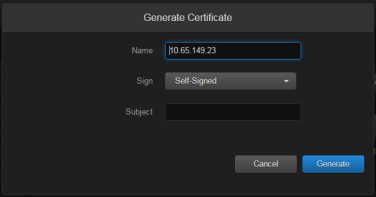
Generate Certificate Dialog
Select either Self-signed or Certificate Signing Request from the drop-down list. For more information, see "Sign" in Certificate Settings.
For the subject, type in information about the device that the Identity Certificate represents. For more information, see "Subject" in Certificate Settings.
Click Generate. If the Certificate Signing Request (CSR) was selected, the generated CSR file needs to be sent to a Certificate Authority to be signed. A copy of it is saved in the current administrator’s home directory, or it can be copied and pasted from the CSR view. You can import it back later by clicking on the Import button (using the same name as the request).
Tip
Keep in mind that there is a difference between importing a new certificate (generated externally) and importing a newly signed certificate whose request was previously generated on the Makito X and exported for signing. For details, see “Certificate Name” in Certificate Settings.
To manage Certificates:
To import a Certificate, click Import next to either the Identity Certificates or CA Certificates section.
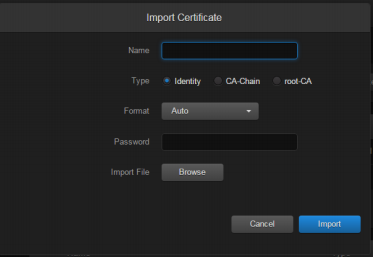
Import Certificate Dialog
Type in the Certificate Name.
Select or enter the new value(s) in the remaining field(s). See "Import Identity or CA Certificate dialog” in Certificate Settings.
Click Import.
To view the details of a certificate, select the certificate name from either the list of Identity Certificates or CA Certificates. (See Viewing Certificate Details.)
To delete a certificate file, select the certificate name from the list of Identity or CA Certificates and click Delete.
To set the default Identity Certificate (i.e., the Identity Certificate that will be used to represent the device during Audit and HTTPS authentication), hover over the certificate row and click the (greyed out) checkmark under Default. The selected certificate will be saved as the default certificate, and its effect will be directly applied to the Audit but does not apply to HTTP until the next service restart or system reboot.
Related Topics