Account Management
Tip
It is recommended to set the Policies for your system before creating users.
The Password Policies do not apply to administrators creating user accounts or setting passwords for accounts other than their own.
To add a new account:
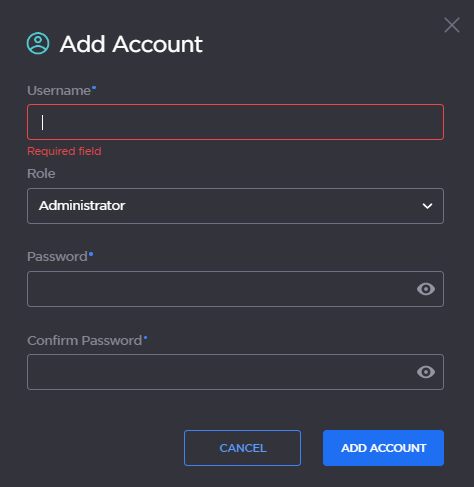
From the Accounts List View, click the Add Account button.
In the Add Account panel, type a unique user name in the Username text box.
Tip
The user name must comply with Unix restrictions (lower case letters a-z, numbers 0-9, hyphen and underscore).

Select the Role for the user. See "Role" in Account Settings.
Type the initial password in the Password field and again in the Confirm Password field. For the allowed characters, see "Password Requirements" in Changing Your Password.
Click Add Account.
To manage existing accounts:
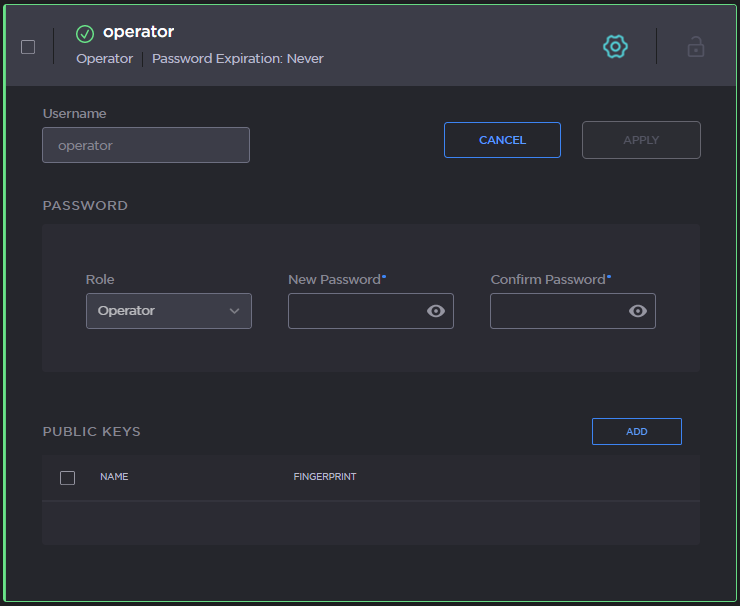
From the Accounts List View, click the Settings icon
 in an existing account panel to view or configure the account settings.
The account settings details open for the selected account (as shown in the following example).
For security purposes, you cannot modify the Name or Role for an existing account.
To reset the password of an existing account, type the new password into both the New Password and Confirm Password fields. For the allowed characters, see "Password Requirements" in Changing Your Password.
To change your own password, type the current password in the Current Password field, and then type the new password in the New Password and Confirm Password fields.
Note
New users must change their passwords the first time they sign in as well as when the administrator resets the password of an existing account. When you change your password, the new password takes effect immediately.
To upload a public key for the account, follow the steps in Managing Public Key Authentication.
To get the fingerprint for a public key, select the public key in the list. For more information, see Account Settings.
To apply your changes, click Apply.
Related Topics
