Streaming to Facebook Live

Facebook allows people and organizations the ability to stream live video. To stream a professional-looking broadcast, set up a KB RTMPS stream to use with Facebook Live.
Important
Facebook limits all live streaming events to four hours. After four hours, the live event ends and a video recording of the event is embedded in the page's post.
Streaming to a Facebook page requires that you have the appropriate permissions to the Timeline, Group, Event, or Page where you want to post the live stream. You also need a live feed.
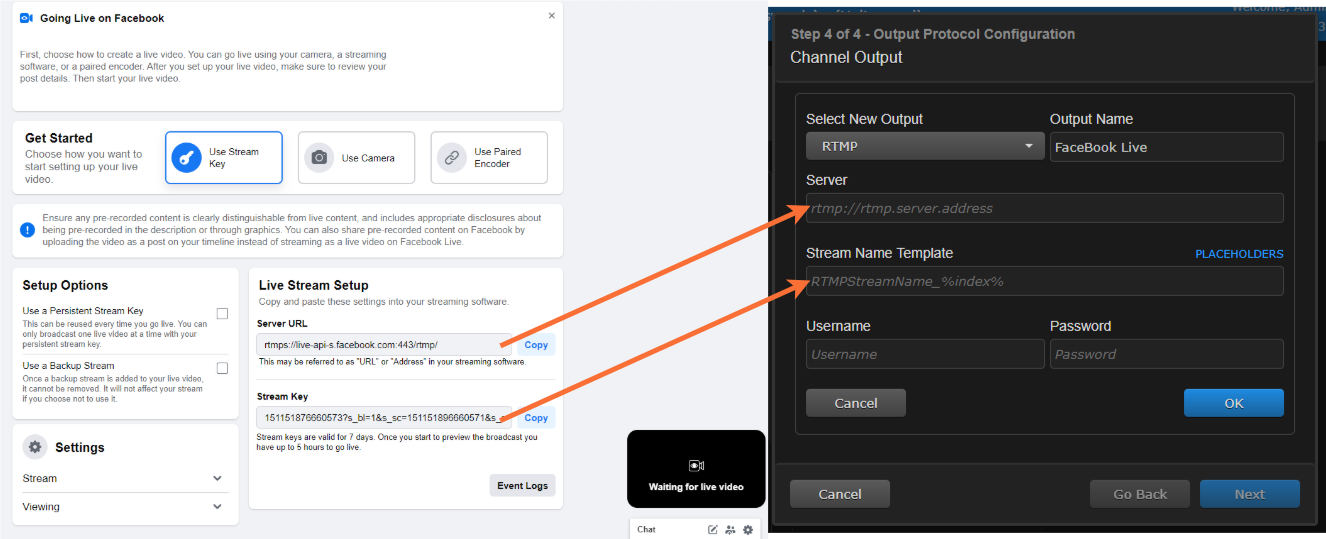
Facebook generates a Server URL and Stream Key when you create a Live post. You input this information into your KB output parameters configuration to enable streaming to Facebook.
Tip
Open two tabs in your browser: one to your Facebook page and one to your KB web interface. This way you can copy and paste the information instead of having to manually enter it.
To use KB for streaming to Facebook Live:
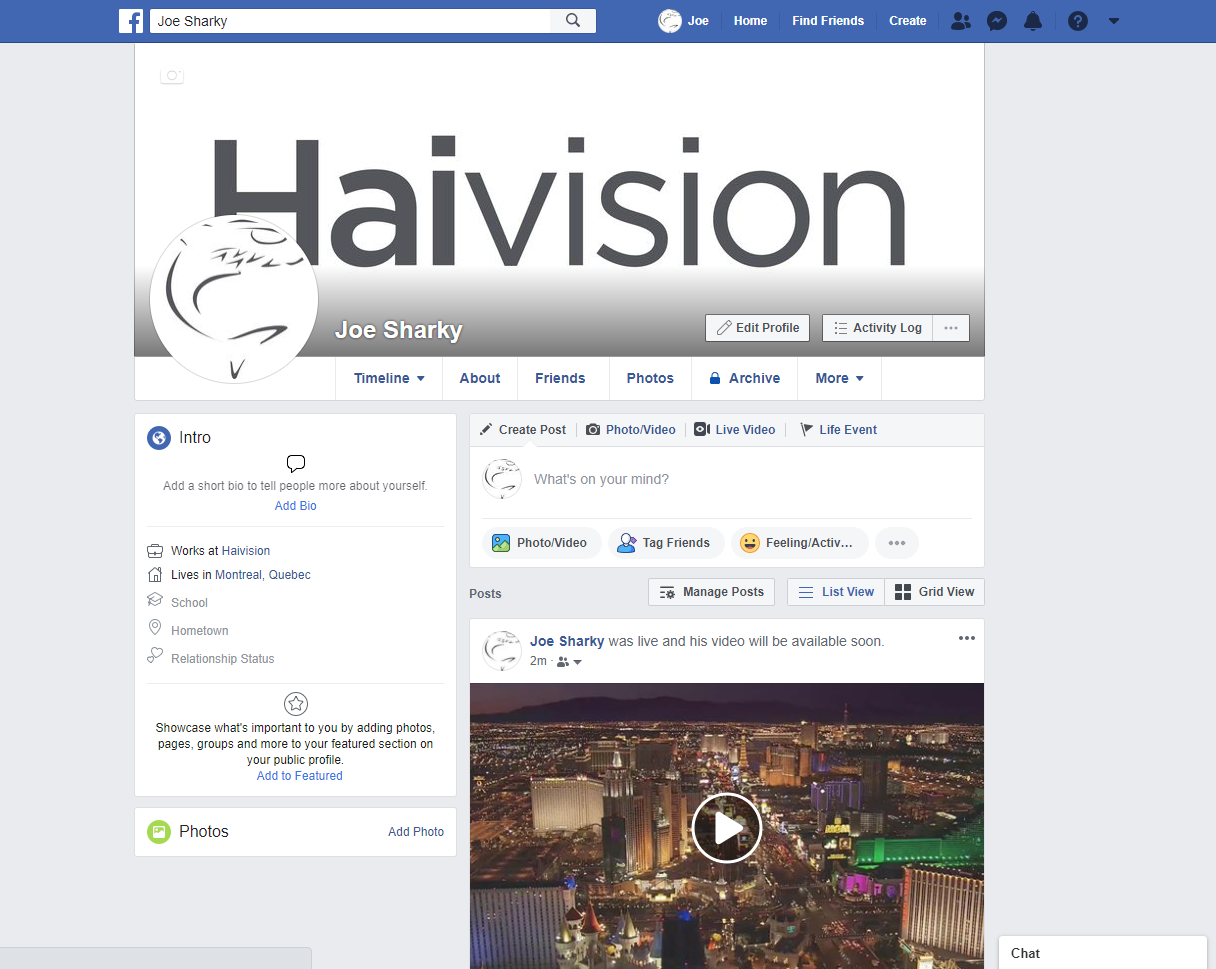
Open a browser and log into your Facebook page.
On the Timeline tab in the Post window, click Live Video.
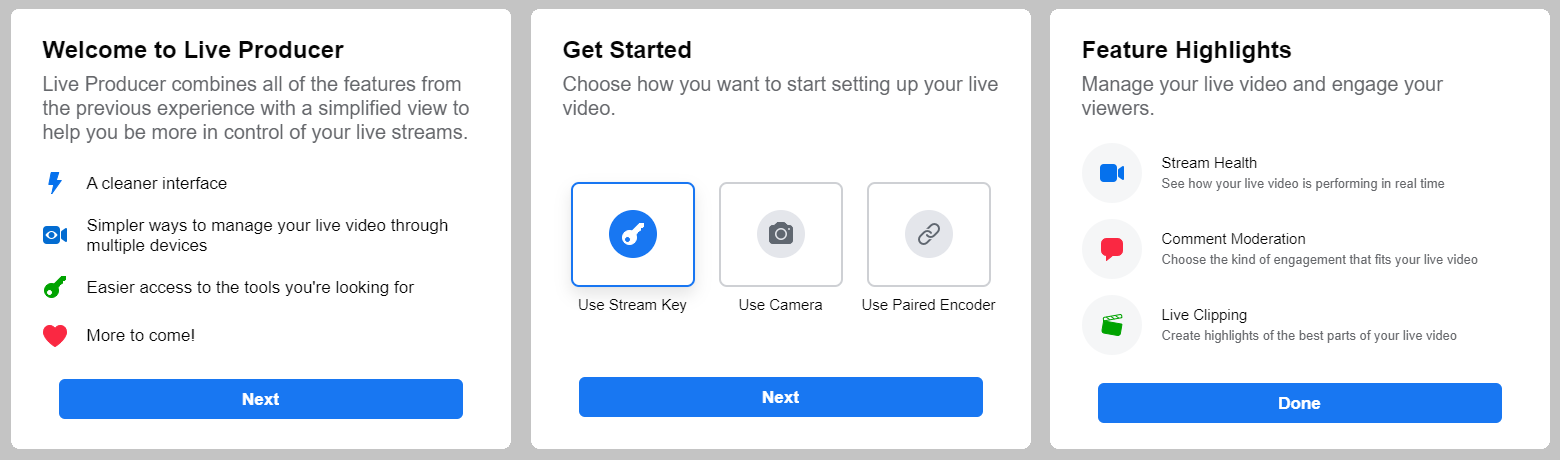
If this is the first time your Facebook profile streams live video, a "Welcome to Live Producer" dialog opens.
Click the Next button.
Select User Stream Key and click the Next button.
Click the Done button.
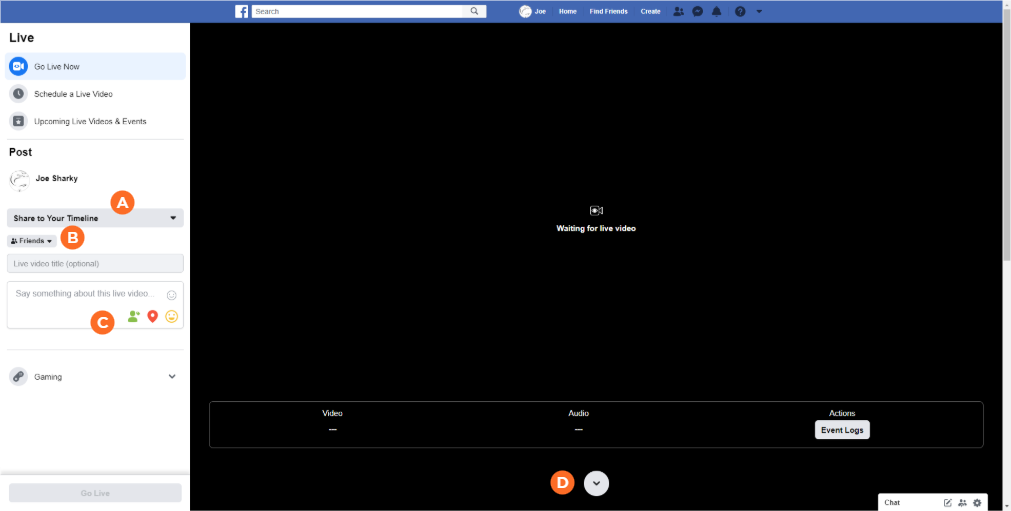
On the resulting preview video screen:
Use the Share On Your Timeline drop-down to select where you want to post your live stream.
Use the Privacy drop-down menu to specify your audience.
Add a comment to the post and use the icons to tag individuals, location, etc.
Click the
 icon under the preview video to show the Stream Setup page.
Switch to another browser tab and sign in to your KB web interface.
From the Channel Control Center, create a new channel.
Follow the Create Channel Wizard prompts to create a channel as normal:
Step 1: Enter the desired channel name
Step 2: Identify your live source for the channel input.
Step 3: Select H264-720-AAC-192 for the Encoder Template.
Note: Facebook only accepts video up to a maximum of 720p (1280 x 720) resolution and 30 frames per second.
Step 4: Choose RTMP for the channel output, and enter a desired output stream name.
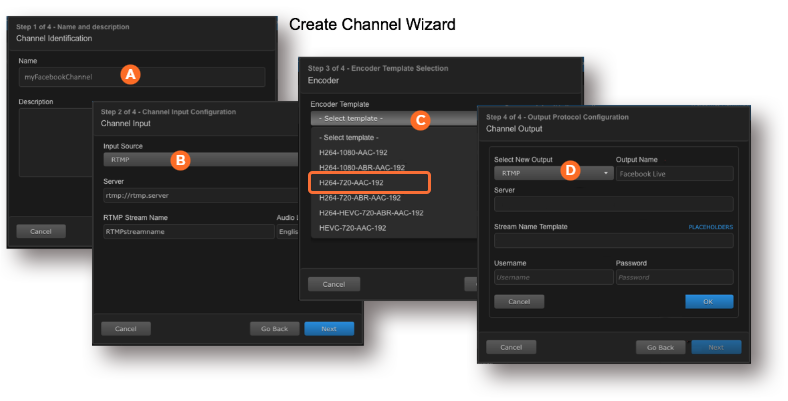
Switch to the Facebook browser tab. Copy the contents of the Server URL and Stream Key fields to the KB browser tab's Server and Stream Name Template fields, respectively.
Respond to the remaining prompts to finish the wizard and create the channel.
Click the
 button for the channel you just created.
When the stream appears, switch to the Facebook browser tab and use the Preview to verify the stream. When satisfied with the stream and its settings, click the Go Live button.
When the stream is done, click the End Live Video button to end and post.
Click the End button to confirm.
On the Dashboard screen that appears, you can view your post, trim your video, create a clip, or delete your video.

If you do not delete the video, your post is visible shortly on your profile. Click the
button to replay.