Rolling Back to a Previous KB Version
This procedure is useful when you have an upgrade that was not successful or if an existing installation has quit working properly.
Note
If you have an appliance or server, you must perform this procedure at its physical location.
Attach a monitor, keyboard, and mouse to the device.
Reboot the device.
After the BIOS loads, look for the following screen to appear on the screen and immediately move the cursor to the previous version using the ↑ or ↓ arrow keys.
Note
You only have a few seconds to move the cursor before the multi-boot loader loads the default version. If you take too long, return to step 2 and restart the system.
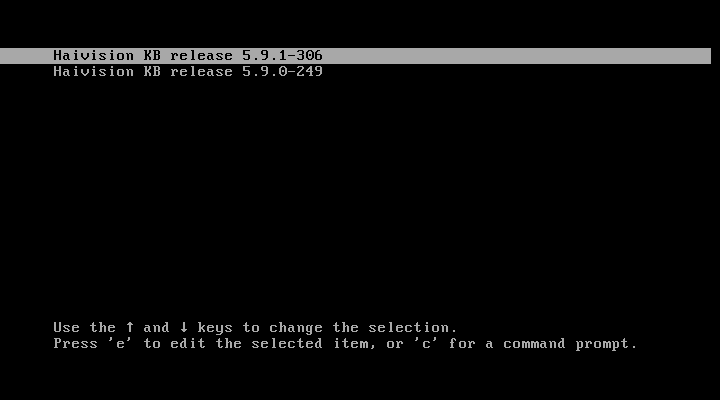
Using the arrow keys, select the partition from which you want to boot. Typically, you want to choose the last stable version.
Press the Enter key.
After the system starts, you can try reinstalling the update again or contact Haivision Support for assistance.
Tip
If you choose not to upgrade again, subsequent reboots require you to perform this procedure. If you wish to change the selected default version, see the following section.
Changing the Default Bootloader Version
To change the bootloader's default version:
Elevate to root access:
su rootVerify the current default:
grubby --default-title
Determine the index number for the boot selection you want to make default. Entries are numbered starting with 0.
grubby --info=ALL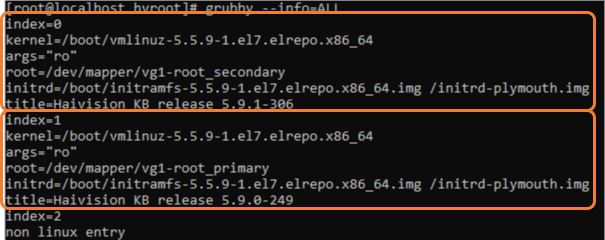
Change the default to the desired index:
grubby --set-default 1Verify the new default has changed:
grubby --default-title
Reboot the appliance:
reboot
Now when your appliance boots, the new default version is used.