Adding a Session
This section shows how to add a session from the Library's Sessions screen.
Tip
To schedule a session from the Scheduling screen, see Scheduling an Event.
To add a session:
On the Library screen, click Sessions on the menu bar.
Click Create Session on the action bar
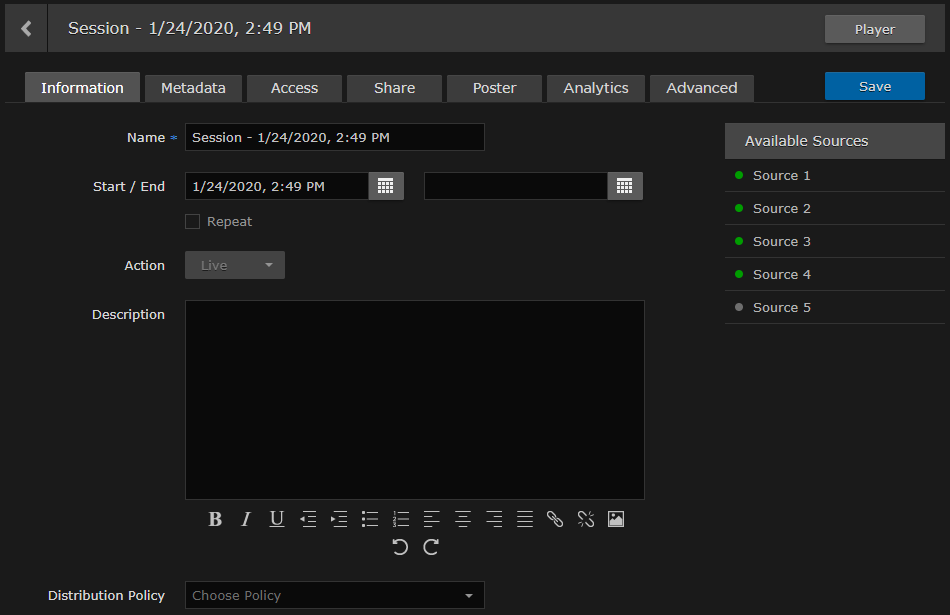
On the Session Information pane, enter a name and description to identify the session. A default name is provided consisting of "Session - <date>, <time>".

Available sources are listed in the sidebar. For details on selecting and previewing sources for the session, see Previewing Sources.
Select one or more sources from the list of Available Sources.
By default, the session will start immediately, with no end time specified, and will be unscheduled, one time.To schedule the session, set up a recurring event, or record the session, see Scheduling an Event (Steps #5 through #7).
Click Save.
The new session is added to the Library's Sessions list.
To assign metadata, click the Metadata tab. For details, see Editing Session Information and Metadata.
To edit session permissions, click the Access tab. For details, see Changing Permissions of Items.
To share your sesion, click the Share tab. For details, see Using Public Links to Share Sessions.
To add a custom poster image for the sesion, click the Poster tab. For details, see Uploading Custom (Session) Poster Images.
To view session analytics, click the Analytics tab. For details, see Collecting User Data Analytics for a Session.
To view the session, click the Player button. For details, see Viewing Sessions.
Tip
You can toggle back and forth between the Session Player and Properties panes.
To return to the Library's Sessions list, click the
 icon.
icon.
