Configuring Network Settings
When setting up Haivision Media Platform, you need to configure the network settings. This includes general settings, such as specifying the server hostname, IP address, subnet mask, and DNS servers, as well as advanced settings, such as setting up multiple network interfaces, NIC bonding, link negotiation settings, and static routes.
To configure the network settings:
Click the
 icon and select Administration from the navigation drop-down menu.
Click System Settings on the toolbar and then click Network on the sidebar.
The Network Configuration pane opens.Fill in the General section. For details, see Network Settings.
To enable SNMP alerts, toggle the SNMP button to On and enter the SNMP-specific fields.
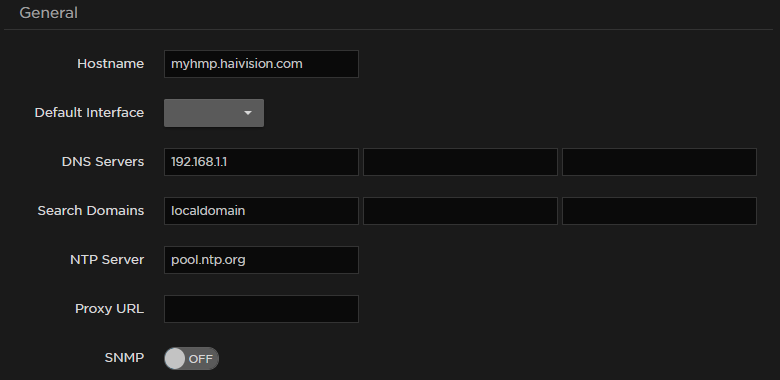
Network General Fields
Under Interfaces, select the tab for the first interface, if not already selected.
Fill in the required fields. For details, see Network Settings.
In the Addressing field, select either DHCP or Static to enable or disable the Dynamic Host Configuration Protocol for the interface.
Note
When DHCP is enabled, HMP receives an IP Address from a DHCP server on the network it is connected. When it is disabled, you must manually enter the appliance’s IP Address and Netmask.
If your network uses addresses within the 172.16.0.0/12 range, please contact Haivision Support for additional configuration steps.
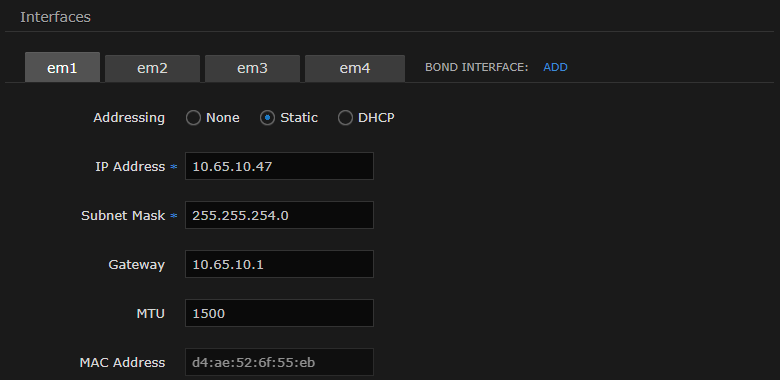
Network Interfaces Fields
To configure multiple network interfaces, select the next interface (e.g., em2) tab and repeat the configuration.
To add a bond interface, click Add and fill in the fields, including the Bonding Mode.
Tip
Bond interfaces provide a method for aggregating multiple network interfaces into a single logical bonded interface. The goal is to increase throughput and to ensure redundancy in case one of the links should fail. See the "Bond Interface" in Network Settings.
Note
When a bonded interface is used, various address fields in the Console UI Network Settings screen appear blank. This is a known issue and will be corrected in a future release. Please use the web interface to read and configure these addresses.

To add one or more static routes, click
 button under Static Routes and fill in the fields.
Click Save Settings.
Click Reboot and click Confirm for the new network settings to take effect.
A dialog appears informing you when the reboot is complete.
Topics Discussed