Configuring AD FS Parameters on HMP
Once the Relying Party Trust and Claim Rules have been set up, find the AD FS parameters you will need to configure SSO on HMP, summarized in the following table. See Integrating HMP with Single Sign-On (SSO) Environments for a complete description of these parameters.
OAuth 2.0 | WS-Federation | SAML 2.0 | Notes |
|---|---|---|---|
Server Address | Server Address | Server Address | Required |
Relying Party Identifier | Relying Party Identifier | Relying Party Identifier | Required |
Endpoint URL Path | Endpoint URL Path | Endpoint URL Path | — |
Identity Metadata URL | Identity Metadata URL | Identity Metadata URL | Required |
Token Signing Certificate | Token Signing Certificate | Token Signing Certificate | Required |
Client ID | Required | ||
Client Secret | — | ||
Redirect URI | Required | ||
Decryption Key | — |
Note
You may want to keep the AD FS management snap-in open alongside a browser window with an active HMP session to make it easier to copy and paste information between the two.
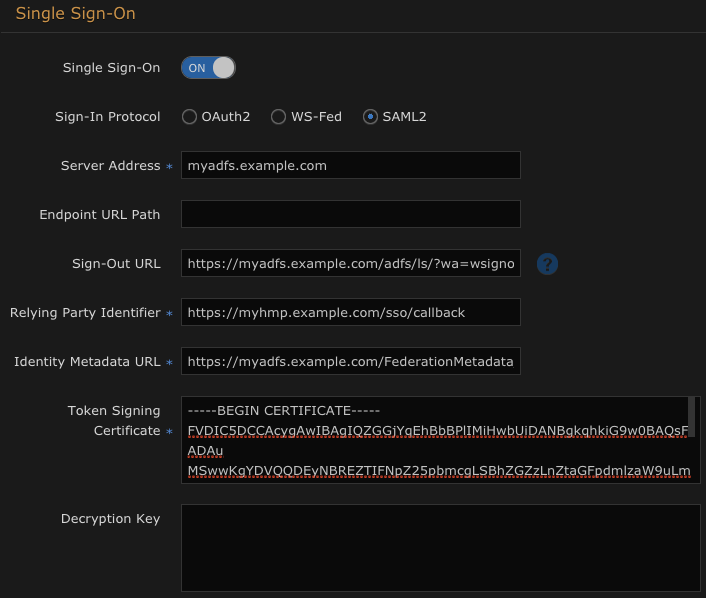
In the HMP web UI, under System Settings > Directory Services > Single Sign-on, enable Single Sign-On, and specify SAML2 as the Sign-in Protocol.
Enter the IP address or hostname of the AD FS server.
Optionally, specify a Sign-out URL. See Logout Redirect.
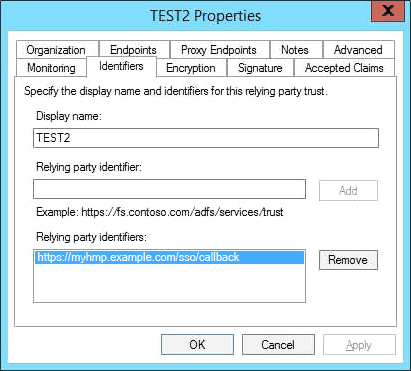
In the AD FS management snap-in, find the Relying Party Identifier by opening the Properties window for the Relying Party Trust you defined earlier:
Note
Note the format of the Relying party identifier, which should be the same for all HMP servers:
https://[HMP]/sso/callback
where [HMP] is the hostname + domain name of the HMP server or its IP address.
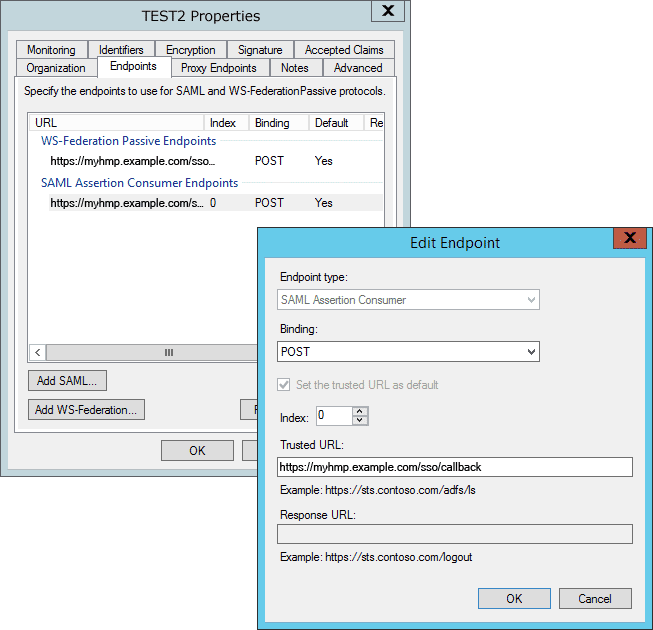
Ensure "Set the trusted URL as default" checkbox is enabled for the SSO endpoint:
Enter the Relying party identifier (callback) URL in the corresponding field in the HMP server's Single Sign-On configuration settings:
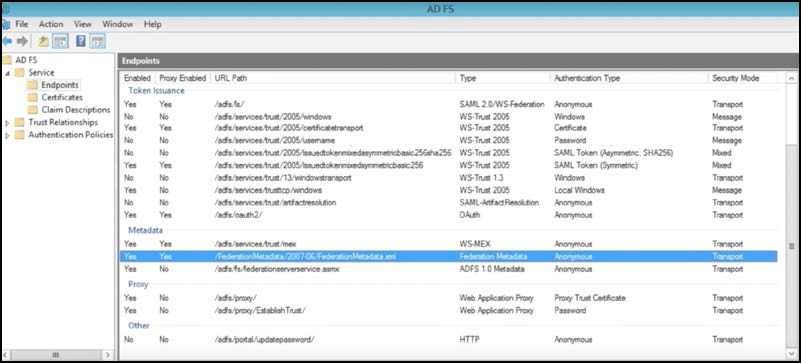
The Endpoint URL Path can be obtained from the AD FS snap-in:

Tip
If this is empty, HMP assumes that the default AD FS endpoint should be used (/adfs/oauth2 for OAuth, /adfs/ls for WS-Fed or SAML).
The Identity Metadata URL is always hosted on the AD FS server with the same URL. For example: https://myadfs.example.com/federationmetadata/2007-06/federationmetadata.xml
On HMP, you may enter a Token Signing Certificate , which comes from the primary AD FS server. You can view it from the AD FS snap-in under Service > Certificates > Token Signing (the example below is from Haivision's own AD FS server):
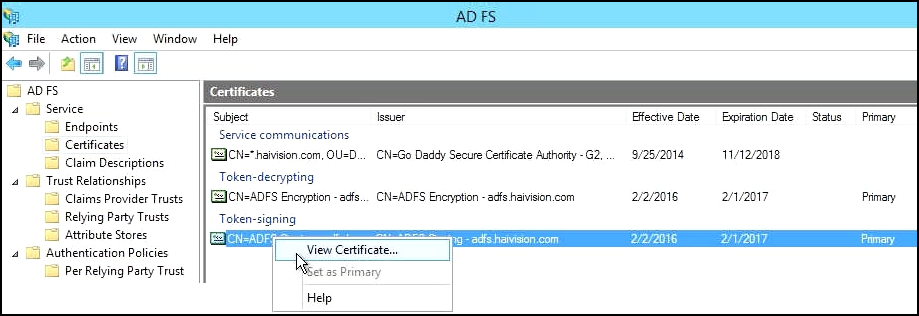
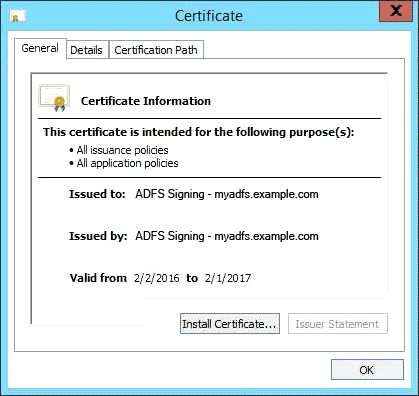
You will need to export a copy of this certificate for HMP. Right-click on the Token-signing certificate and choose View Certificate:
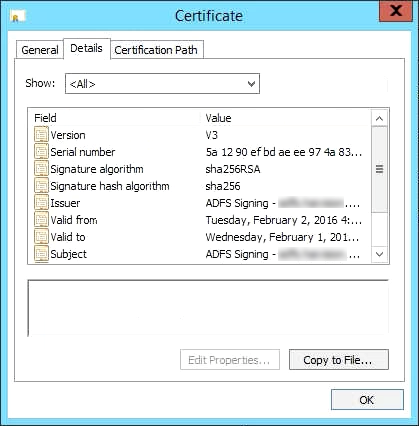
Under the Details tab, click Copy to File:
Click Next to open the Certificate Export Wizard:
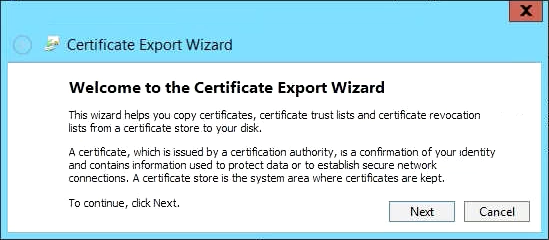
Choose Base-64 encoded X.509 (.CER) as the export format:

Click Next to save the certificate, and then click Finish to complete the export.
Open the certificate file in a text editor:
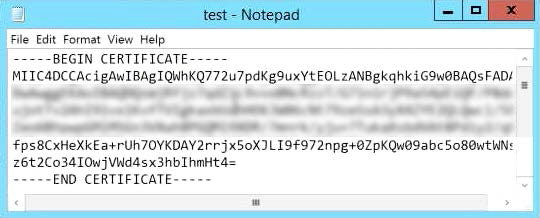
Copy the entire text and paste it into the Token Signing Certificate field in the HMP Single Sign-On settings (see screenshot in Step 6). Make sure there are no trailing spaces or blank lines.
Note
Remember to save your settings on the HMP server.
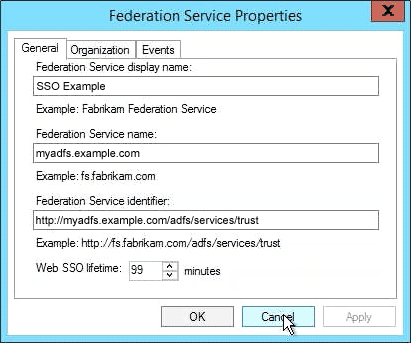
Since HMP users will be authenticated via your AD FS system, you may want to adjust your "Web SSO Lifetime" setting to control their access. The following example is from Haivision's own AD FS server.