Creating a Virtual Server
Signing in to AWS
Sign in to your AWS account: https://console.aws.amazon.com
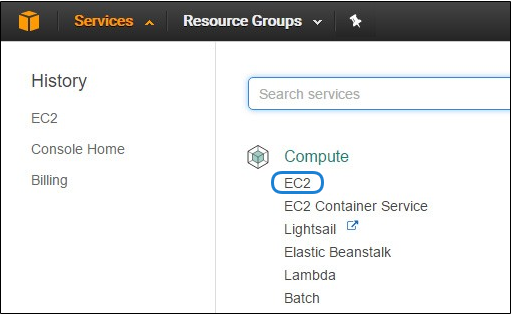
After you have successfully logged in to the AWS portal, click Services > EC2.
Creating a Virtual Instance
On the EC2 Dashboard, click Launch Instance.
Click AWS Marketplace.
Type "Haivision" in the search box and press Enter to find the Media Gateway/SRT Gateway image.
Click the Select button corresponding to the version of the Amazon Machine Image (AMI) you wish to use, PAYG or BYOL.
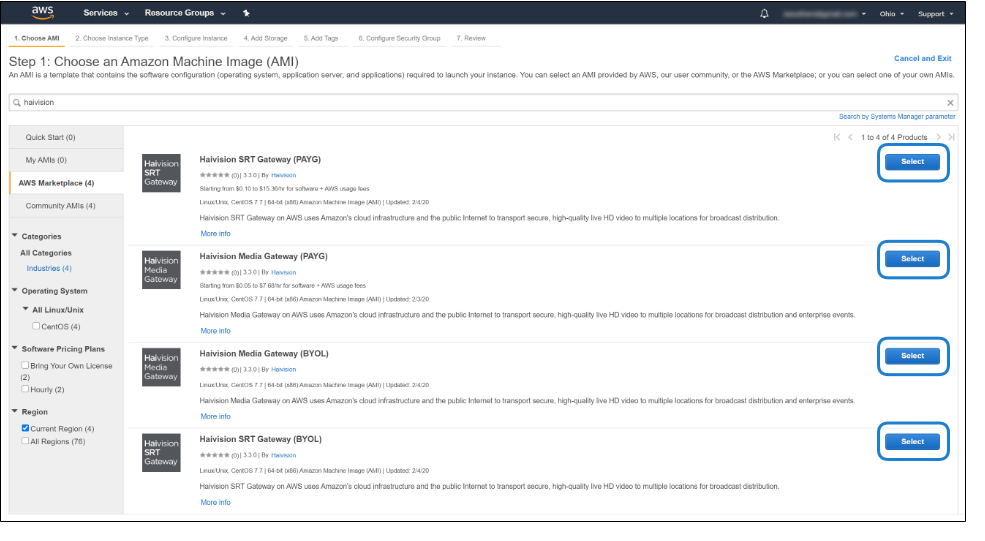
Review the product and pricing details, and then click Continue.
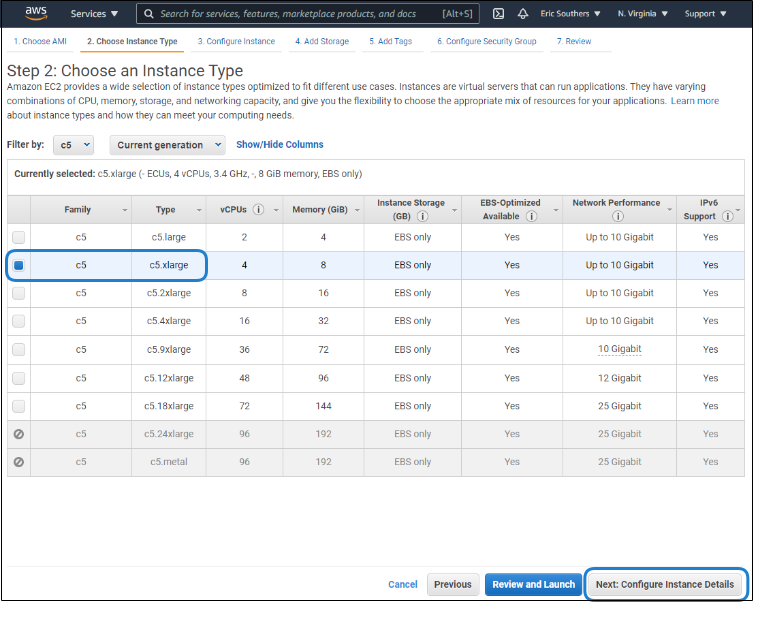
Choose an Instance Type, and then click Next: Configure Instance Details:
Note
Only instances built on the Nitro system are supported. Please see the following link for a list of compatible instances: https://docs.aws.amazon.com/AWSEC2/latest/UserGuide/instance-types.html#ec2-nitro-instances
For high bandwidth streams or critical viewing requirements, we recommend using Compute Optimized C5 Instances (e.g. c5.xlarge, c5.2xlarge, etc.) tiers, as they are optimized for compute-intensive workloads and have high-performance network I/O.
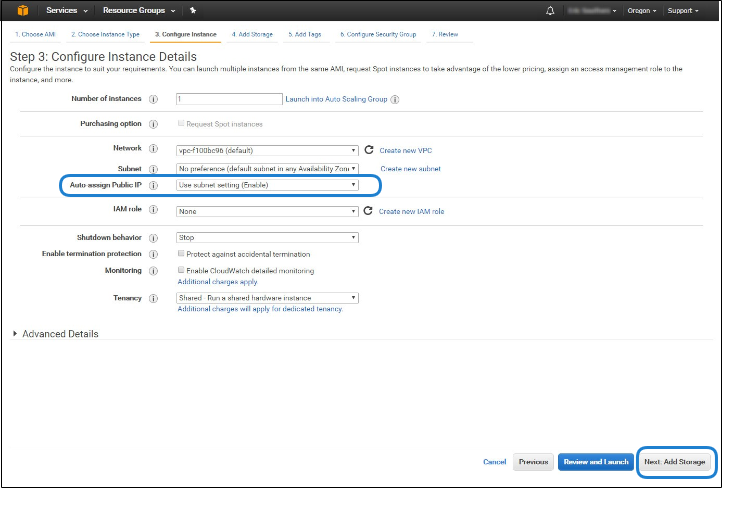
Modify your Instance Details as needed, and then click Next: Add Storage:
Note
You may wish to choose Enable under Auto-assign Public IP to give your server an IP address reachable from any location.
Set the amount of storage space you wish to make available to the server, and then click Next: Add Tags:
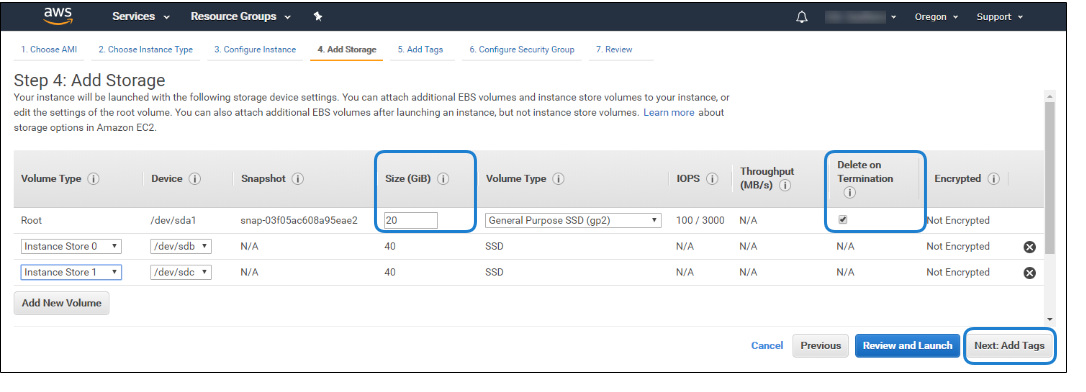
Note
The default storage is sufficient for most Media Gateway/SRT Gateway operations. However, if you intend to use Media Gateway/SRT Gateway in conjunction with a video server (such as using Media Gateway with Haivision Media Platform), having additional storage allows you to benefit from local caching on the virtual server.
You may wish to choose Delete on Termination to have the storage space automatically removed if you cancel your subscription for the server instance.
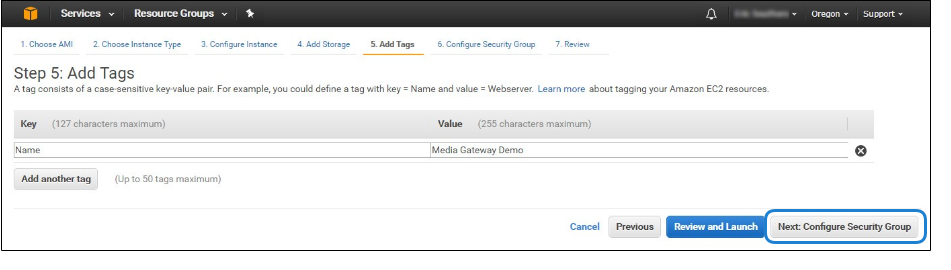
Apply one or more tags (such as a Name) to the server, and then click Next: Configure Security Group:
Create a new security group, or select from a list of existing groups. Make sure you have the following ports open:
Port 443 for HTTPS access to the web interface
Port 22 for SSH access to the Console UI interface
A custom port to allow incoming UDP traffic, such as SRT streams (use Custom UDP Rule). See SRT for more information.
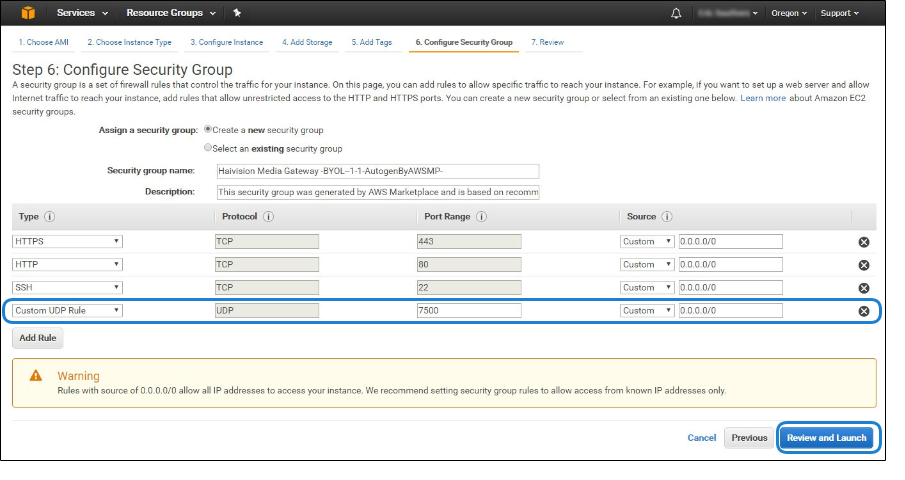
Click Review and Launch.
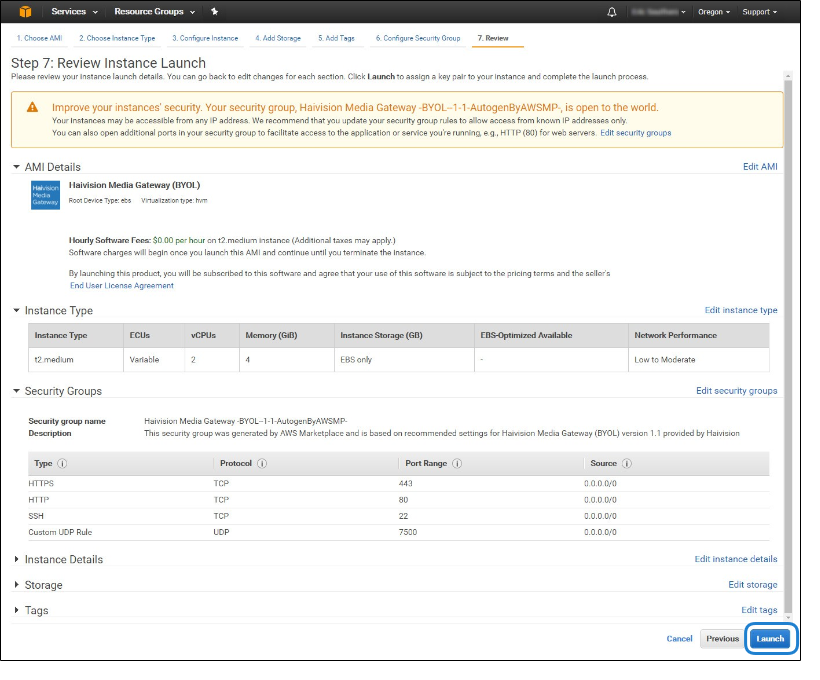
Review your settings, and make any necessary corrections or changes. When you are satisfied, click Launch:
When prompted, select or create a public/private RSA key pair that is used to authenticate SSH sessions, and then click Launch Instances:
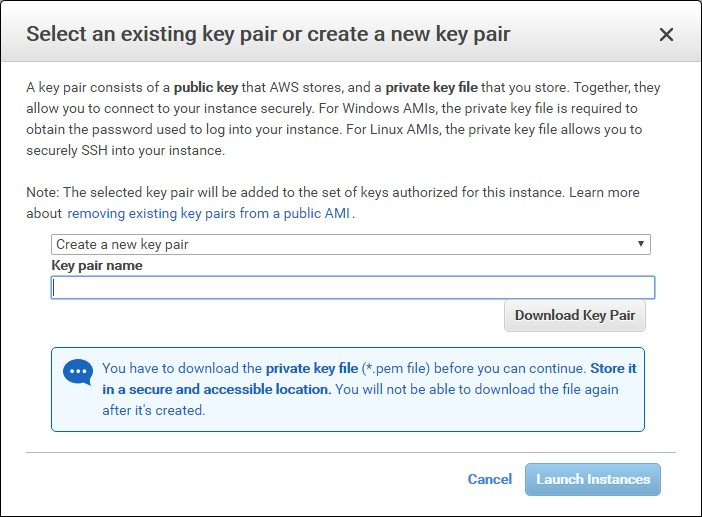
Note
SSH access to the Console UI is only allowed via SSH public key.
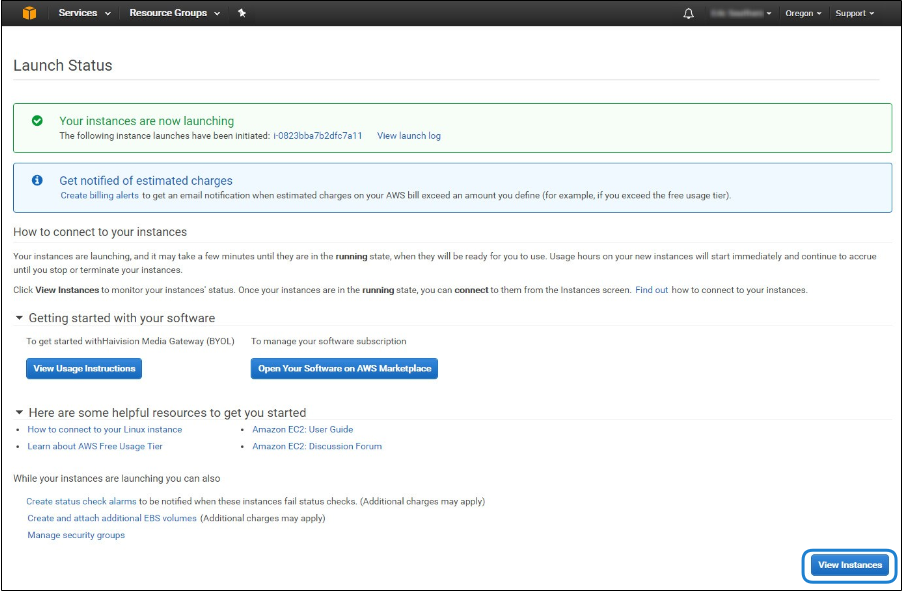
In a few moments, a Launch Status page appears, informing you that your instance is in the process of launching. Creating your server instance can take up to several minutes. At any time, click View Instances to see more details:
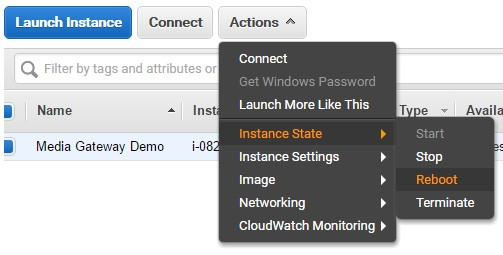
After the Instance State changes to "running", reboot the virtual server by selecting it in the AWS View Instances page and clicking Actions > Instance State > Reboot.
Reboot
Confirm rebooting in the confirmation dialog box.

Confirm Reboot
Return to the AWS View Instances page. In the row corresponding to your server, take note of the Public IP address and Instance ID assigned by AWS to your instance. The Instance ID is the default password for signing into web interface.

At this point, your virtual server is up and running!
If you have created a BYOL instance, before continuing you need to license your server. See Licensing Your Server.
If you have created a PAYG instance, you are ready to sign in and begin using your server. See Signing in to Media Gateway.