Configuring Modem Bands
Important
If modem bands are not set in automatic mode or if they are not all selected, a star is displayed on the modem line.
You can configure modem bands using:
Default Mode – keeps it simple by limiting required fields to Network Mode and Preset.
Expert Mode – gives you access to all bands.
Depending on whether you are working locally from the unit panel or remotely from the web interface, choose from the following sections.
Unit Panel
Default Mode
From the Home menu, tap
 > MOD >
  > Frequency Bands.
Choose one of the following for the Network Mode:
Auto
4G Only
3G Only
Tap on the Preset field and choose either All Bands or Low Frequency.
Note
Low Frequency bands are useful for indoor operations.
Tap on the Carrier field to select an image in the list.
Note
Selecting the carrier-specific firmware may be mandatory to comply with some local regulations (e.g., Japan). In common cases, you should always keep the generic firmware selected. Should you have any doubt, please contact our support team.
Expert Mode
From the Home menu, tap
> MOD > > Frequency Bands.Tap the toggle button to enable Expert Mode. All bands are displayed on the screen.
Tap
 to unselect the different cellular bands. The green dots turn to grey.
Tap
 to save.
Web Interface
Default Mode
From the Dashboard, in the Networks section, click the
 icon on an active modem.
In the Frequency Bands section's Mode list, ensure Default mode is selected.
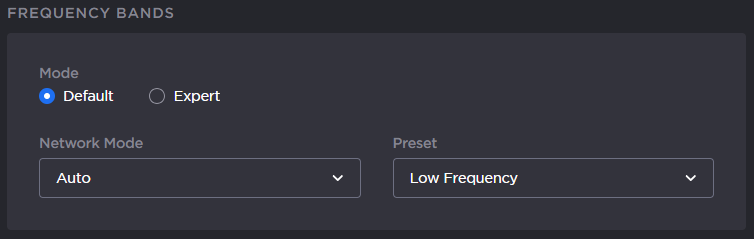
Frequency Bands Default
In the Network Mode dropdown, select a mode (Auto, 3G only, etc.)
In the Preset dropdown, select either All Bands or Low Frequency.
Note
Low Frequency bands are useful for indoor operations.
Click the Apply button.
Expert Mode
From the Dashboard, in the Networks section, click the
icon on an active modem.In the Frequency Bands section's Network Mode dropdown, select Expert mode. The display updates to show the various frequency bands.
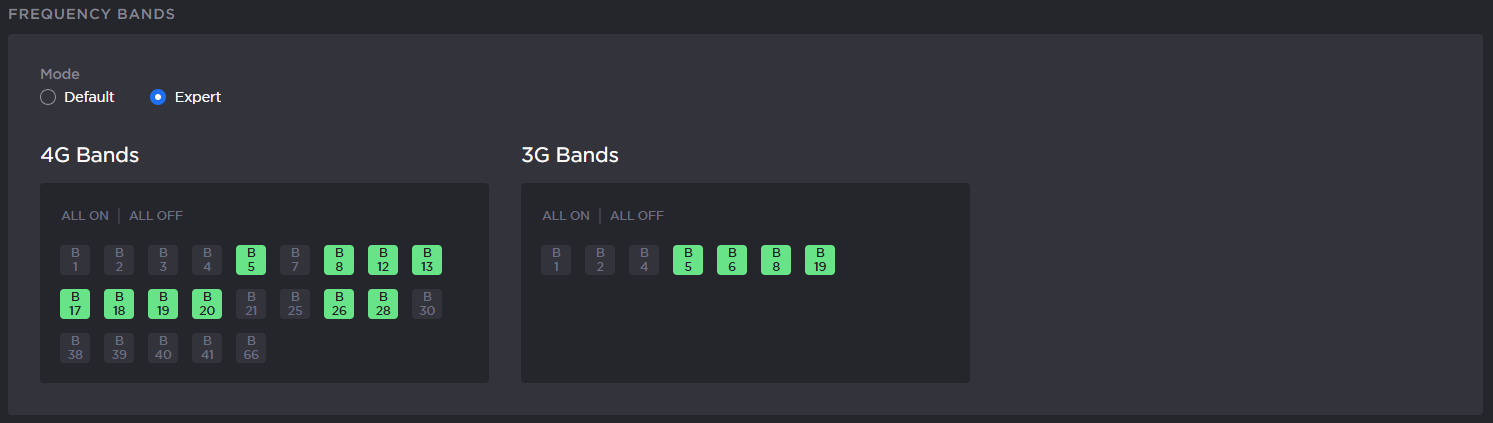
Frequency Bands Expert
Enabled bands show a green background, while disabled bands show a dark gray background. Click each icon to enable/disable them as desired.
Click the All On and All Off buttons to enable/disable all frequencies within the respective 4G or 3G bands.
Click the Apply button.